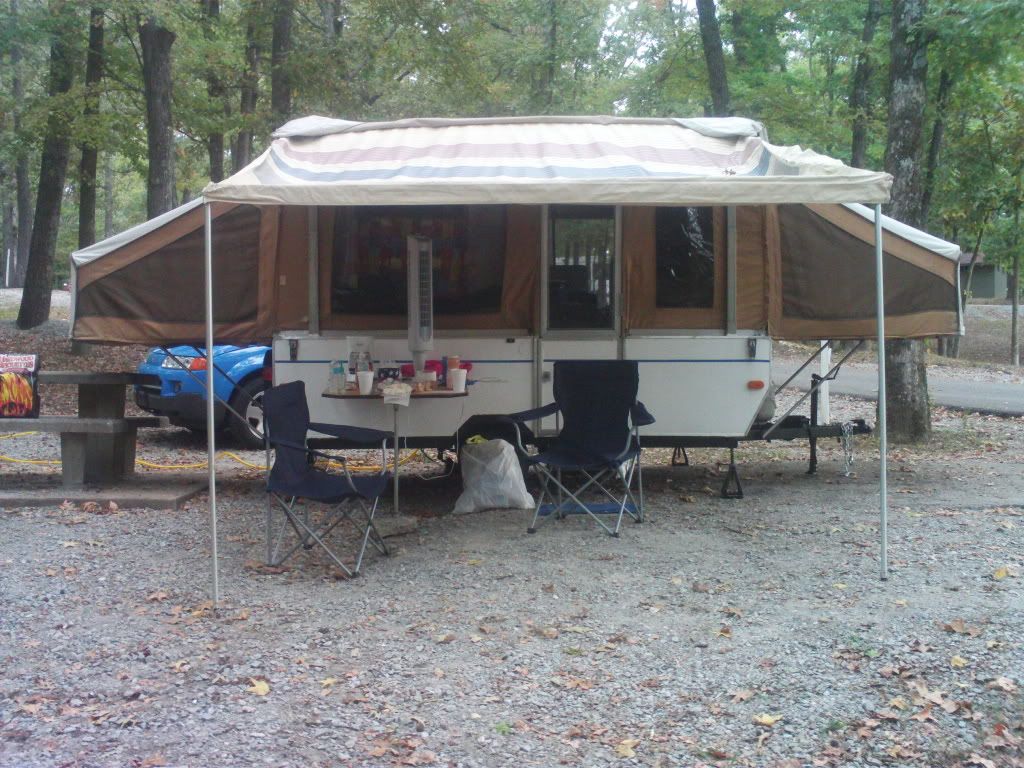
One thing I should point out is that I've had Frostbite popped up since last Friday. It rained last Sunday and this past Monday and Tuesday saw some pretty strong thunderstorms pass through our area.
Frostbite remains high and dry. No water anywhere that I can see. Canvas is dry on the inside everywhere I can touch.
Unless I miraculously fixed a major hole in my water proofing efforts, I don't see where any major leak is or was located. The area of the floor in the corner that was completely rotted due to water damage remains high and dry like everything else.
It's funny that, from what I have noticed, all the panels that needed a rebuild have the most severe water damage on the bottom inch or so of the boxes. It's almost like that camper at some time had an inch or so of water standing in it. It the only thing I can think of to explain it. Maybe the water hose sprung a leak or something.
This "big flood" theory is looking like more and more of a possibility.
Thursday, July 15, 2010


Rebuilding the complicated boxes #2
More panel rebuilds today. Here is the original galley box:


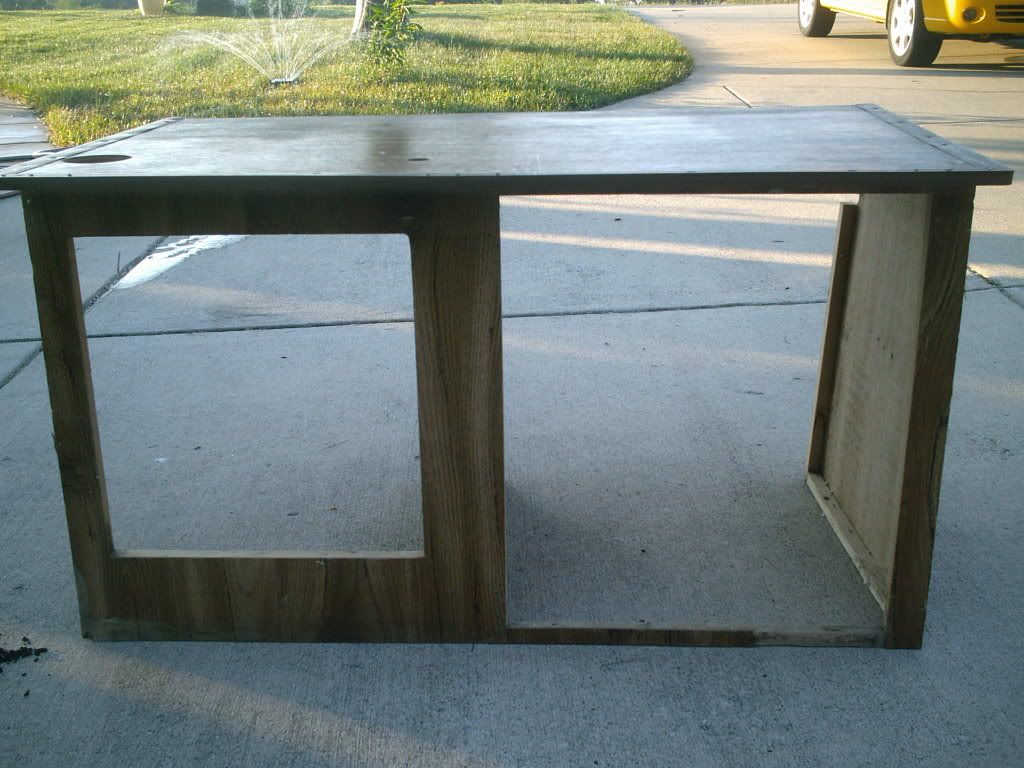
front
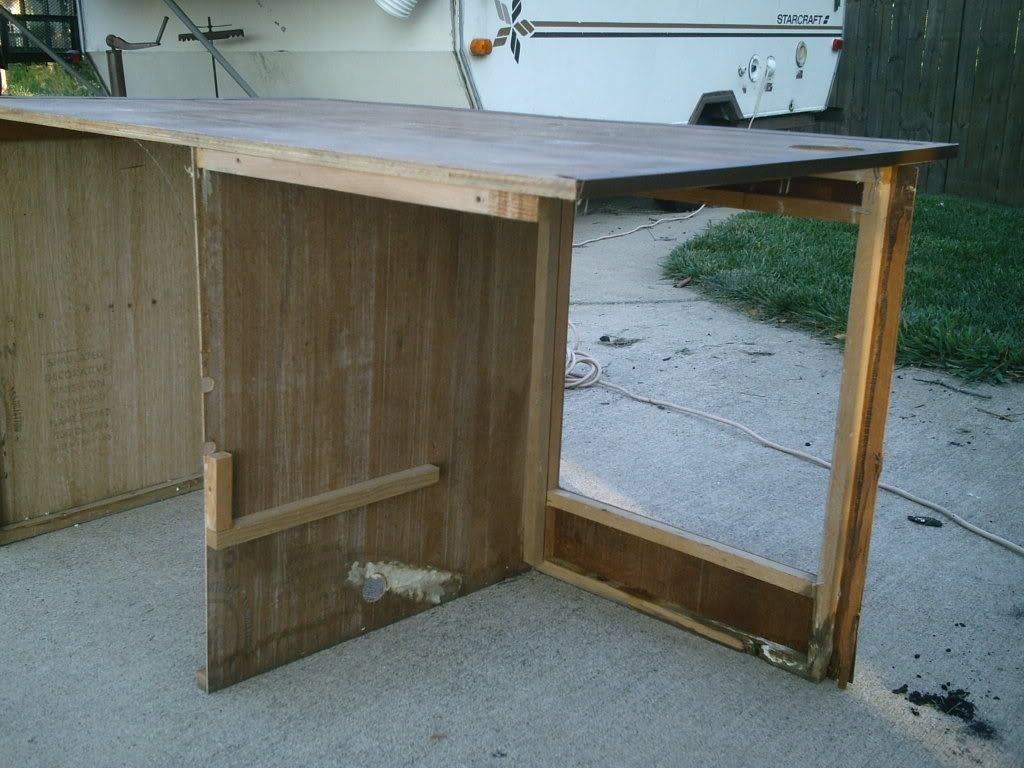
back
The face and one of the inner panels need to be rebuilt due to water damage to the wood paneling. Here is the original face removed:
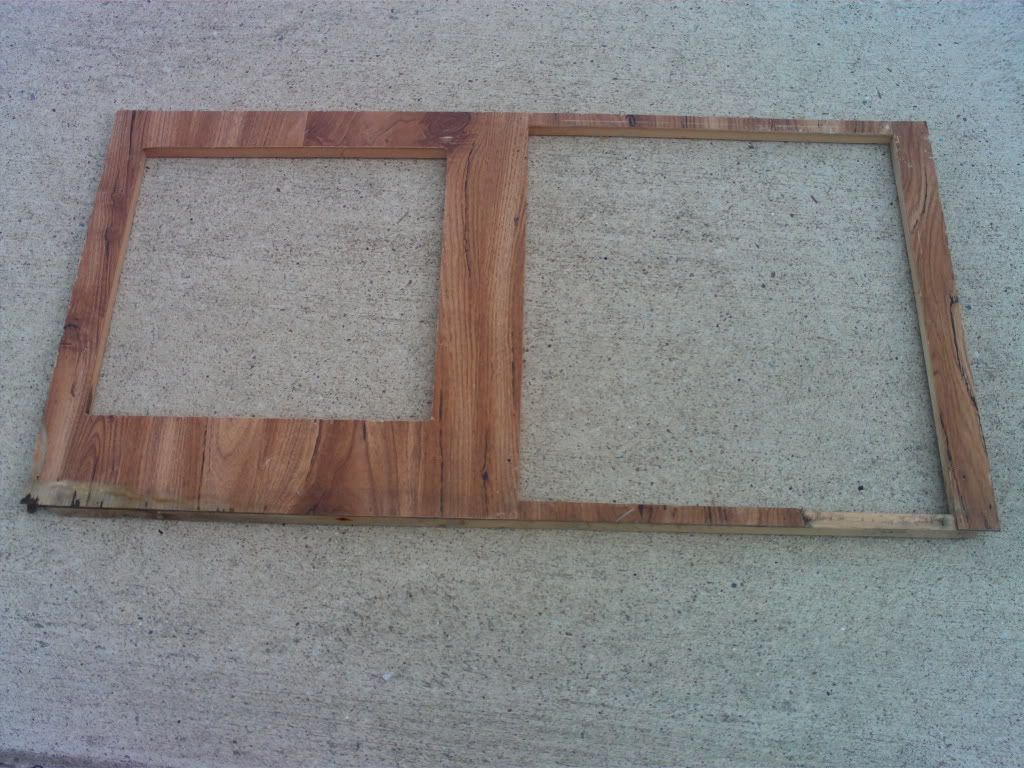
front
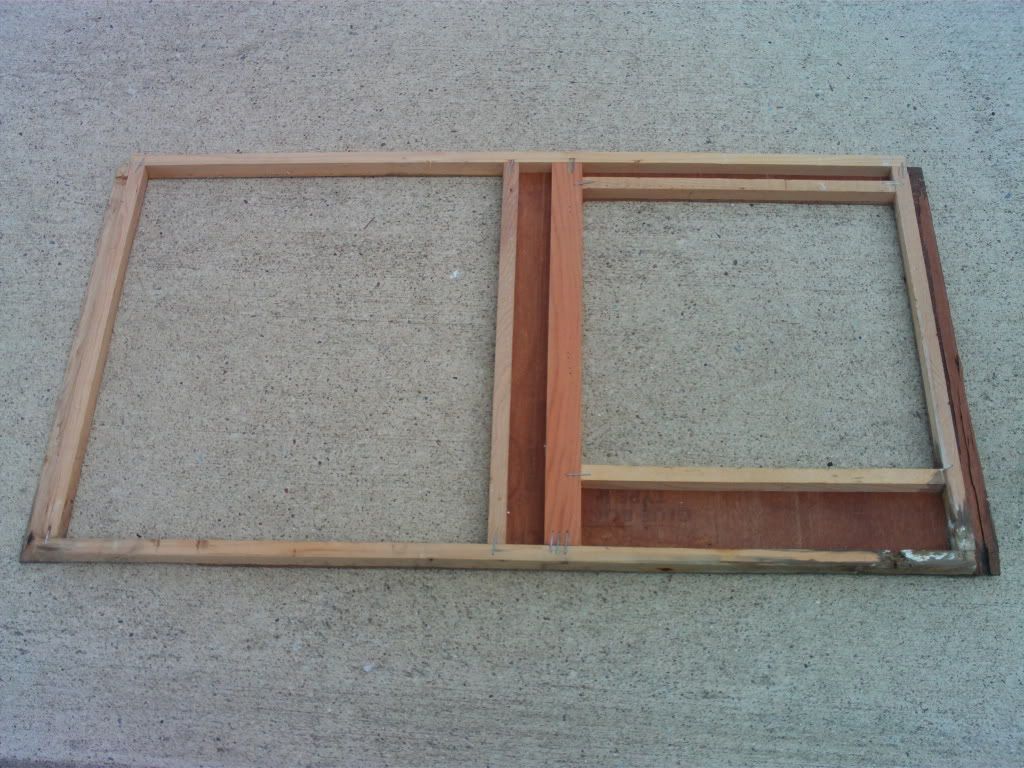
back
And here is my rebuild:
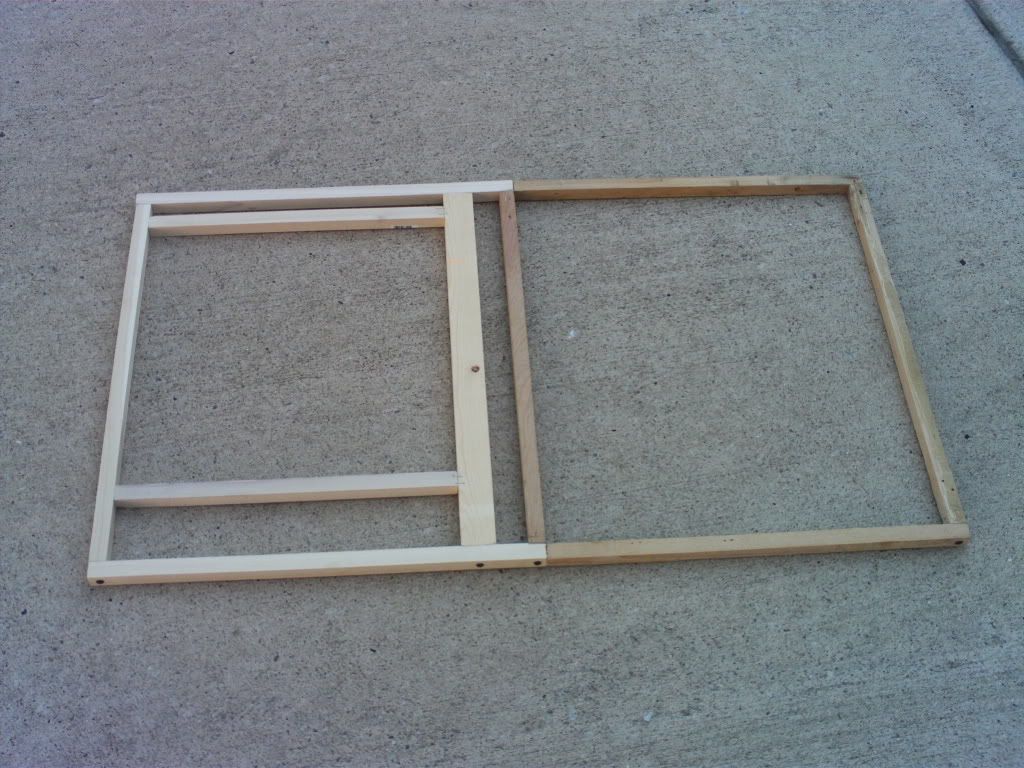
front
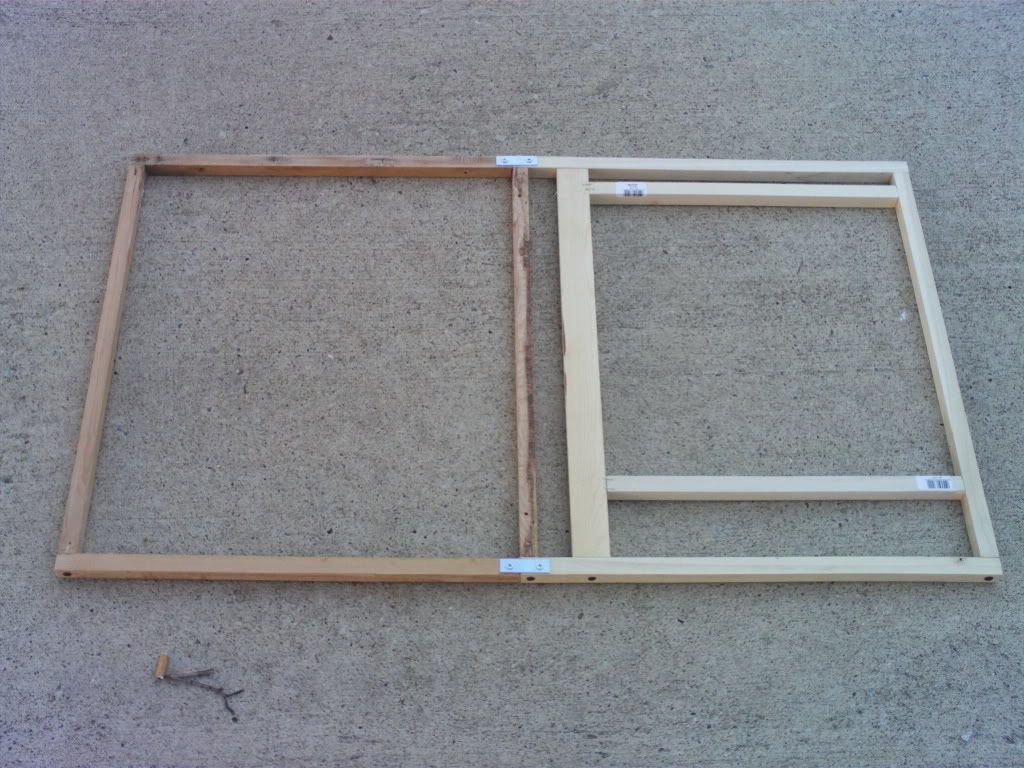
back
You might notice something strange about this. First, I didn't have any dowels longs enough for the length of this frame so I built it in two pieces and put them together with a bracket. I think, since this thing will be attached to the floor and attached to a single countertop piece, it will be plenty strong enough. The paneling is not yet attached, however, last night I cut it out in two pieces but it got dark before I could attach it to the frame and sand it down to fit perfectly. The larger square is where the refridgerator will go and the other opening is just for storage. It will have a cabinet door and a shelf inside but the door is there mainly to cover the bottom of the sink and the water hose.
Also, I've run out of long dowel pieces so I had to scavange the good pieces off the original frame and use them here. That is why the dowels are colored slightly different.
Here is the original galley panel that needs a rebuild:
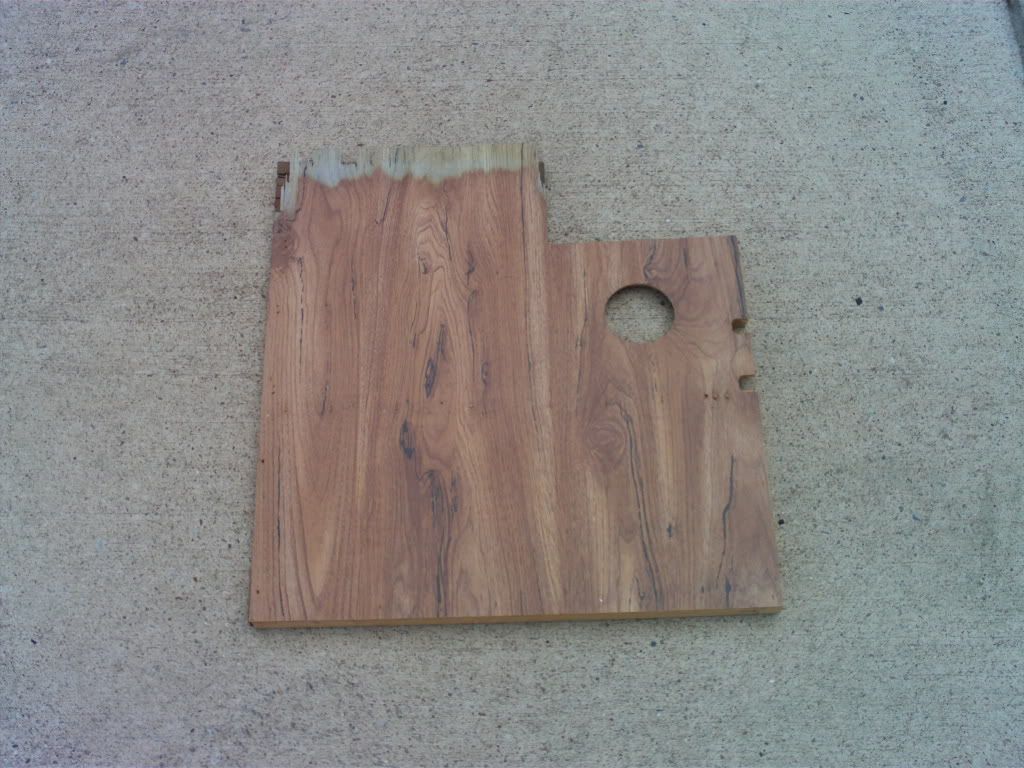
front
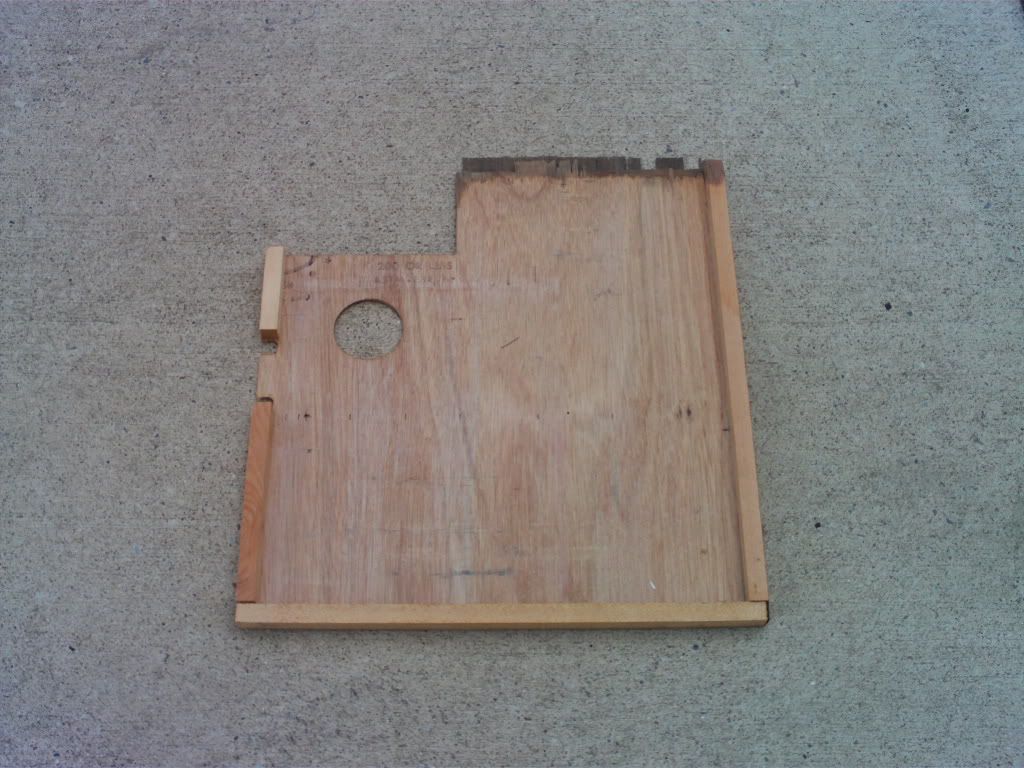
back
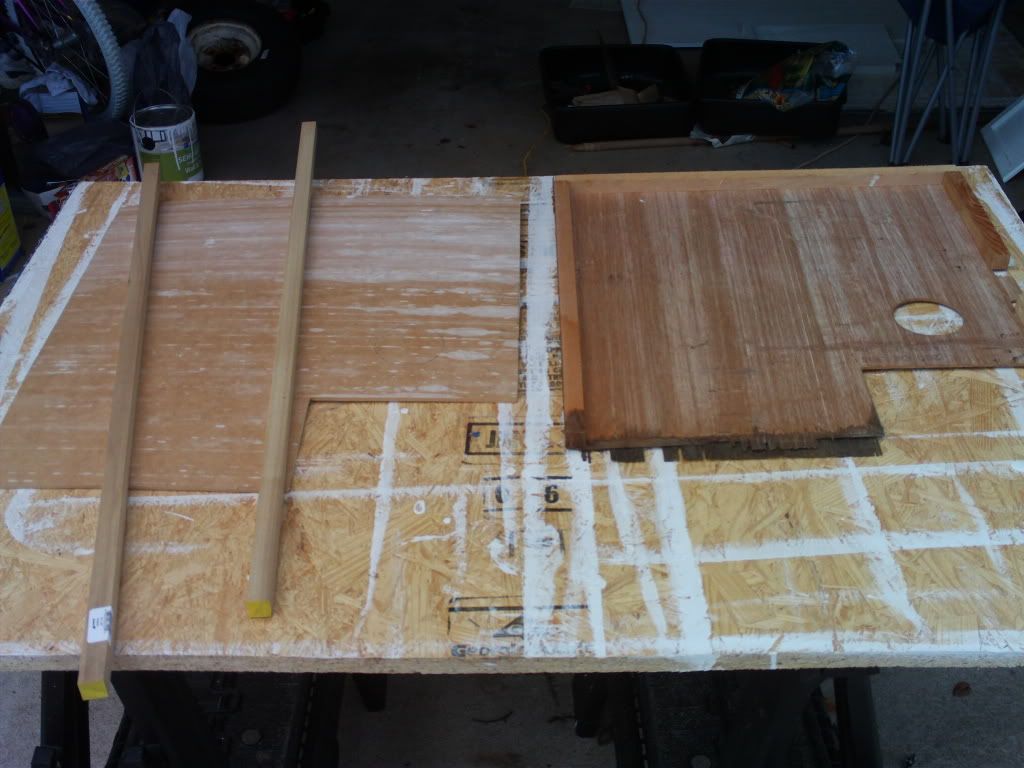
cutting out the pieces
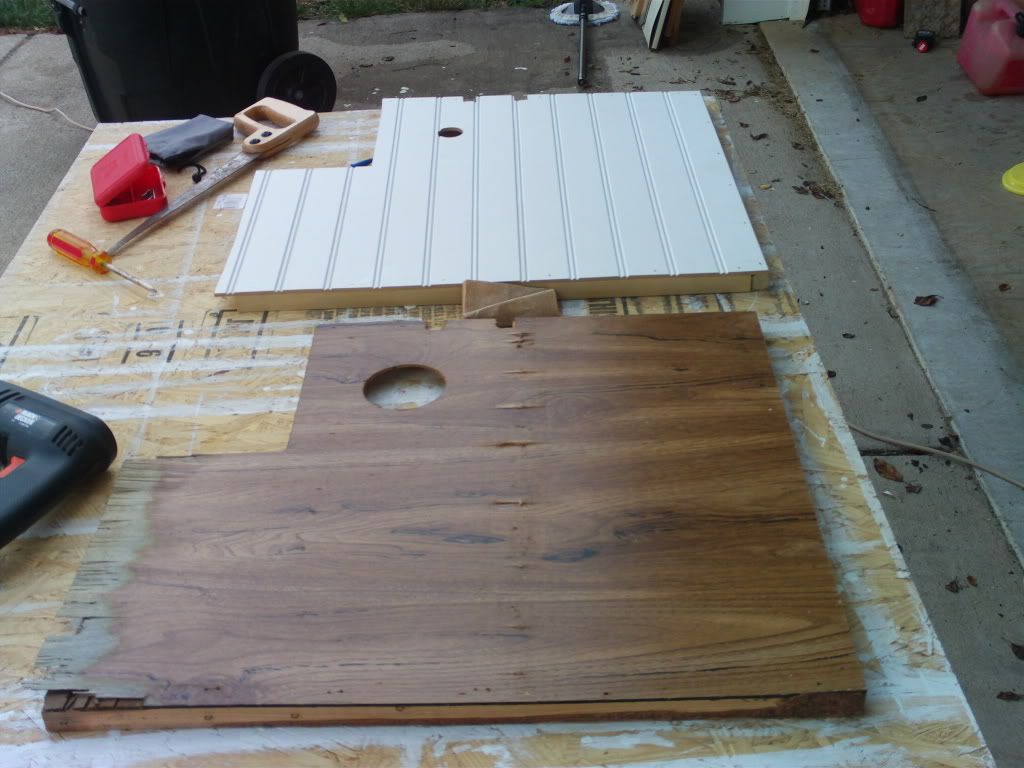
The finished panel
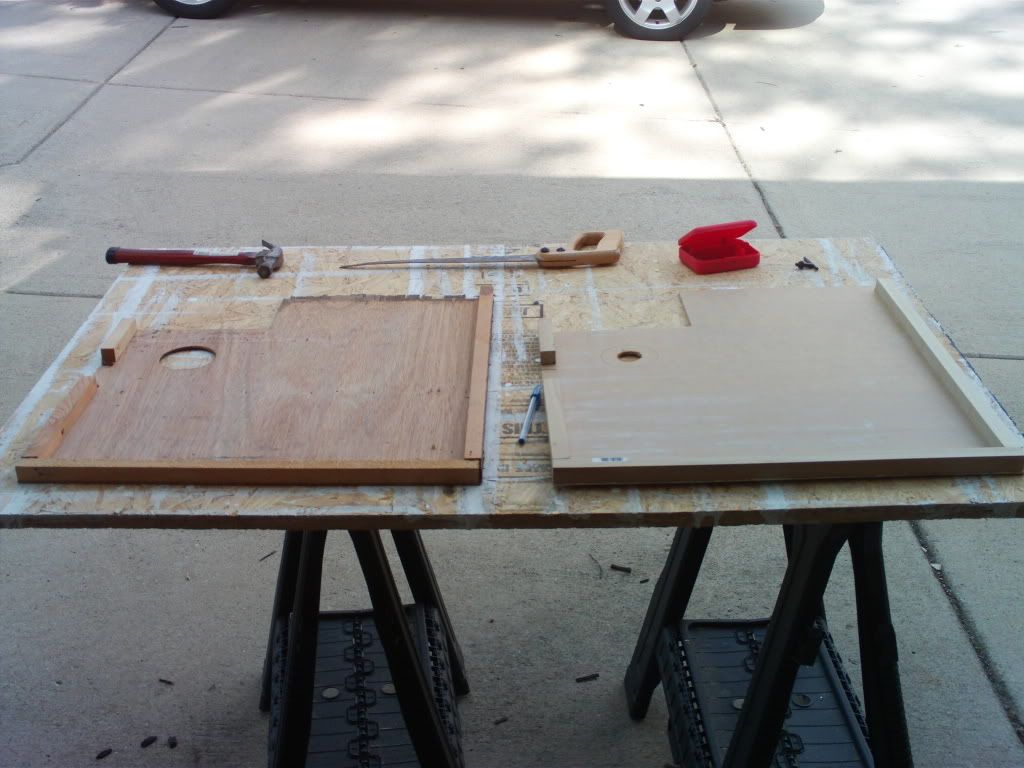
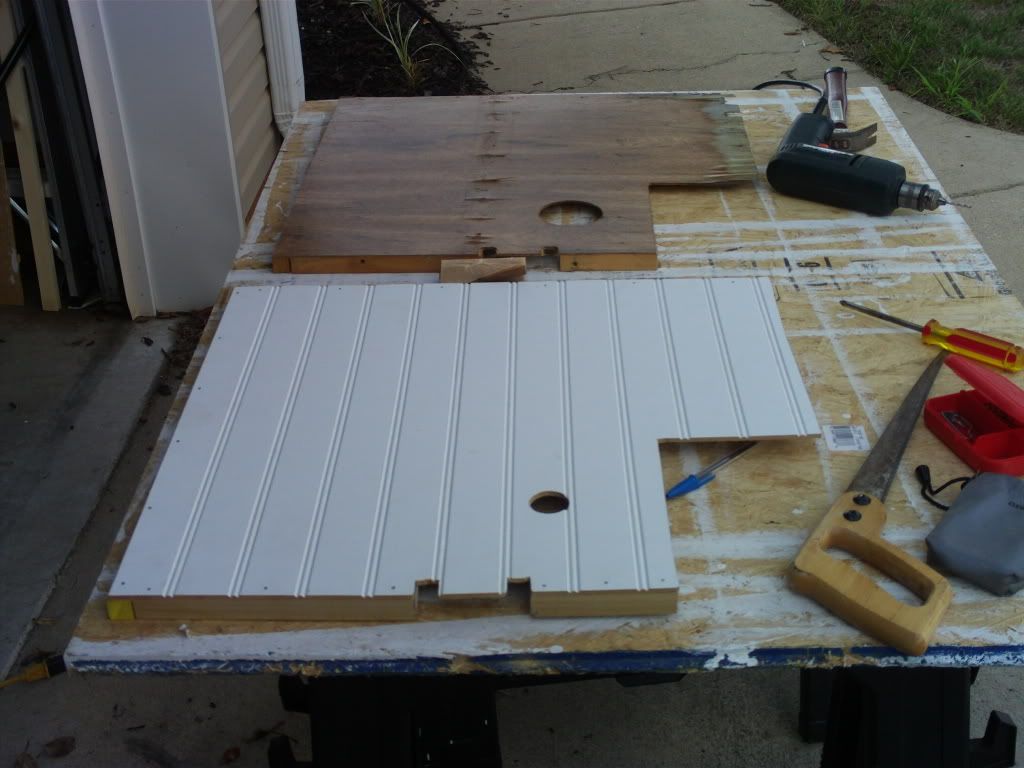
You might notice the the hole is much larger in the old panel than in the new one. This is because I only have one drill attachment capable of making a hole. I did this one just to see if it will be large enough. It probably won't. Anything larger will have to be a square.
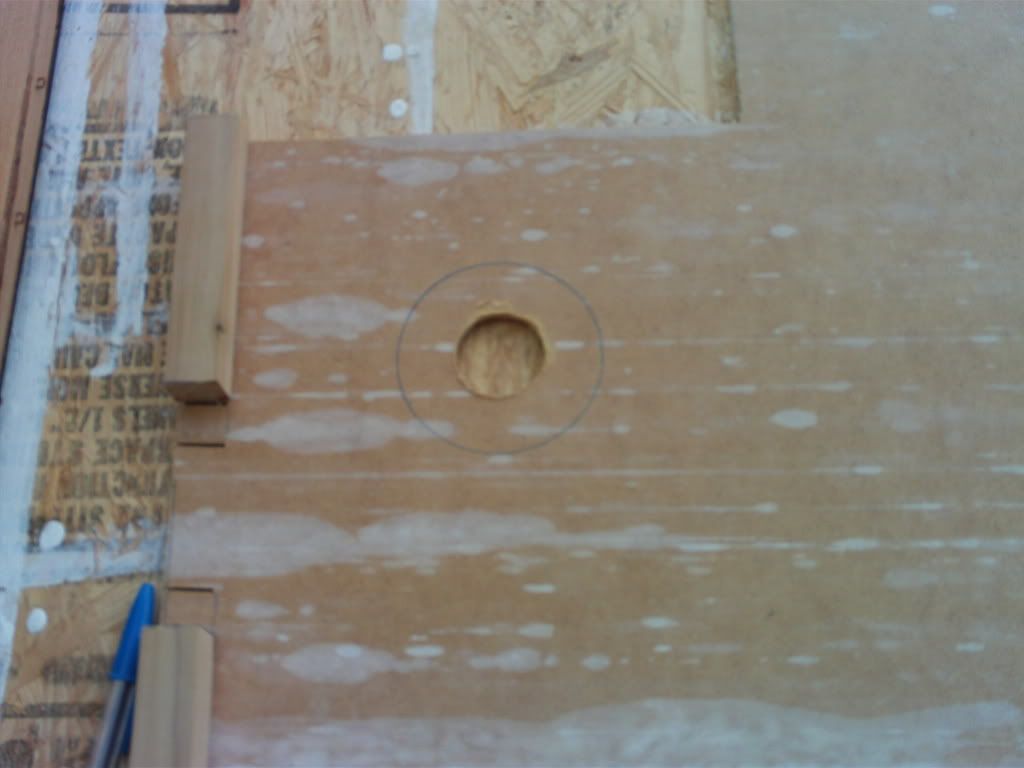
The size difference between the holes
So far I have rebuilt all the pieces that I need to complete the inside boxes for the camper. This afternoon, I should be able to put this galley box back together and install it in Frostbite. The end storage bunk will follow that.
I was able to find a door knob/latch that I *think* will work in Frostbite. It's under $10 but I'll have to order it from the internet.
Wednesday, July 14, 2010
Rebuilding the complicated boxes #1
The final two boxes in Frostbite have a couple of things that make them much more difficult to put in. First, they are the boxes that contain all the "hardware" in the camper like the gas, water, and electric so I have to be sure to run the hoses and wires correctly before connecting the boxes to the floor. Second, the front of these boxes had water damage that needed replacing. Since there was extra wood supports on these faces for the hardware, I have to rebuild those supports as well.
Here is the face of the box that goes to the gally side bench. The converter and connections to the outside hookups are contained inside this box.


Here is the face of the box that goes to the gally side bench. The converter and connections to the outside hookups are contained inside this box.
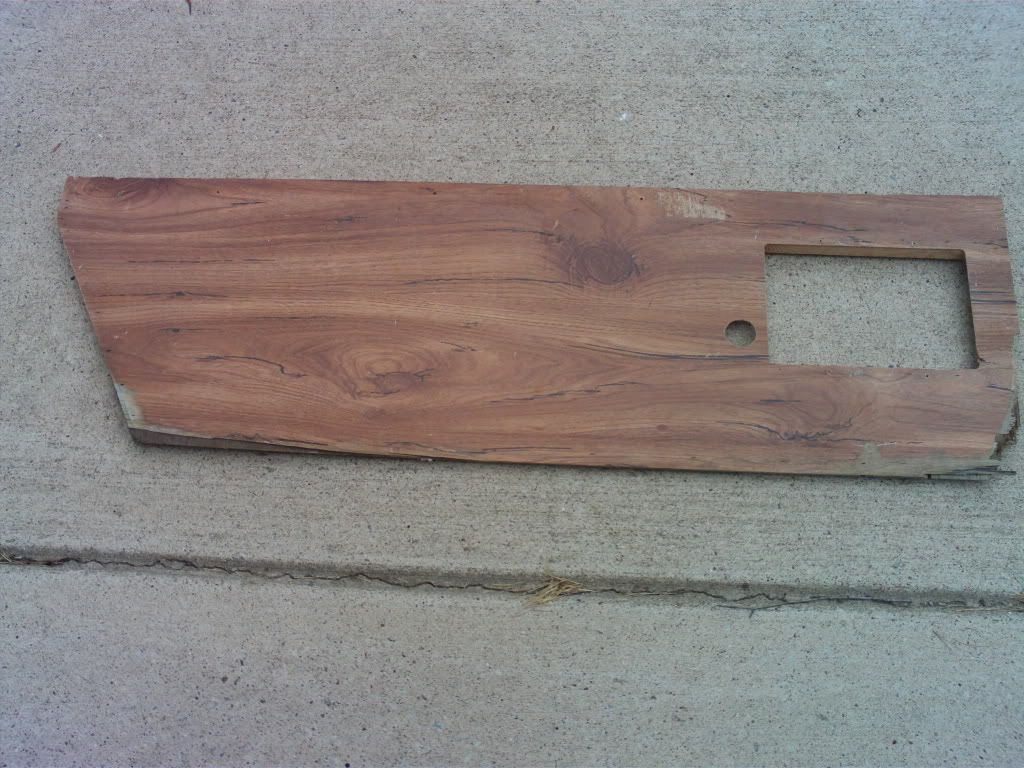
I copied the panel and the wood supports and build a copy.
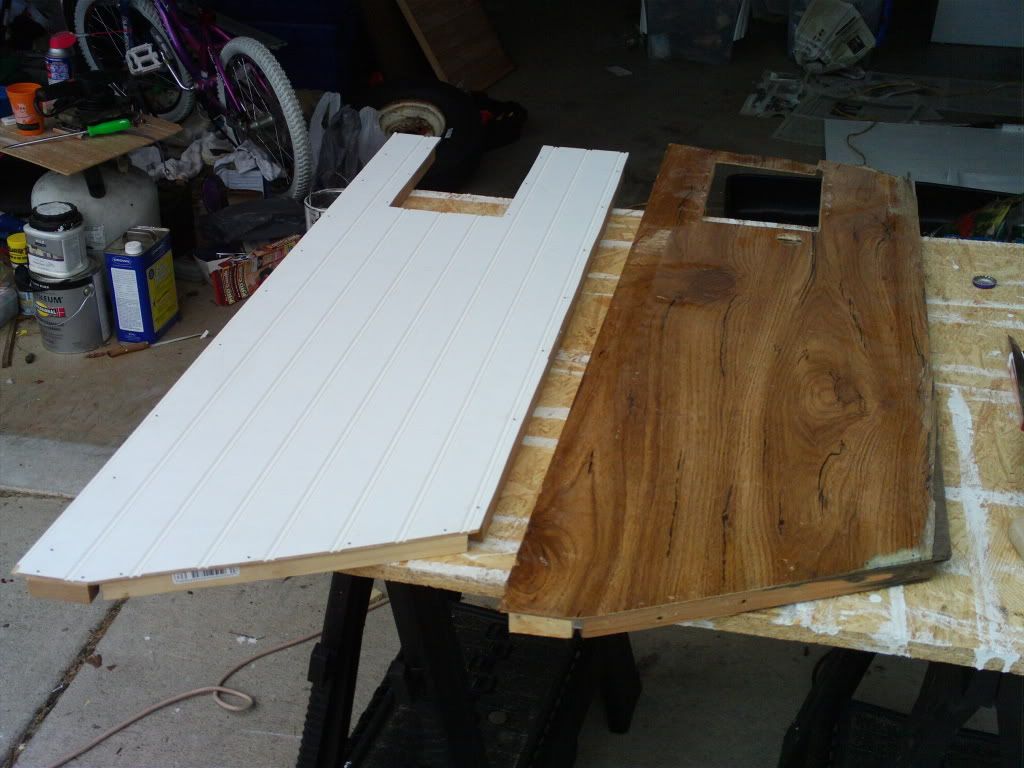
The back side shows all the supporting wood dowels.
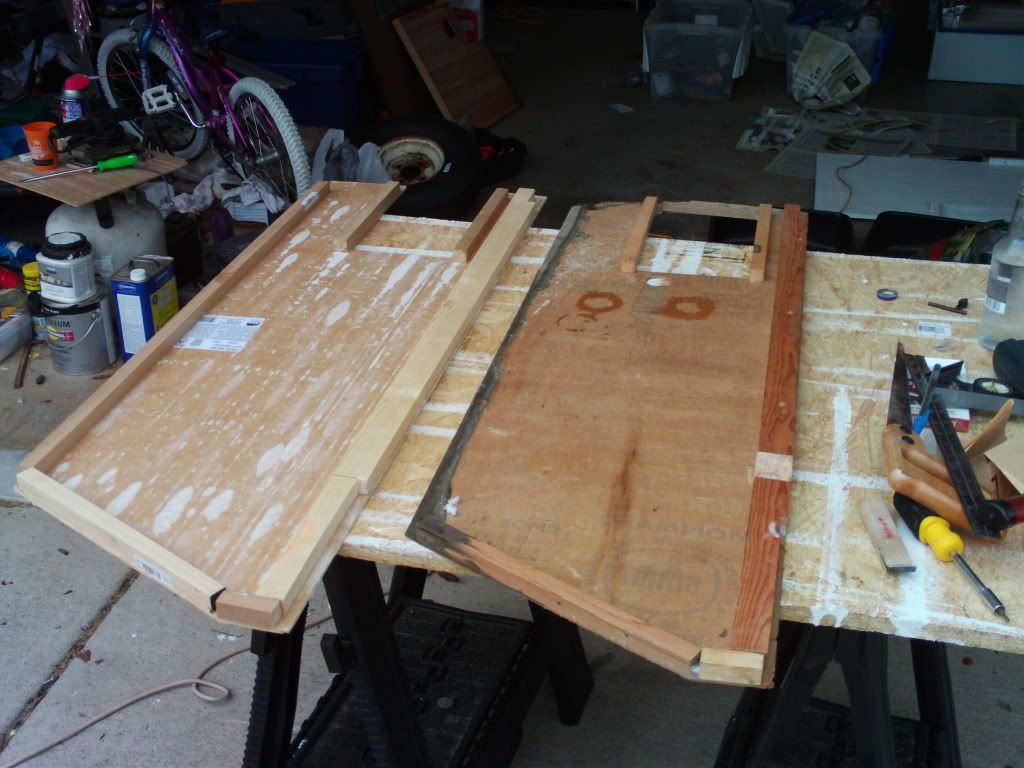
Notice the notches cut into the dowels on the right side. Since my $15 jigsaw has already tore up (imagine that?), I had to cut those notches by hand with a 10 year old dull handsaw which was a major pain in the butt.
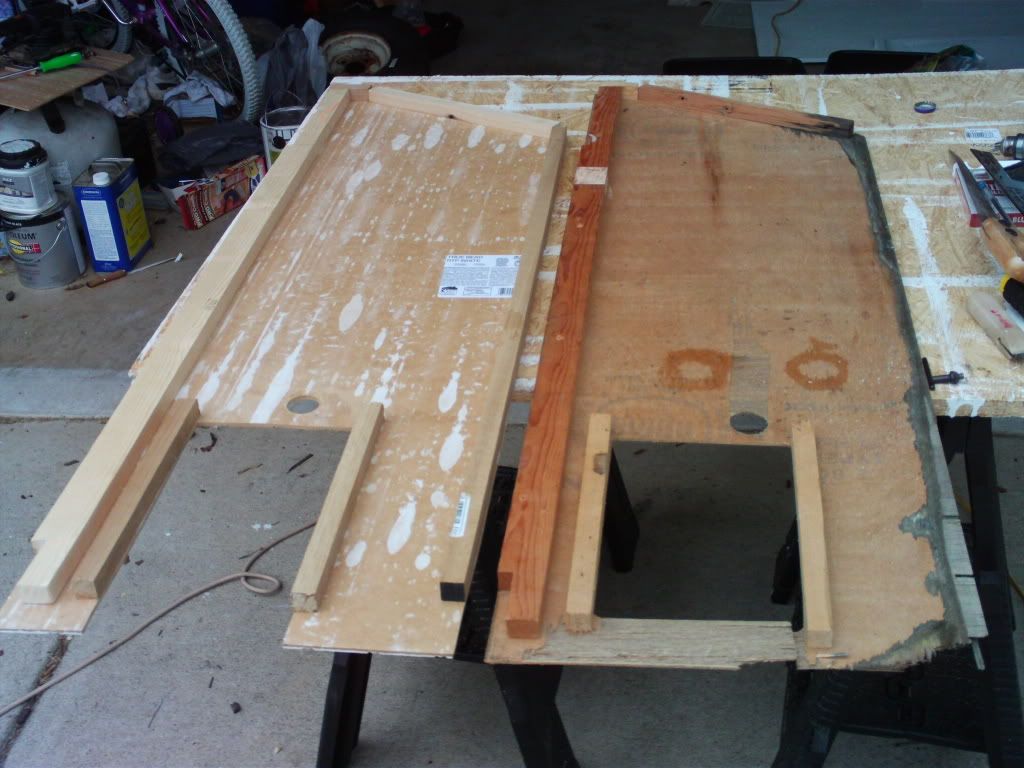
Notice in the last pic that I left the end open. This is where the converter box goes and the box was meant to be slipped in the open square and the face of the converter is larger than the open square which keeps it from going all the way through. However, on my converter, all the wires are already connected to the box. Rather than unhooking all the wires, installing the box in the square, and then reconnecting all the wires, I opted to simply slide the already connected converter box into the groove at the end and then install a piece of beadboard at the end using brackets and screws/bolts.
It *should* work anyway.
Not happy with doing a job somewhat perfectly, I managed to do something idiotic when drilling the 1 inch hole through the beadboard. I used one of those drill bits that is for drilling the latch hole in doors when installing a door knob. It's the only drill bit I have that is capable of making a circle.
I started drilling from the back of the beadboard and, just when the hole was almost complete, it ripped through at the end and ripped off a bit of the white surface of the bead board. Had I started drillling from the white front of the bead board, this wouldn't have happened. This is probably obvious stuff to all the rest of you but I have to learn things the hard way. Hopefully my touch up paint won't be that visible. This part sits on the floor underneath a bench.
I have completed three of these "complicated" rebuilds so far but left my camera at home this morning so I'll update progress on those tomorrow. So far, I am still on track to have all the inside boxes rebuit and installed by the weekend.
On a slightly more depressing note, the inside doorknob on Frostbite's door fell off. The pin it connects to pushed inside somehow and I cannot reconnect it. The door is still *usuable* but I need to find a replacement. I'll try to search today. The thing is sort of odd, though, as the door knob mechanism is not inside the door like most door knobs. It is all contained in a box on the outside of the door itself (on the outside of the inside door if that makes sense). I suspect it can only be replaced with something similar. My limited searching so far has only turned up door knobs that have the mechanism "inside" the door itself like all the doors in your house.
Hopefully, something will turn up. I haven't had much luck with the Starcraft company having what I need.
Tuesday, July 13, 2010
Reinstalling the easy boxes
Now it's time for the fun stuff. Putting the newly painted and rebuilt boxes back in Frostbite makes for a great feeling of accomplishment since it is starting to look like a camper again.
For the first box, which is by itself to the right of the door, I had to rebuild the top due to water damage. This was the top that I detailed in the post, "Rebuilding the first box."


For the first box, which is by itself to the right of the door, I had to rebuild the top due to water damage. This was the top that I detailed in the post, "Rebuilding the first box."
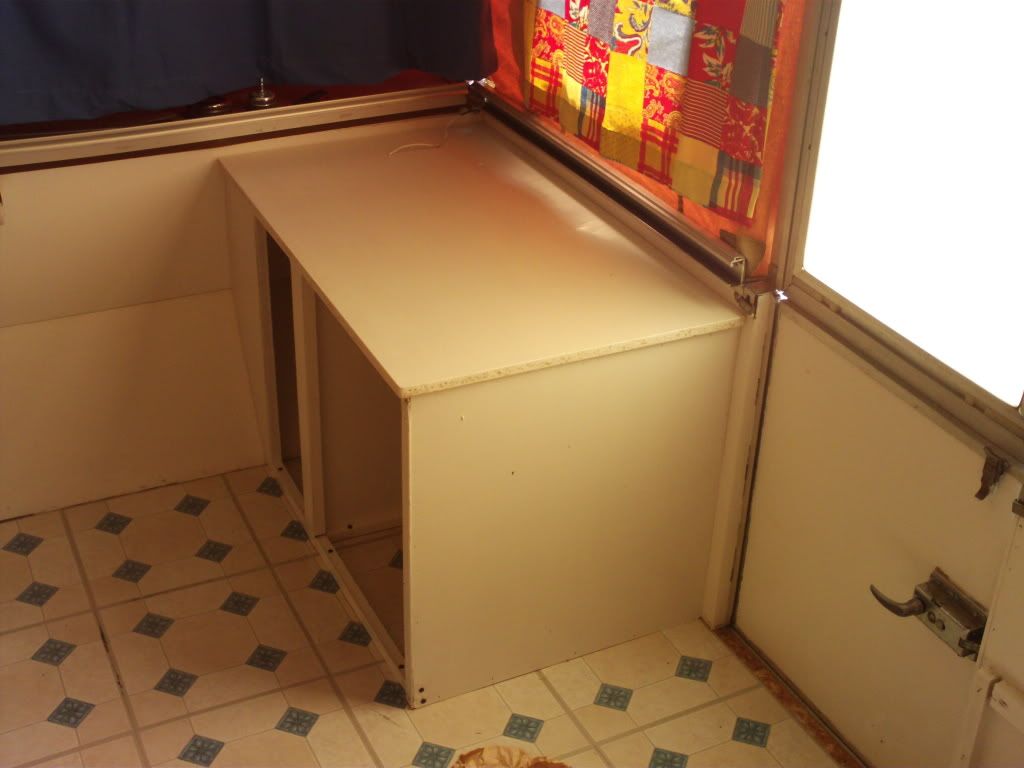
It's funny, the thing seems sorta flimsy by itself but, when I put it in and screwed it to the floor and the back wall, it is solid as a rock and can easily hold the weight of someone sitting on it. Here is another angle:

I plan to put a final coat of paint and some clear coat on the counter tops once everything is installed. It probably would have been best to completly finish the painting and everything prior to installing the boxes but, to be honest, I was getting bored with painting and sweating in the hot sun and would prefer to work in the air conditioning.
So there!
Here is box #2. I rebuilt the counter top on this one as well.
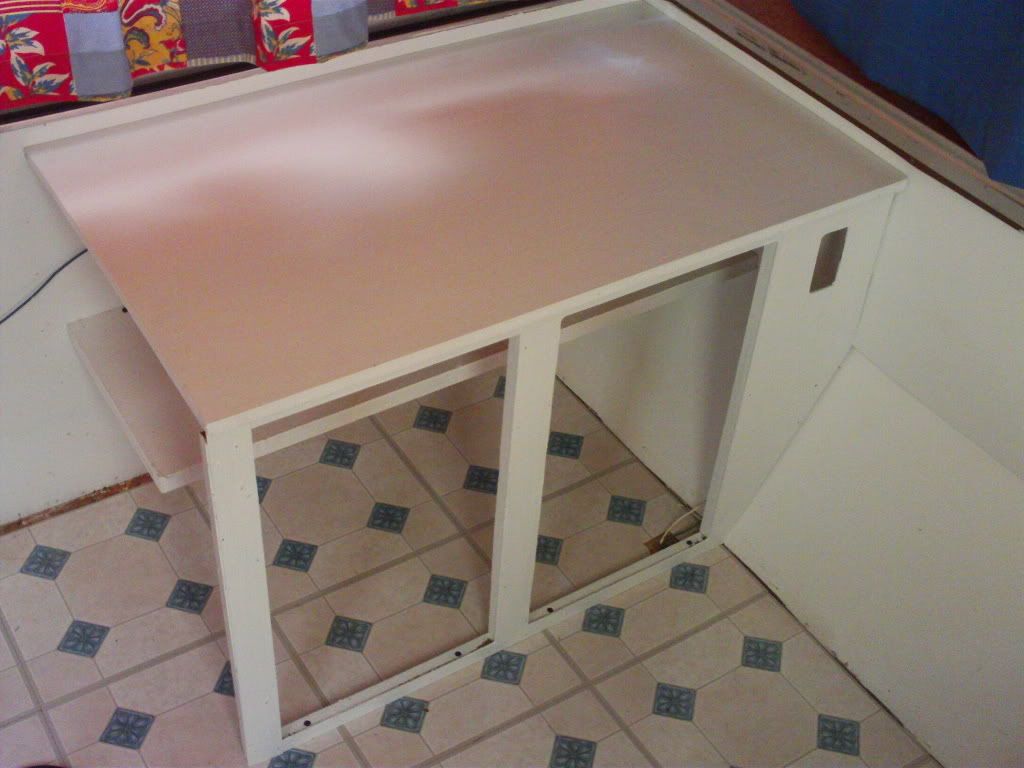
The open left end will be connected to the middle galley box.

A shot of the two of them together.
Now for the big one, the long bench and storage area:

Yes, it needs another coat of paint. I'll get to that.
There is a hindged door that allows access to a storage area inside the box. When I put it all together, I couldn't get ahold of the door to open it. I'm sure there was some type of handle originally attached but I couldn't find anything in my box of parts. I did find a new cabinet handle I had purchased for some other project I never got to so I installed that and it works fine.
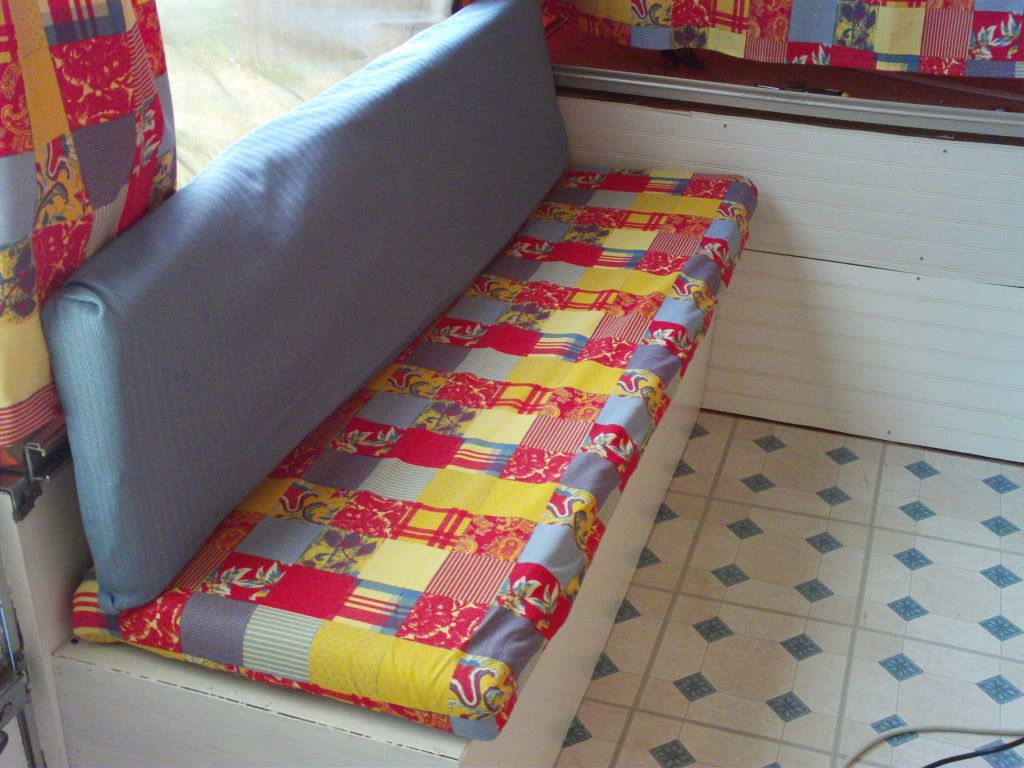
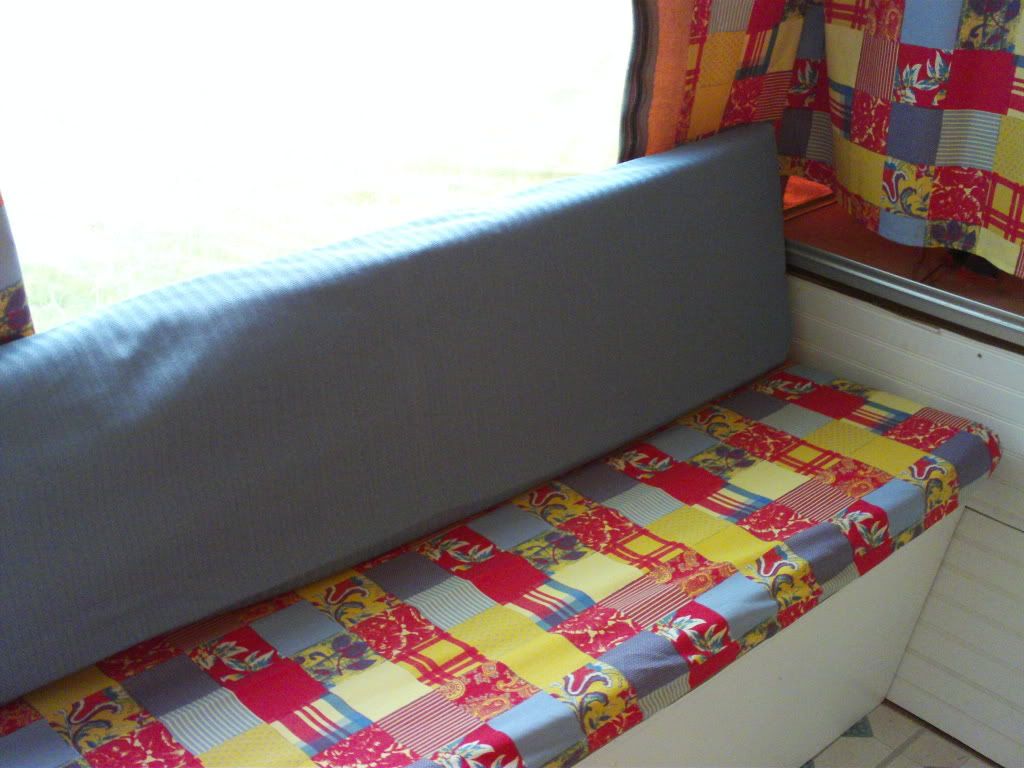
Just for fun (and a place to sit) I went ahead and put the new covers on the cushions for that bench. This took a bit of work as there were several times that I was convienced that my seamstress had made them too small for the foam inserts.
I kept goofing with it and eventually they got in properly. It was a perfect fit!
Just for laughs, I went ahead and hooked on my new rebuilt table.

Now it's really starting to come together. There are five boxes total in Frostbite and 3 of those are already installed. I still need to put on the cabinet doors and hardware but that should be easy.
The final 2 boxes are the galley and the electrical storage underneath the galley bench opposite the table. These are the 2 boxes that needed the most rebuilding and will be the most difficult as it will require hooking up the water/gas/electric. I've already rebuilt some of the box parts which I'll detail in the next post.
Currently I plan to have the inside boxes installed by the end of the upcoming weekend. Bluebell is still spending the nights outside until I can empty the garage of Frostbite parts.
Monday, July 12, 2010
Fixing the Tables
There are 2 tables in Frostbite. One is the main table for the inside benches. Another larger table is for attaching to the outside of the camper to the left of the door. I have never set either of these tables up because the folding legs on both were broken and barely hanging on the the table itself.
I've been thinking of how to fix these things since I first starting working on Frostbite and have managed to put it off until now. During our trip to Lowes last month, I was insipired in the plumbing section.
I found some pieces of steel pipe along with attachments, caps, and extensions that seemed (in my head anyway) like it would work fine. This weekend I finally got around to putting the idea into action and I thought it turned out pretty well.


I've been thinking of how to fix these things since I first starting working on Frostbite and have managed to put it off until now. During our trip to Lowes last month, I was insipired in the plumbing section.
I found some pieces of steel pipe along with attachments, caps, and extensions that seemed (in my head anyway) like it would work fine. This weekend I finally got around to putting the idea into action and I thought it turned out pretty well.
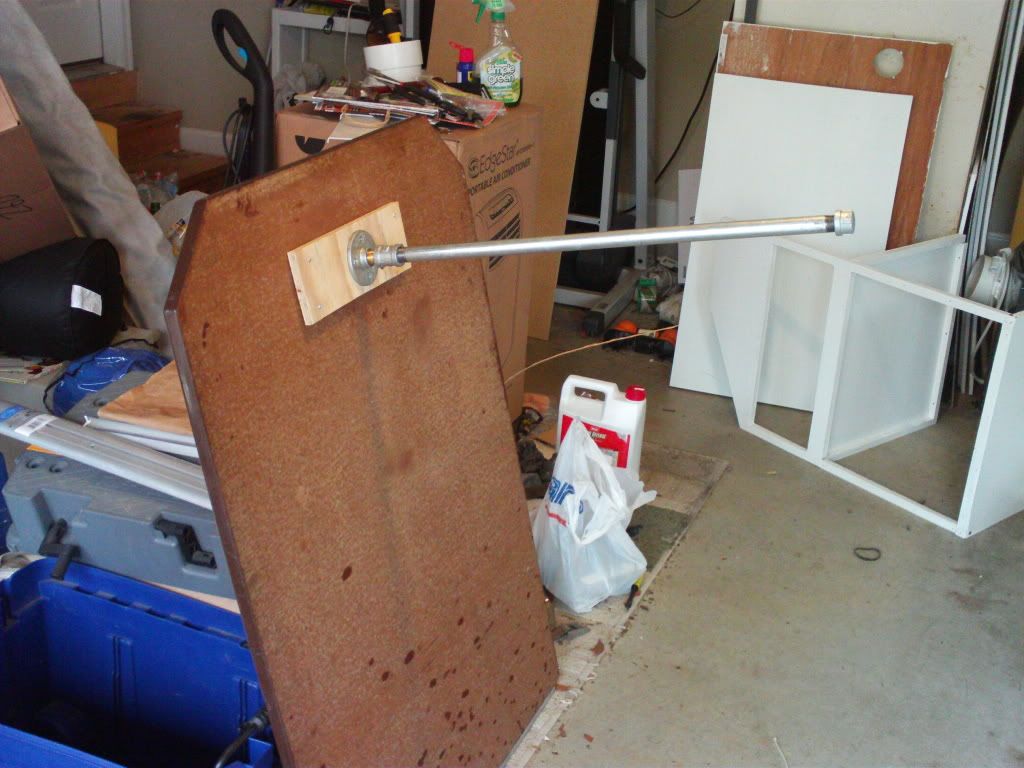
This is the larger outside table. I had to add a piece of wood for two reasons. One, I thought it best not to attach directly to the table since it was particle board and the previous legs had stripped out all of the holes anyway. The second reason was that I only had 1 inch wood screws and needed the extra thickness so they wouldn't pop through the top.
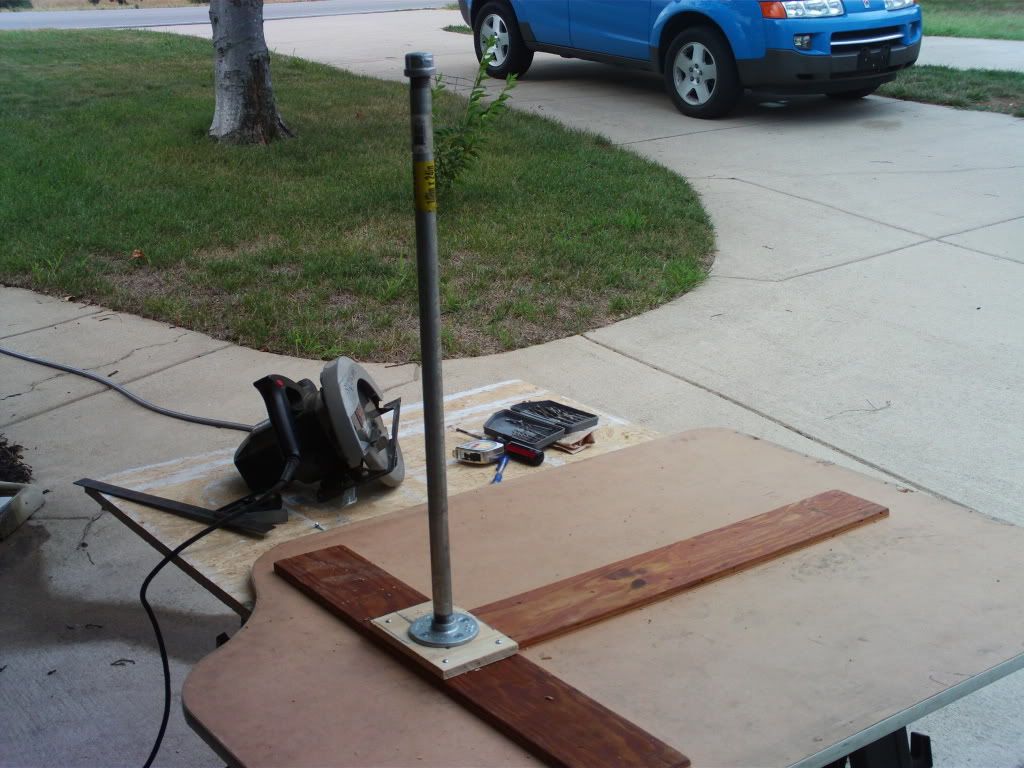
This is the smaller inside table. It already had extra wood supports but I still needed more thickness due to the aforementioned 1 inch screws.
Here are some closeups of the leg attachments:
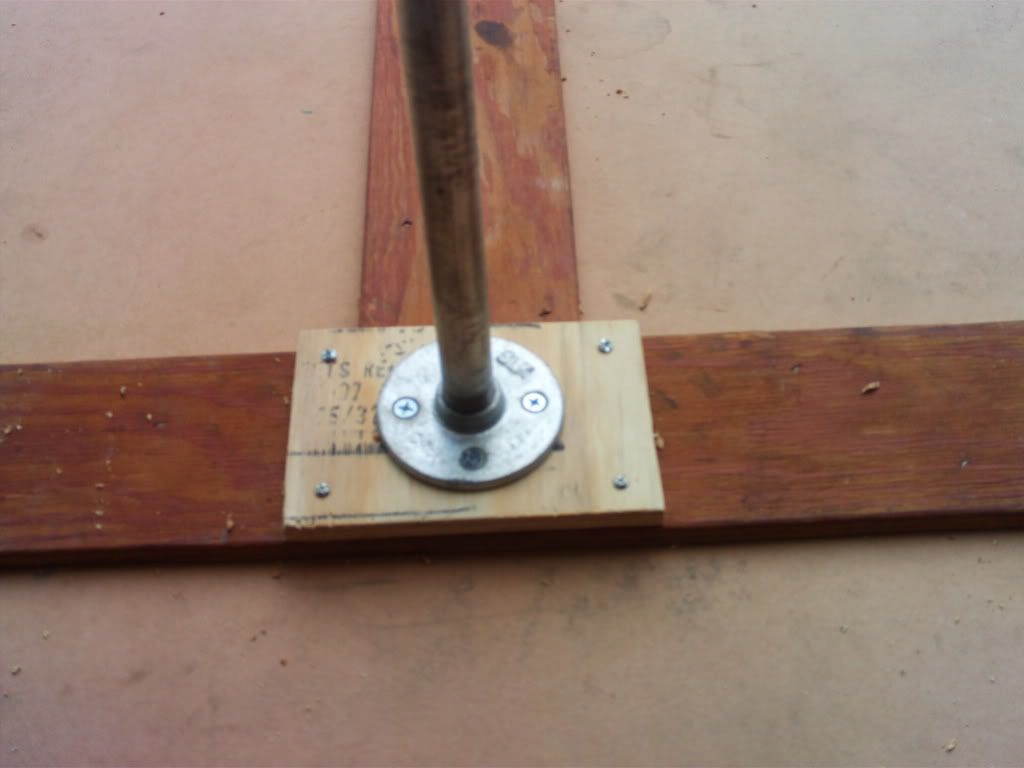

The only real problem I see with this solution is the leg cap on the inside table. I worry that it might be too rough/hard and might damage the floor somehow. I'm going to leave it as it is for now. If it cracks the floor, I have plenty of extra tiles and can replace that and then figure out how to put some type of material on the cap to make it softer.
If it doesn't damage the floor, I'm golden.
This weekend resulted in massive progress on Frostbite and I will detail the work I did in future posts and photos here this week.
Believe it or not, this thing is starting to look like a camper.
Wednesday, July 7, 2010
She's a beauty!
Removing the tape turned out to be much more of a pain than I originally thought. I worked on it about 2 hours yesterday and quit only because I needed to install the new vent in case it rained. The tape, in places, left a sticky film and in other places seemed like it was baked on.
I tried to use real "Painter's tape" but it kept falling off like it wasn't sticky enough. Instead, I used masking tape which is probably why I'm having problems getting the stuff off.
Stupid tape.
Anyway, I did remove about 90% of the tape yesterday and installed the new vent. Hopefully, she is looking much better.


I tried to use real "Painter's tape" but it kept falling off like it wasn't sticky enough. Instead, I used masking tape which is probably why I'm having problems getting the stuff off.
Stupid tape.
Anyway, I did remove about 90% of the tape yesterday and installed the new vent. Hopefully, she is looking much better.

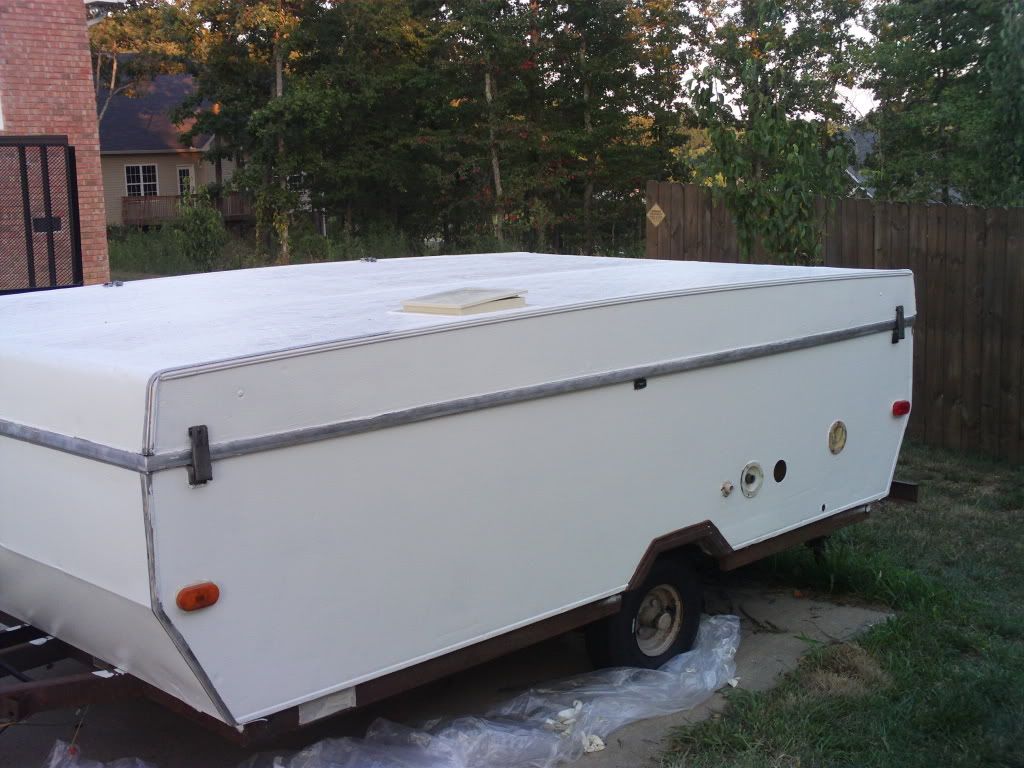
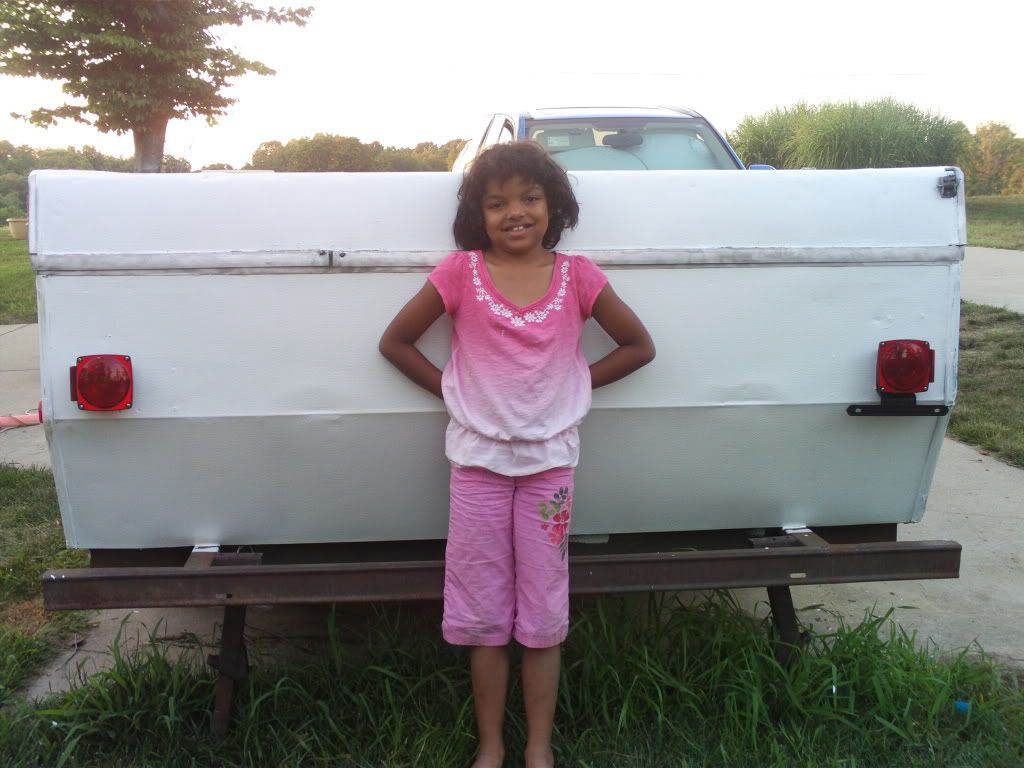
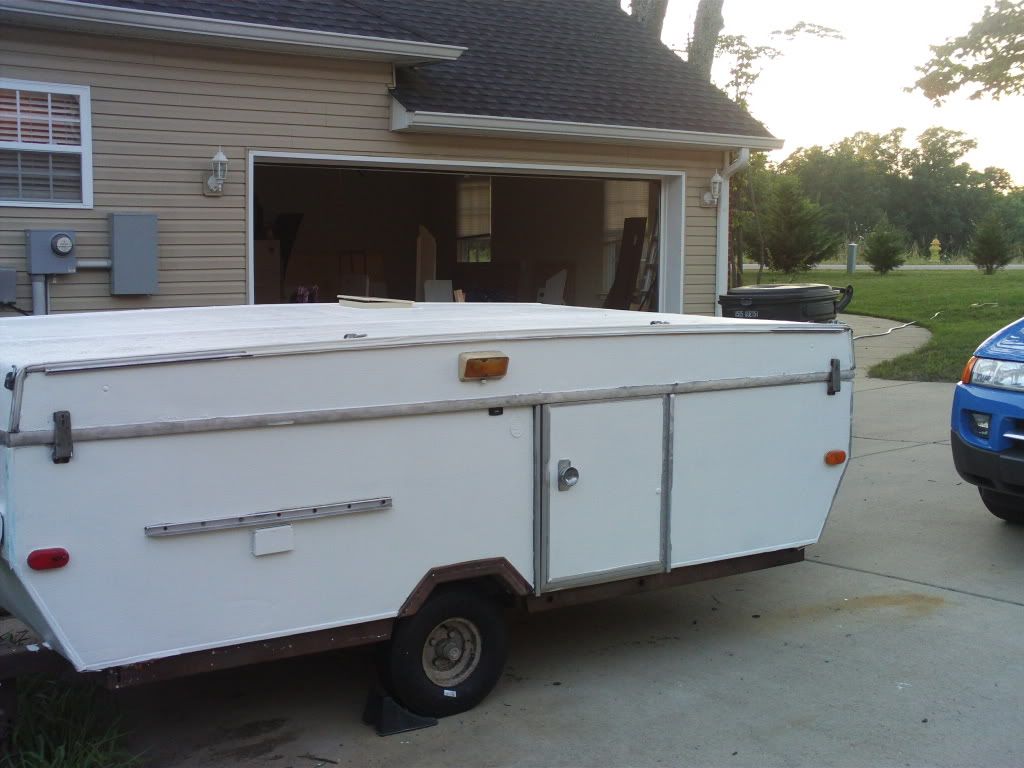
The new vent went on OK. I put in some weather stripping underneath and caulked it all up. I opened it up a bit just so I would be sure that I was orientating it correctly. Now, I wish I hadn't of done that since it is now open for rain to get in and I will need to pop up Frostbite to get to it so I can close it.
Hopefully, it won't rain today.

Tuesday, July 6, 2010
The Big One
I managed to pull off the "Big One" this weekend; painting the outside of Frostbite. I started by getting out my trusty wire brush drill attachment and scraped off all of the decals and lettering. The "brown" and "tan" color scheme wouldn't fit with the new look I have in mind and, besides, it's not like I have some obligation or allegience to the StarCraft Camper company anyway.
Once this was done I then started taping up all the parts that I didn't want painted. This took much longer than expected. It was Sunday before I even started painting. She look pretty rough before hand. Here are some "before" shots I took just before I started painting:


I put on 2 coats and even managed to save some paint for touch ups which I will probably find a need for. I thought it turned out pretty well. You are going to have to wait until tomorrow before I post the "after" shots, though. I needed this afternoon/evening to remove all the tape and install the new roof vent. I want Frostbite to look her best for the first "after" photos.
I hope to paint the frame itself black alter this week. *Nearly* all of the inside box parts have at least 2 coats on them. Most have four. I will start putting the boxes back together soon. I have some clear coat that I intended to paint onto the counter tops. I might wait until they are all installed before I do that. I can't think of any reason why not and, frankly, I'm tired of painting.
Once this was done I then started taping up all the parts that I didn't want painted. This took much longer than expected. It was Sunday before I even started painting. She look pretty rough before hand. Here are some "before" shots I took just before I started painting:

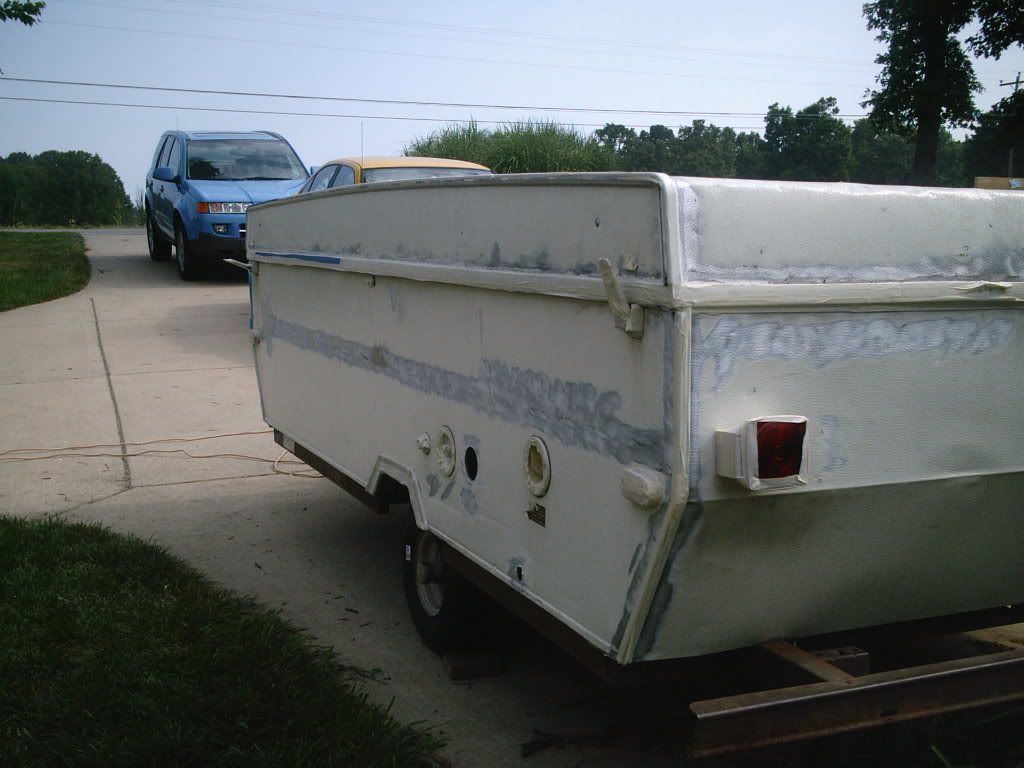
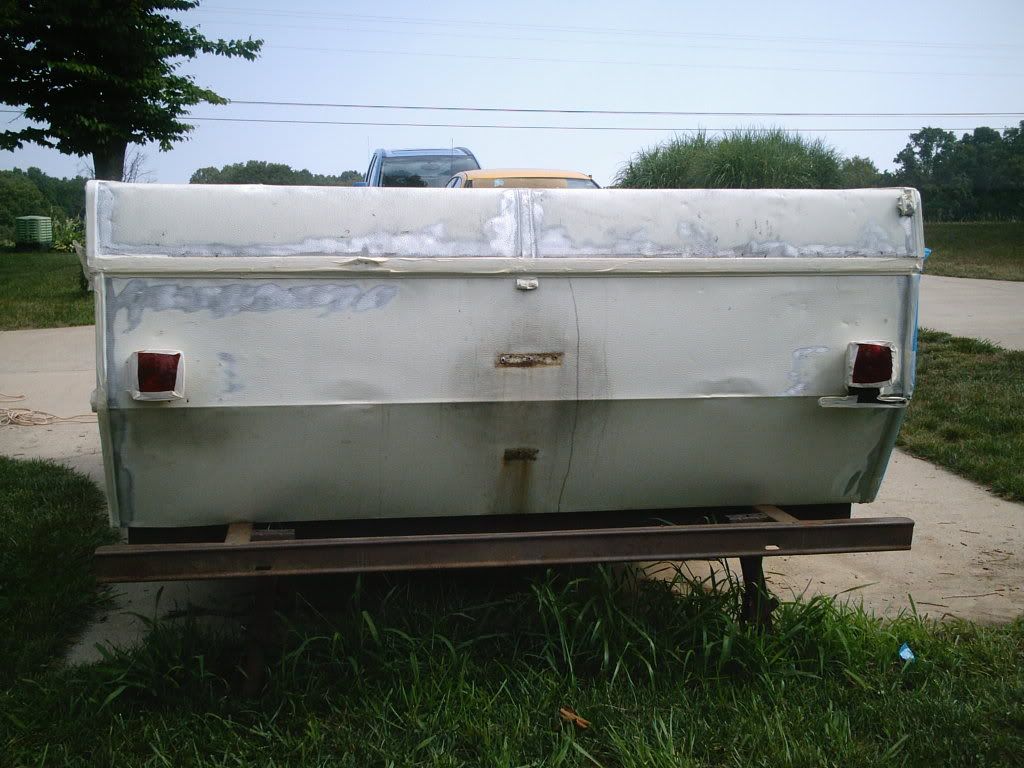
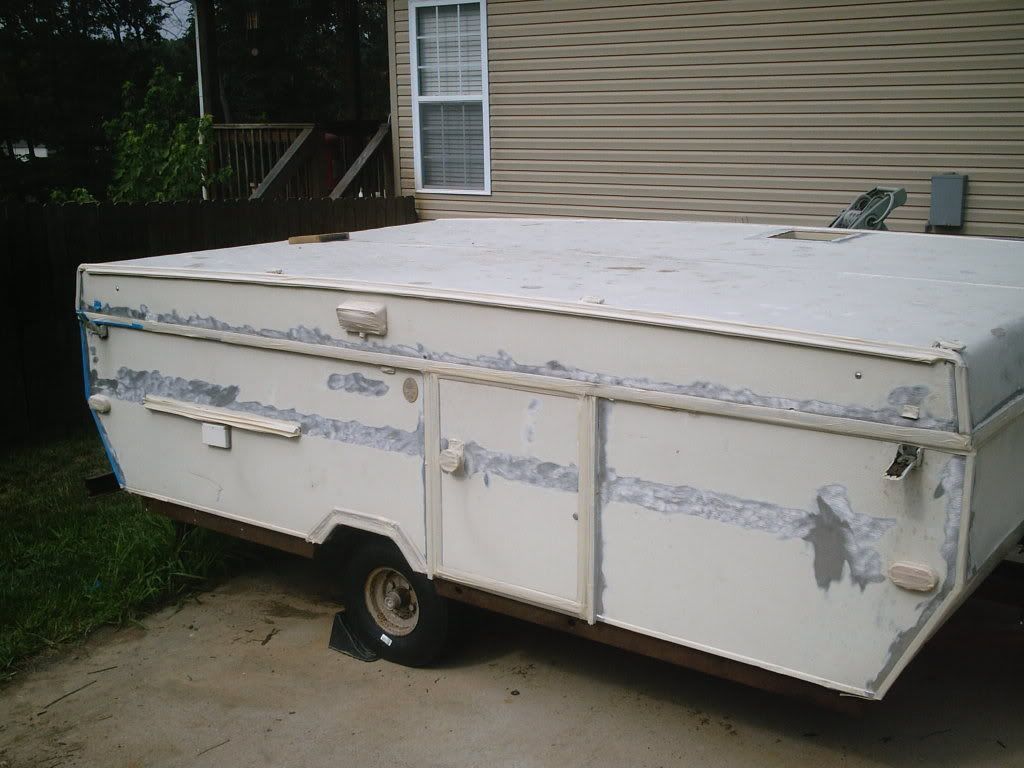
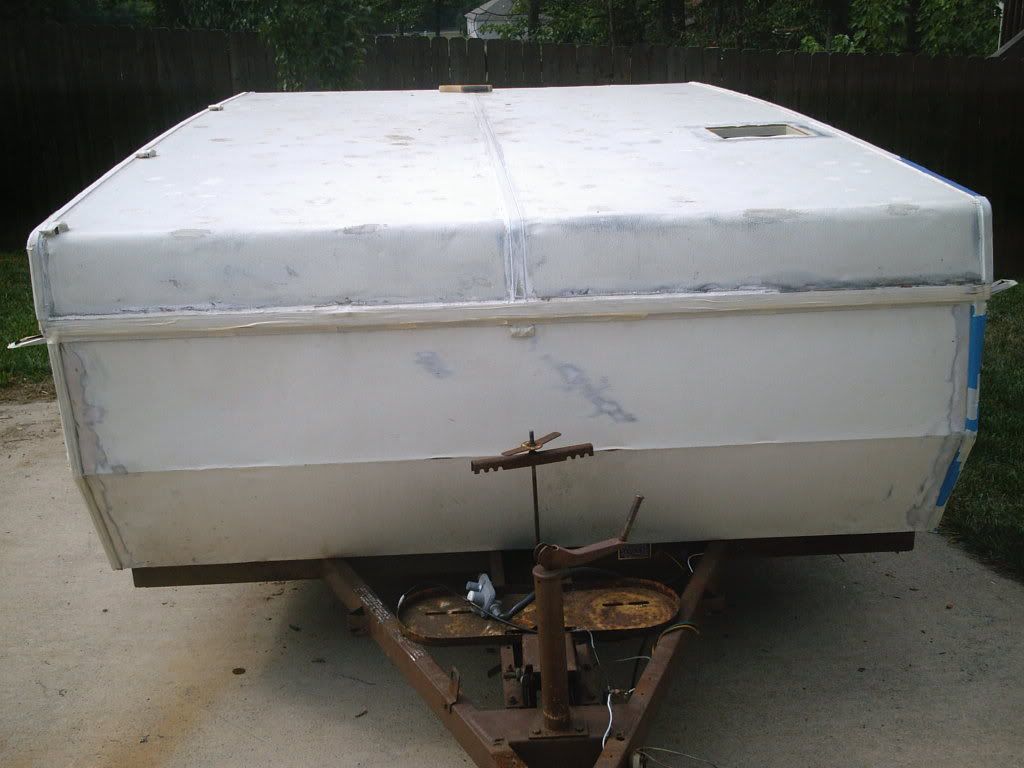
I put on 2 coats and even managed to save some paint for touch ups which I will probably find a need for. I thought it turned out pretty well. You are going to have to wait until tomorrow before I post the "after" shots, though. I needed this afternoon/evening to remove all the tape and install the new roof vent. I want Frostbite to look her best for the first "after" photos.
I hope to paint the frame itself black alter this week. *Nearly* all of the inside box parts have at least 2 coats on them. Most have four. I will start putting the boxes back together soon. I have some clear coat that I intended to paint onto the counter tops. I might wait until they are all installed before I do that. I can't think of any reason why not and, frankly, I'm tired of painting.
Subscribe to:
Posts (Atom)