It also makes the camper look 100% redneck.
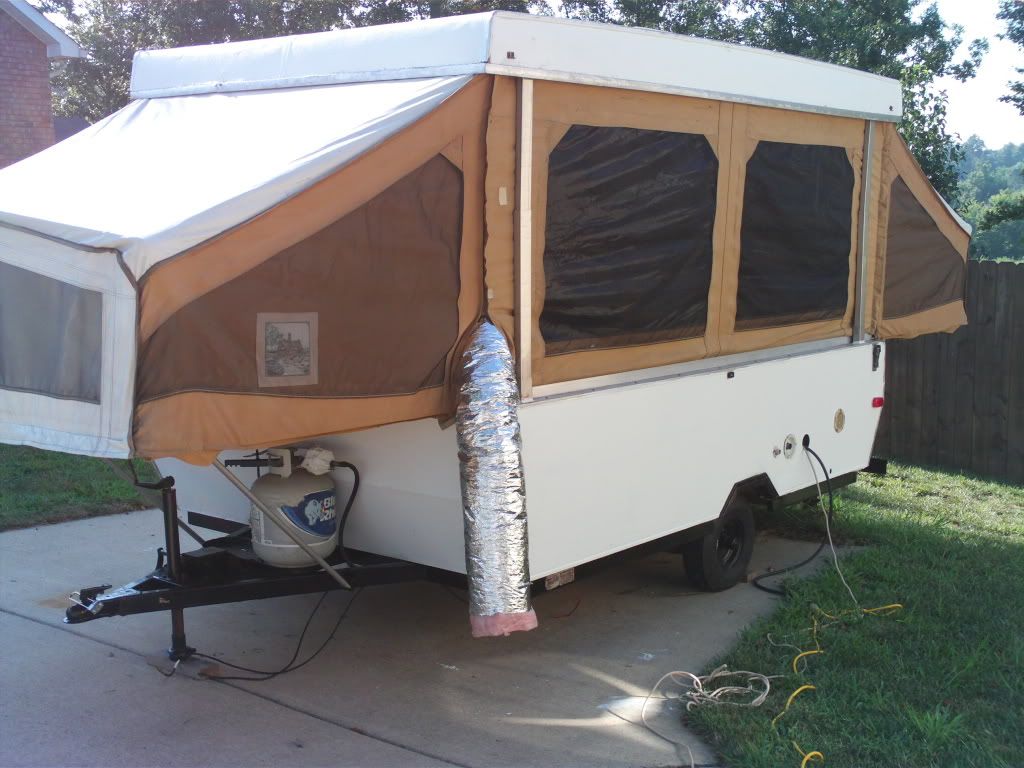
See what I mean?
I decided then and there that I needed to run the exhaust hose down through the cabinet underneath the AC and vent out through the floor. First, though, I needed a dryer vent. We went to Lowes and they had several to choose from. Inquiring about where they were in the store, I was asked "Do you need 4 inch or 6 inch?"
Of course, I had no idea so I held up my hand that made a circle with my thumbs and index fingers.
"About this big."
"OK, that looks like about six," I was told and then directed to the correct row in the store. I had hoped that I could get a vent with a flap that would keep it closed when the air is not blowing. All of the ones I was looking at had these flaps but they depended on gravity to work. A vent coming out the side of a house has a flap that stays closed except with air is blowing. If you turn that same vent upside down, the flap gapes open.
I briefly thought about venting out the side of Frostbite but decided against it. The chances of me goofing up are great and goof ups on the side of the camper will be hard if not impossible for me to fix. No, I needed to vent from the bottom. I was much more confident about my ability to drill a hole in the floor.
Luckily, I found a vent meant to be installed in the eve/overhang of a house roof. It was designed to hang upside down and the vent flaps were spring loaded so they stayed closed when air was not blowing. Not only that but it claimed to work with BOTH 4 inch and 6 inch connections which was especially nice.
I took it home and tested it against the AC exhaust hose. Strangely, it didn't fit. I then got out my tape measure and guess what I discovered?
The AC hose is 5 INCHES! Man, does anyone even TRY to follow some standard for these things?
I vowed to get some type of adapter someday. Unit then, this would have to work. I planned to make an adapter out of good ol' duct tape.
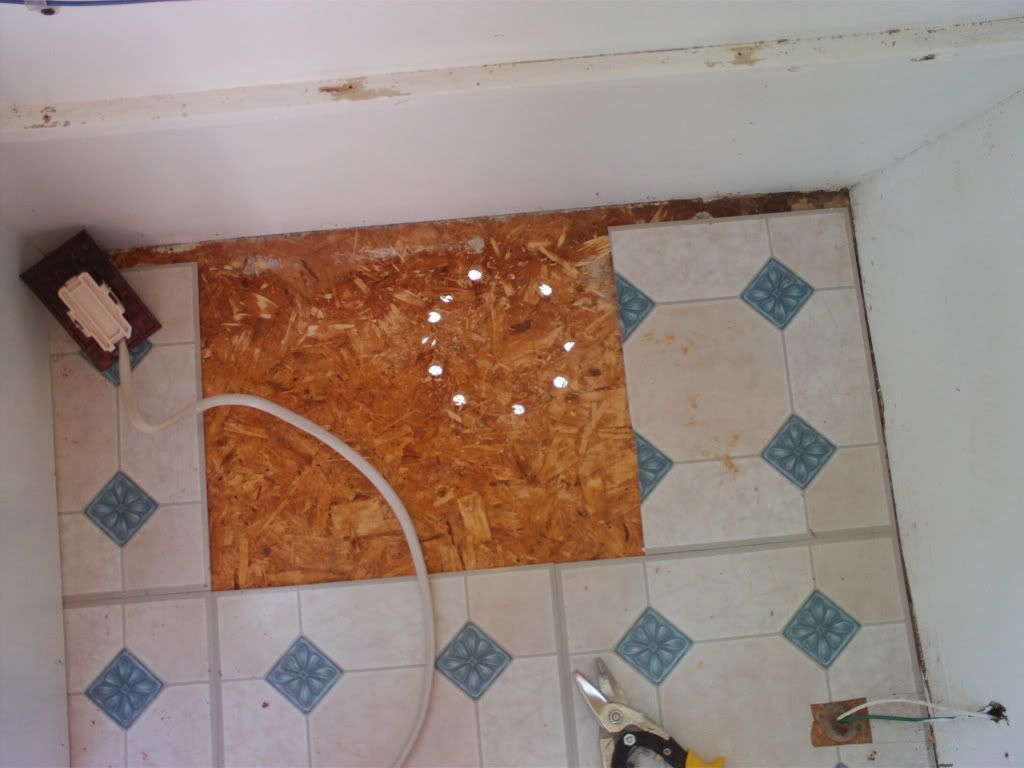
First, I needed to drill a hole in the floor. I removed the box in that corner with a screwdriver. Now, I had no real idea how to go about doing this so I just forged ahead clueless and it seemed to come out ok. I took the outside cover from the vent so that I had just the inside part that had to go through the floor. I found a place underneath that I *hoped* would come up in the proper place inside, held up the vent, and drew a circle around the piece on the underside wood.
I drilled a hole through the floor inside the circle nearest the edge of the camper. I then verified inside that it was in the correct place and the vent would fit properly. Man, I got lucky on that one!
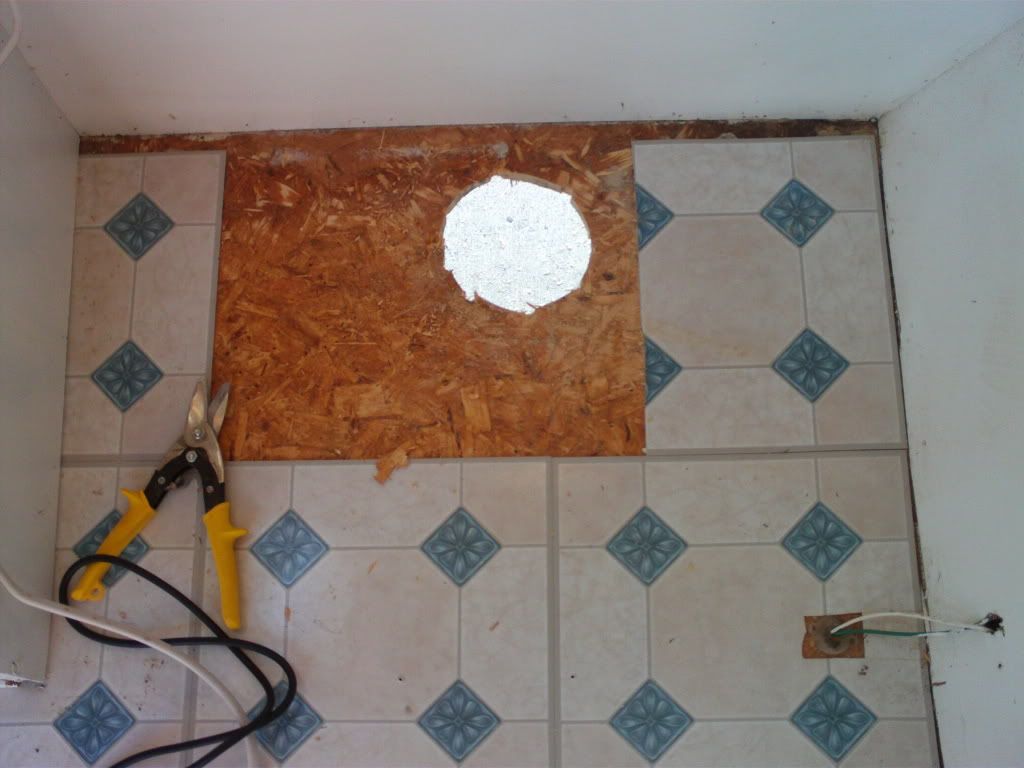
I decided to keep drilling holes inside the circle I drew underneath the camper trying to make the outside edge of the drill hole match the edge of the circle I drew. The was made extra difficult since I had to drill with my eyes closed. I would place the drill bit where it needed to be and then close my eyes because the sawdust flew directly into my face and eyes.
Eventually, I had the outline of a circle in the floor.
I used my new $15 jigsaw (yes, I still bought another after the last one tore up) and cut from hole to hole until I had a BIG hole.
A hole in the floor
It wasn't perfect and I had to sand and use the jigsaw to cut it larger in places but I eventually got the vent through the hole.
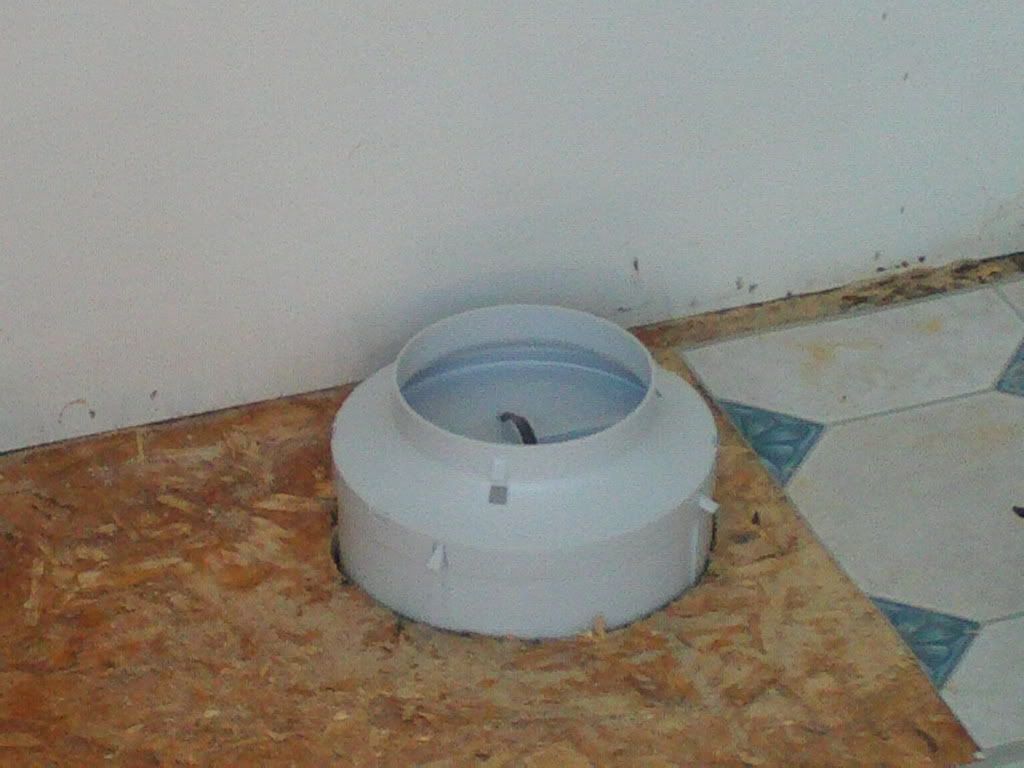
nice!
Here is what it looks like from underneath the camper:
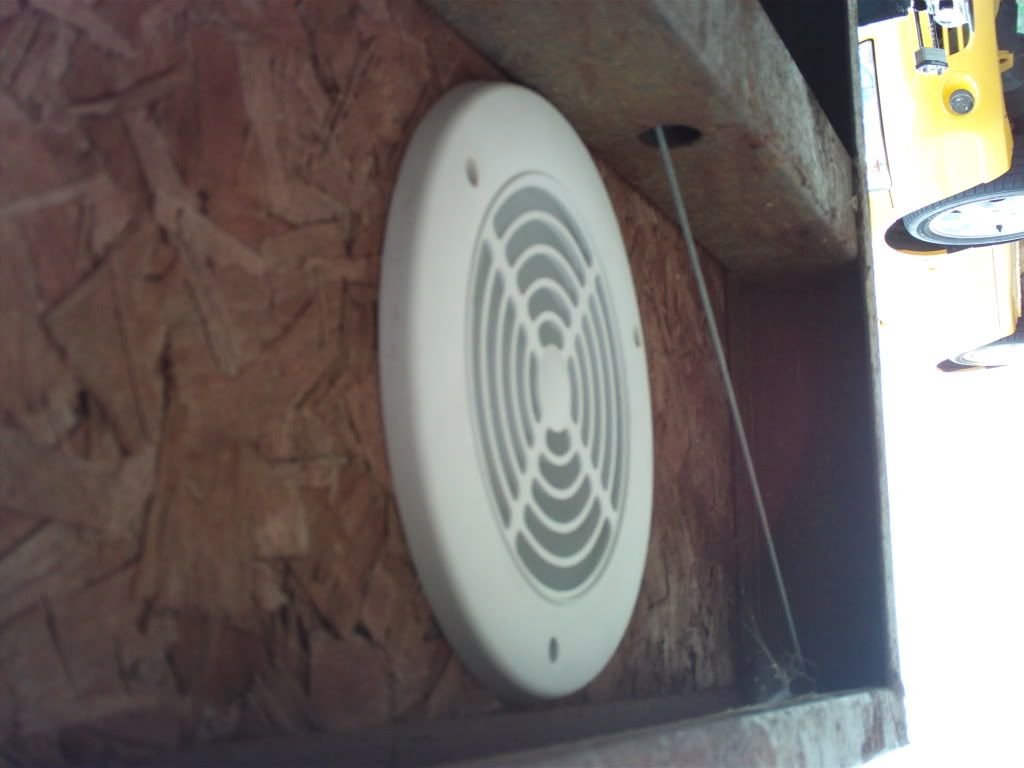
also nice!
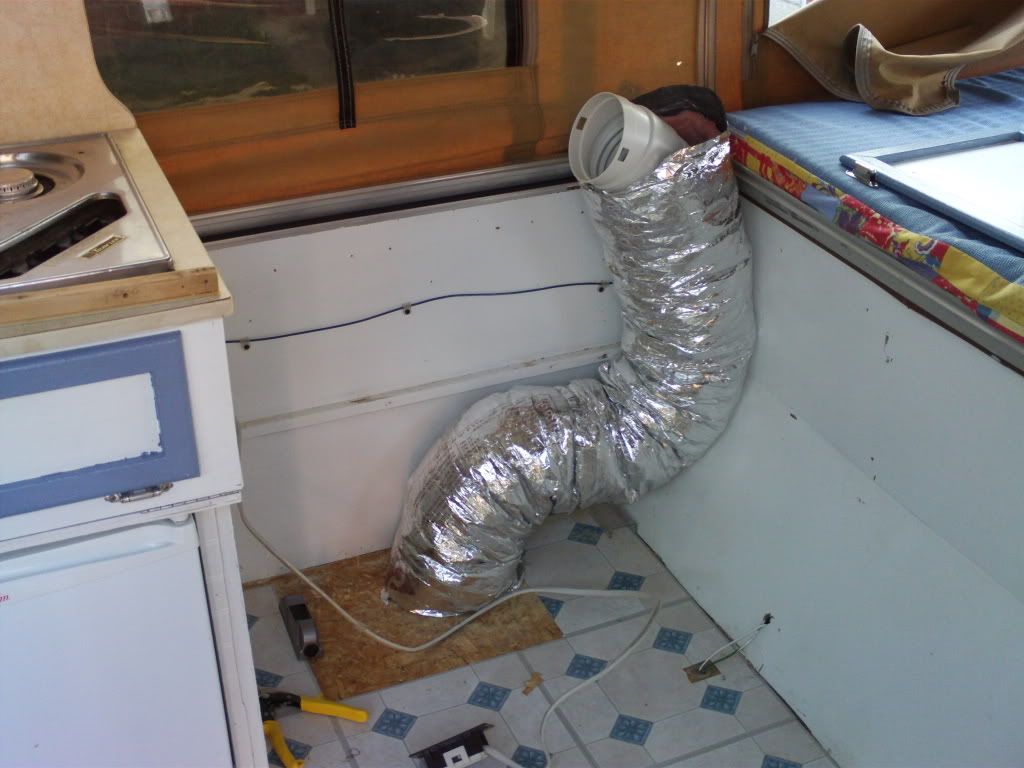
I then fashioned my duct tape adapter. Man, that is tough stuff.
Now it was time to start putting the box back together around it.
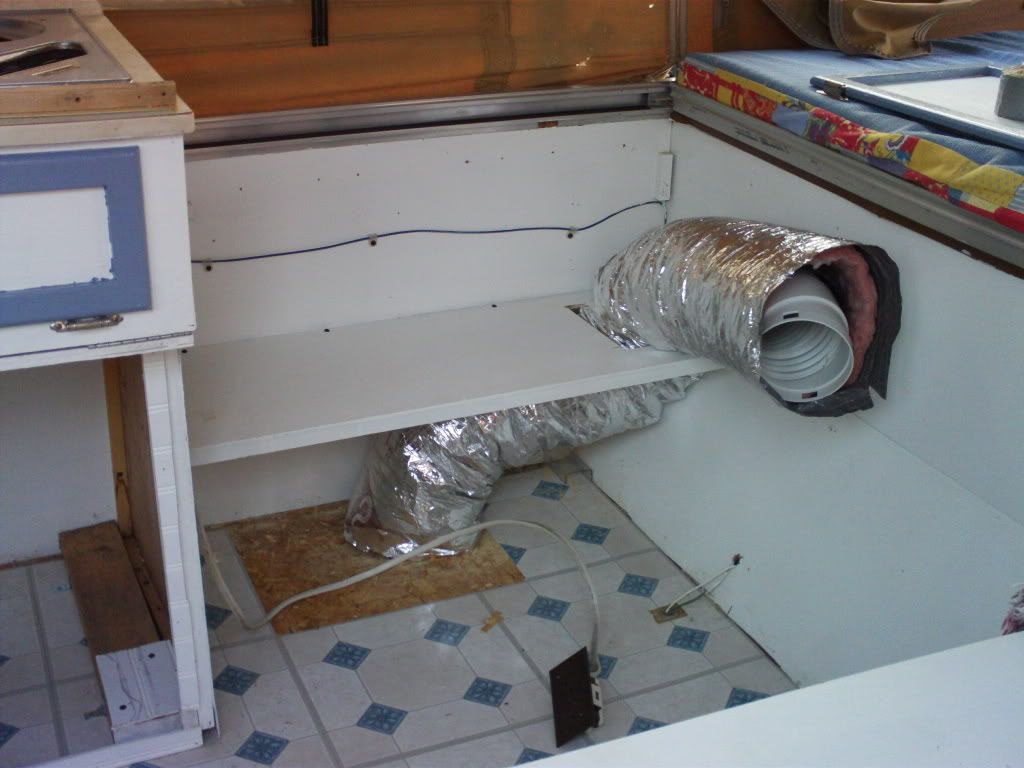
I cut out a square and installed the inner shelf.
I did get a square cut into the counter top and have that nearly re-installed but I found a piece of dowel that I forgot to put back on the counter top when I removed it to cut out the square. I'll need to take the counter top back off, fix it, and then put it back together.
I will have to do this Monday or Tuesday since I was tired and hot and it was starting to get dark; a trifecta excuse to quit work for the day.
I'll detail the finish of this little project in a future post.


No comments:
Post a Comment