OK, I realize that I haven't exactly been working on Frostbite 24/7 and Frostbite is not the motivation for this. My work has been fairly stressful this past month and I've been sick for the past two weeks (I am on the back end of it I think!). The cold and grey days have returned to TN. My daughter's pet bunny passed away this week. As you can imagine, things around our house have gotten a bit depressing. My wife especially wants to "get out of the house" for the weekend and so do I.
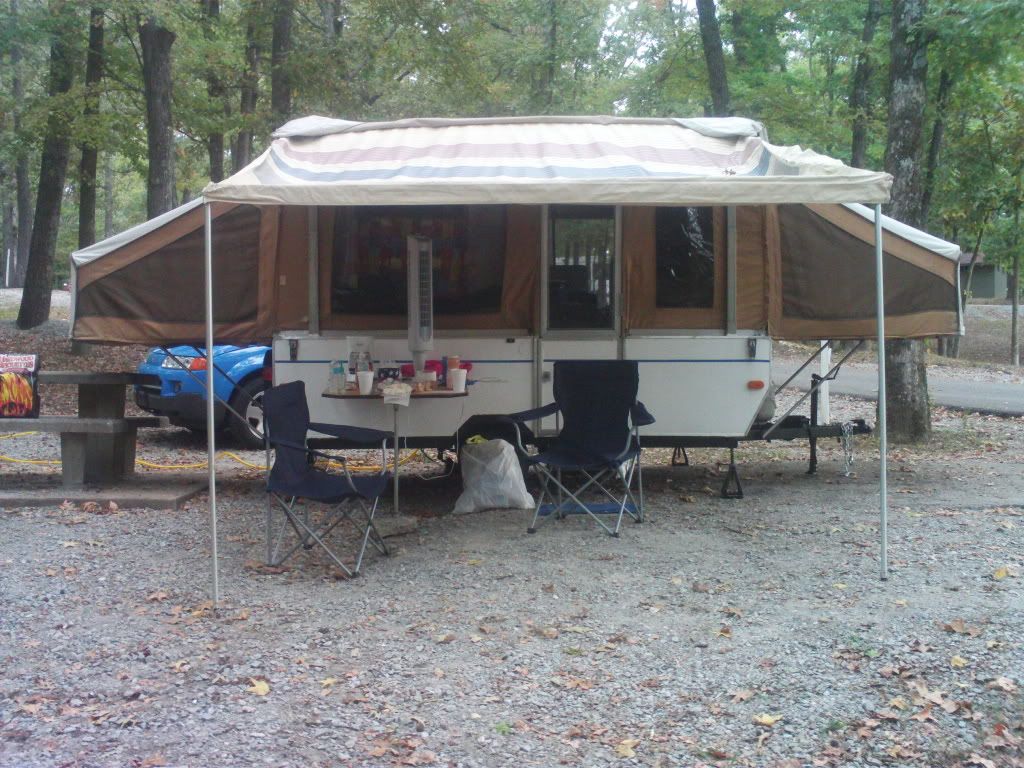
Frostbite, of course, is in no shape to be used for camping yet so we made reservations to stay in the Inn at Natchez Trace State Park. Since it is the winter season and my wife gets a discount for being a state employee, the Friday and Saturday night stay will only cost us $60 which is amazingly cheap.
It's just an hour and a half drive to the park from our house so I might be able to get in Frostbite on Sunday afternoon and do a bit of work by finishing the lights and painting the back wall. We'll see.
Thursday, February 25, 2010
Wednesday, February 24, 2010
Let There Be Lights
After putting goo all around the floor patch and the four lift post corners, I decided it was time to tackle the lights. I removed the tail lights and discovered that the seals were all ruined and they pretty much fell apart once off of the trailer. I decided to get new tail lights. A quick trip and $20 less in my pocket later and I had a new set of tail lights. They came with a wiring harness too so the previous wiring kit I had bought was unnecessary. That 20 bucks may as well have been set on fire.
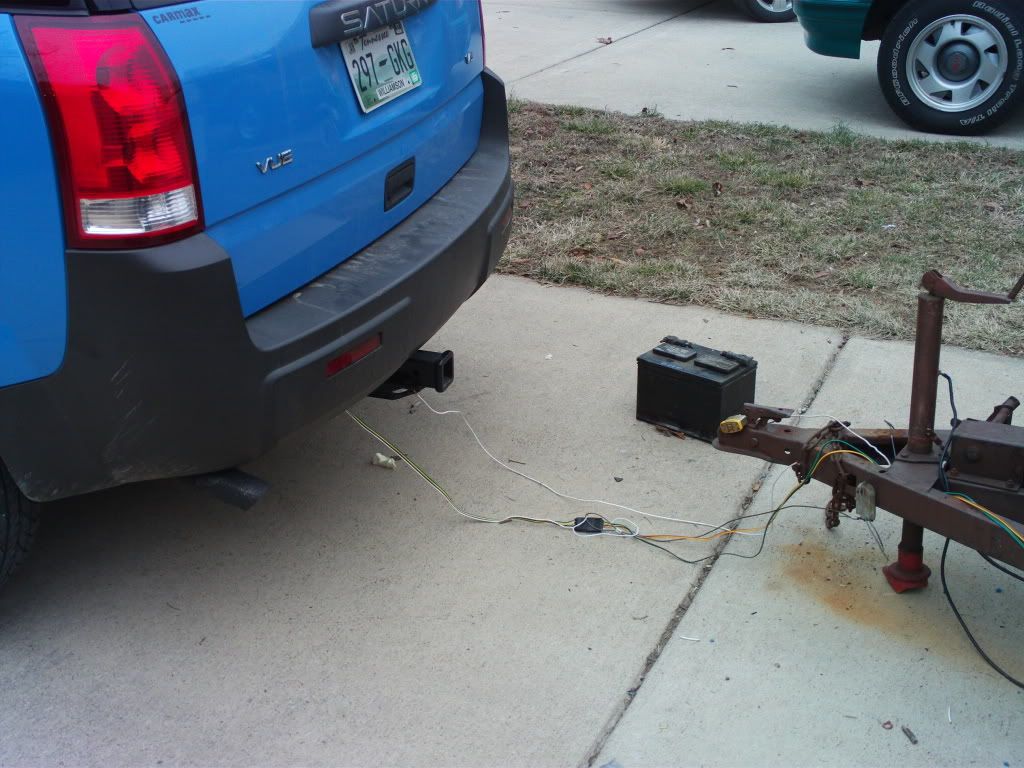
Anyway, I got the old lights off, cleaned up the camper skin where the lights attached, ran the wires underneath the camper and hooked it all up. I backed Bluebell up to the camper close enough so I could attach the wires. I did NOT actually hook Frostbite up to Bluebell's hitch. There was a slight problem with this which I covered in a previous post.
Once everything was hooked up, I tested it out and . . .
nothing.
Not even a flicker.
I tried to simplify the problem. I got out the other wiring kit and connected the lights to the new kit without going through the trailer.
nothing.
I got the old wires out of the trash, trimmed the wires to just a foot past the connector to Bluebell.
nothing.
Stumped. I did a redneck move and chose a green wire and brown wire and touched it with my tounge.
YES. There was a charge going through.
I hooked those green and brown wires up to a taillight in my lap.
nothing.
At this point it was getting dark so I put everything up for the night and decided to start fresh on Sunday. That night I called my father and sought out his advice. I explained my failures and he suggested that the lack of light simply means that the circuit is not complete. We talked about the white ground wire and how I had attached it to the chain on the tounge. My father suggested that the ground had to flow from the battery to the light itself and this could be done via the hitch connection meaning that Bluebell had to actually be hooked to Frostbite to make the correct ground circuit. It made sense to me.
The next day, I decided to cheat a bit initially and try a new wire connecting Bluebell's hitch to Frostbite's tounge. I though I would try this first since I would have to take up the stablizers and lower Frostbite to actually hook it up to the hitch. Anyway, I fired it up and BAM! There was light. The brakes worked and the blinker's worked!
I ran the wires underneath Frostbite and into the back of the camper and attached the new tail lights to the back.
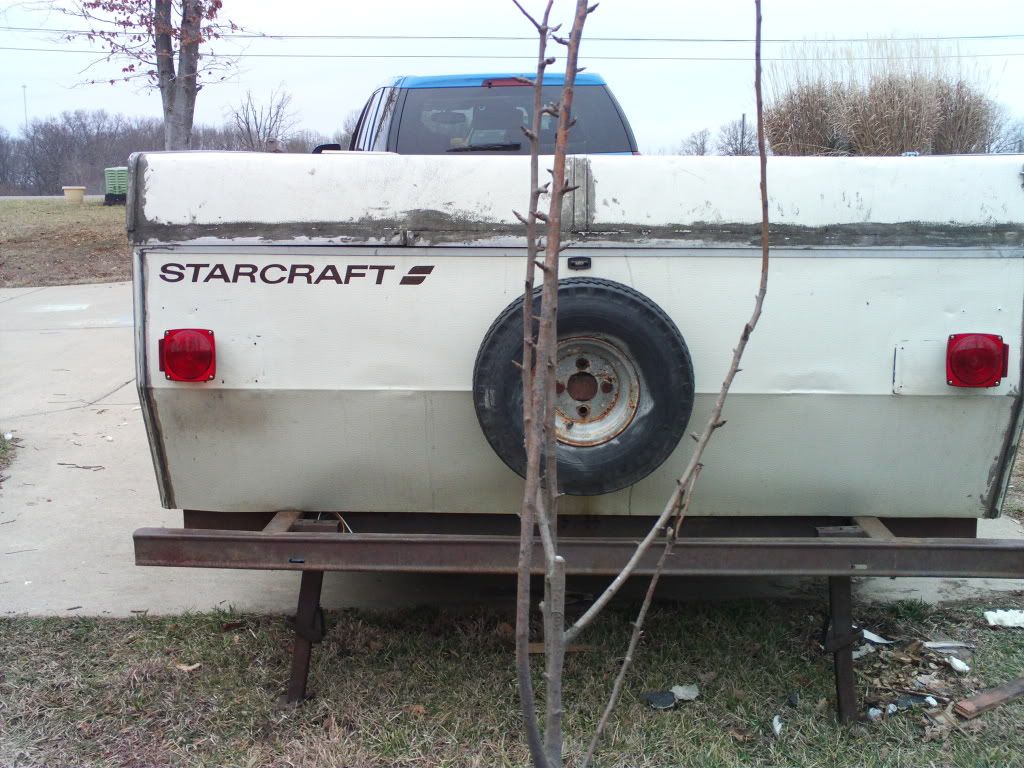
Everything worked. I think it is an improvement visually especially since the left blinker wasn't working at all before with the old lights.
Anyway, I got the old lights off, cleaned up the camper skin where the lights attached, ran the wires underneath the camper and hooked it all up. I backed Bluebell up to the camper close enough so I could attach the wires. I did NOT actually hook Frostbite up to Bluebell's hitch. There was a slight problem with this which I covered in a previous post.
Once everything was hooked up, I tested it out and . . .
nothing.
Not even a flicker.
I tried to simplify the problem. I got out the other wiring kit and connected the lights to the new kit without going through the trailer.
nothing.
I got the old wires out of the trash, trimmed the wires to just a foot past the connector to Bluebell.
nothing.
Stumped. I did a redneck move and chose a green wire and brown wire and touched it with my tounge.
YES. There was a charge going through.
I hooked those green and brown wires up to a taillight in my lap.
nothing.
At this point it was getting dark so I put everything up for the night and decided to start fresh on Sunday. That night I called my father and sought out his advice. I explained my failures and he suggested that the lack of light simply means that the circuit is not complete. We talked about the white ground wire and how I had attached it to the chain on the tounge. My father suggested that the ground had to flow from the battery to the light itself and this could be done via the hitch connection meaning that Bluebell had to actually be hooked to Frostbite to make the correct ground circuit. It made sense to me.
The next day, I decided to cheat a bit initially and try a new wire connecting Bluebell's hitch to Frostbite's tounge. I though I would try this first since I would have to take up the stablizers and lower Frostbite to actually hook it up to the hitch. Anyway, I fired it up and BAM! There was light. The brakes worked and the blinker's worked!
I ran the wires underneath Frostbite and into the back of the camper and attached the new tail lights to the back.
Everything worked. I think it is an improvement visually especially since the left blinker wasn't working at all before with the old lights.
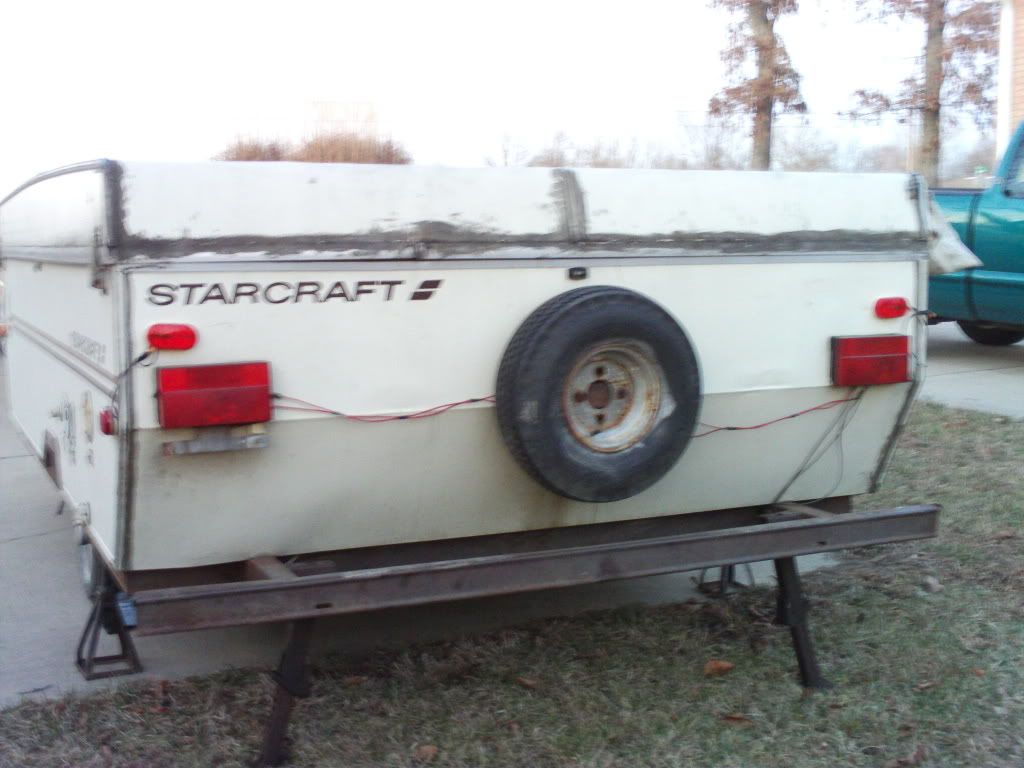
Before
After
I've still have the side lights to splice in. There are 2 in the front and 2 in the back. Running lights are also a problem. Bluebell is one of those new vehicles where the headlights are on all the time. It has a light sensor on them that make the lights brighter when it gets dark. We've noticed a problem with the lights the past few months in that the inside dash lights don't work well and I couldn't get the fog lights to work either. I suspect problems in Bluebell that will require that I take it to CarMax to fix. It's all under an extended warranty so fixing it will just be 50 bucks. I'm crossing my fingers that the running lights will start working on Frostbite when this problem is fixed.
Tuesday, February 23, 2010
The First Casualty
I had assumed that my blood would be spilt first in the course of this project(preferably without the accompanying loss of an appendage); but it fell upon Bluebell to take one for the team. Here is the first of a hopefully short list of casualties:
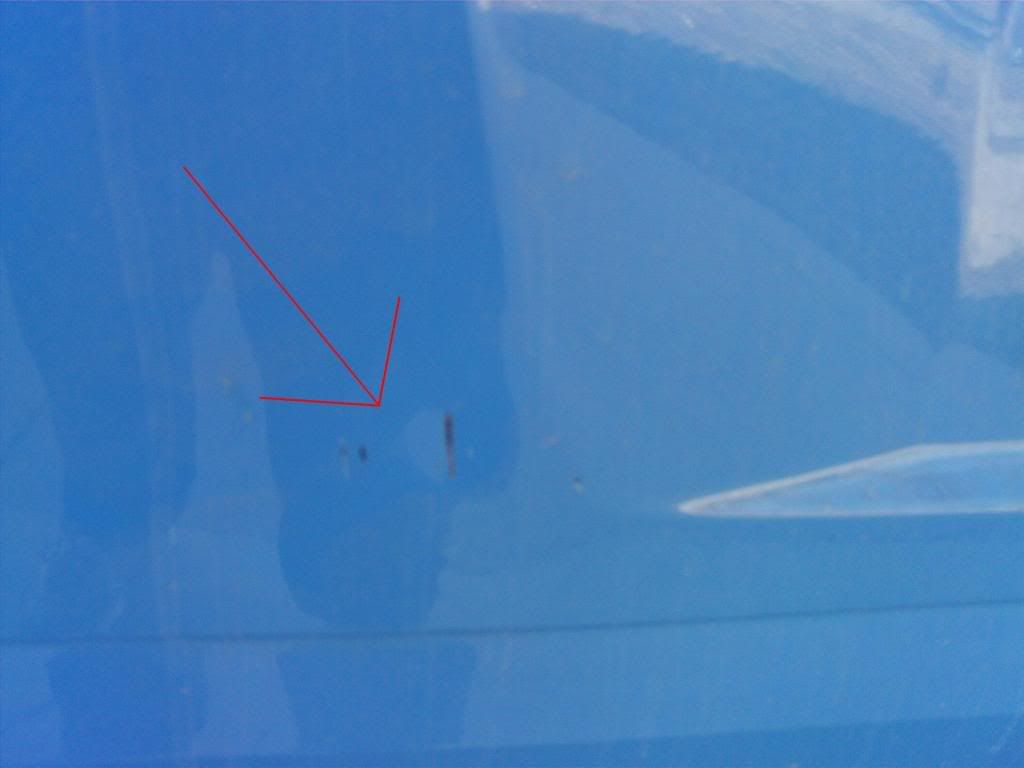
If you are guessing that the scratches and indention look suspiciously like the end of one of the pullout bunk support poles on Frostbite, you’d be correct. Here is a larger view:
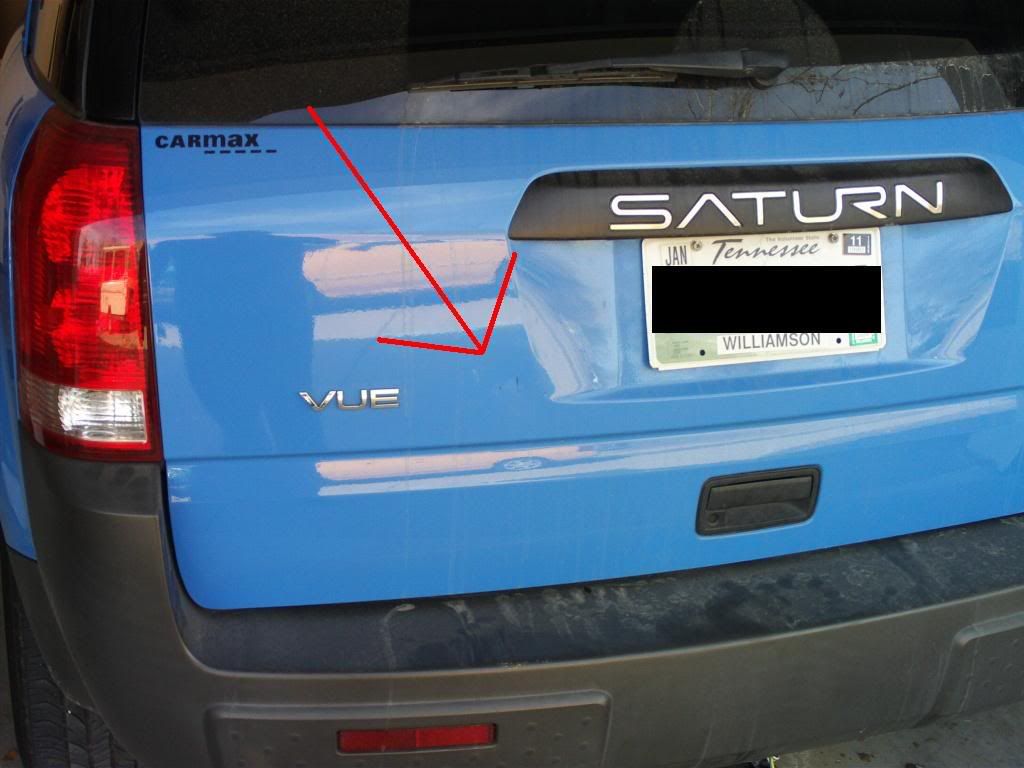
I was backing Bluebell up to Frostbite just close enough for the hitch wires to connect so I could work on the lights. I had the bed pushed in because I was working on the hitch and needed it out of my way.
The support poles were not in my way, however.
It wasn’t even that loud of a thump.
My wife’s support for this project has been reduced dramatically. She lamented “Why didn’t we just get something that is ready for camping now and didn’t need so much work?”
I thought about suggesting that more than likely I would have had the exact same mishap with a brand new camper but opted not to.
If you are guessing that the scratches and indention look suspiciously like the end of one of the pullout bunk support poles on Frostbite, you’d be correct. Here is a larger view:
I was backing Bluebell up to Frostbite just close enough for the hitch wires to connect so I could work on the lights. I had the bed pushed in because I was working on the hitch and needed it out of my way.
The support poles were not in my way, however.
It wasn’t even that loud of a thump.
My wife’s support for this project has been reduced dramatically. She lamented “Why didn’t we just get something that is ready for camping now and didn’t need so much work?”
I thought about suggesting that more than likely I would have had the exact same mishap with a brand new camper but opted not to.
Monday, February 22, 2010
Finally, something is fixed!
It was a beautiful weekend. The temperature was 65, it was sunny, and I was in a short sleeve shirt working on Frostbite. This has been the best weather so far this year. I reached a major milestone this weekend in that I actually did something to Improve Frostbite instead of just tearing her apart.
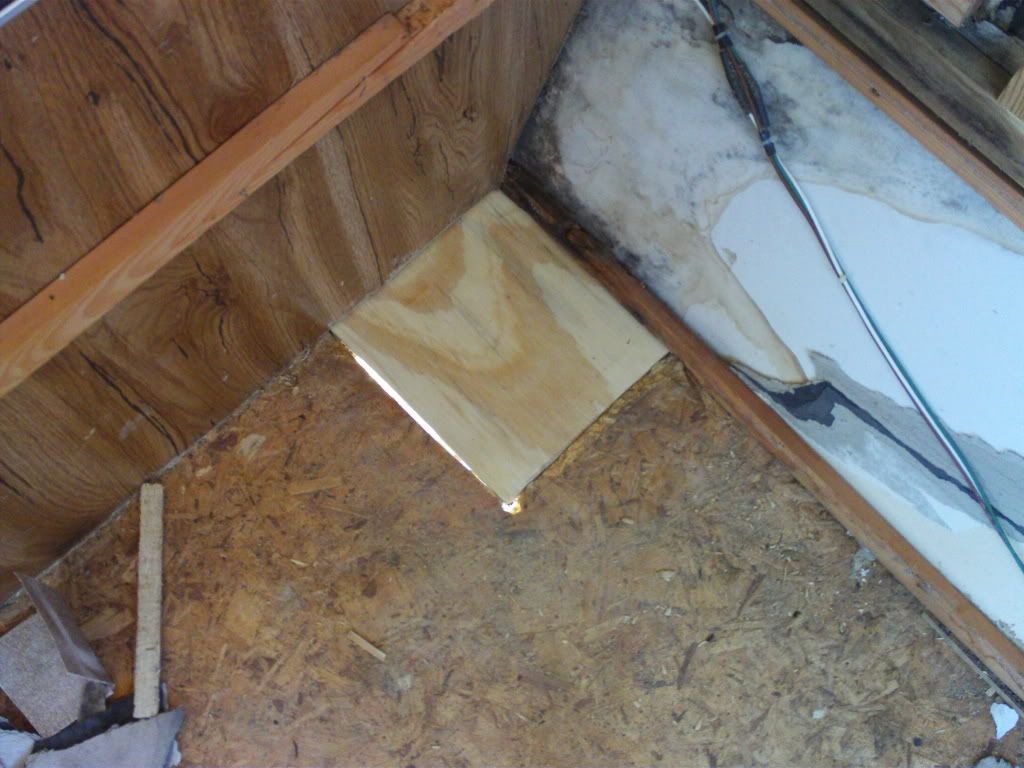
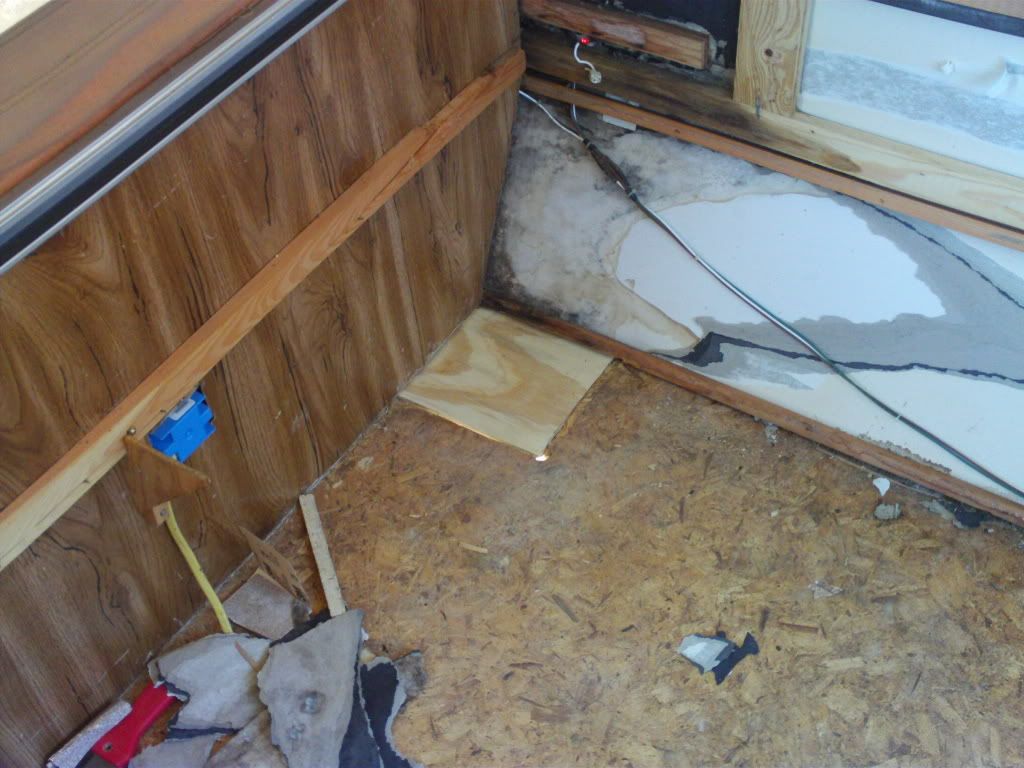
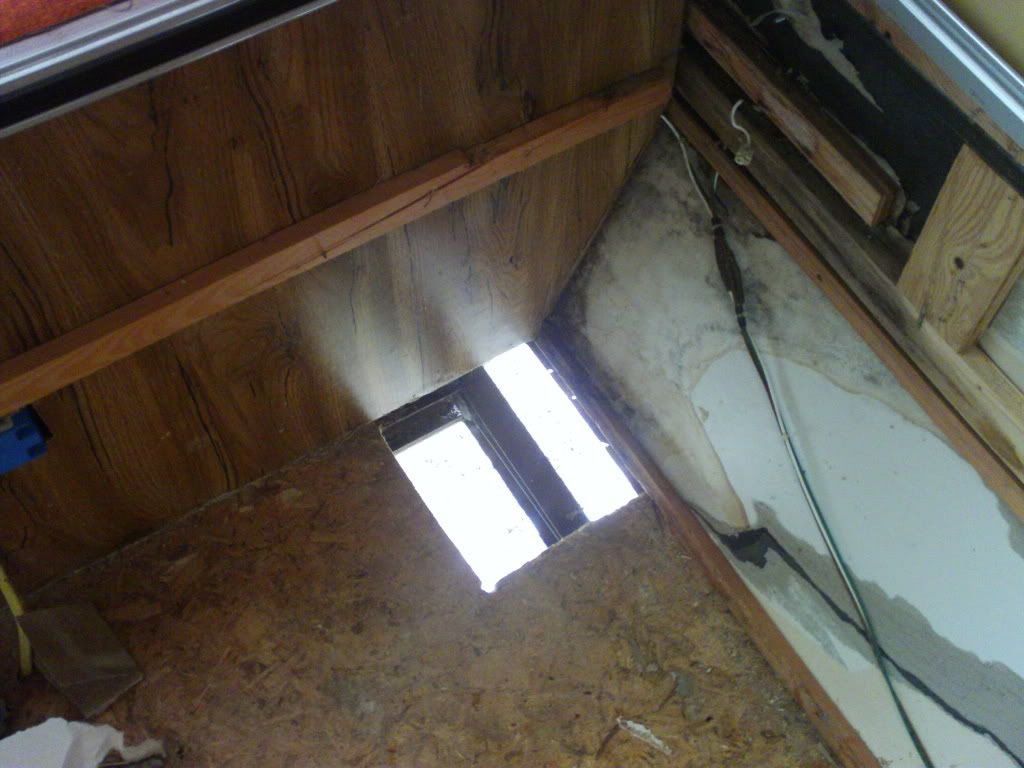
I fixed the rotted back corner of the floor.
After the fiasco with the flooring I bought and my failure to measure the floor thickness, I managed to get some plywood scraps that I could use. I dusted off my skillsaw for only the second time since I've had it (I inherited this from a friend going through a divorce 10 years ago) and carefully measured the hole, marked the square on the plywood, and cut it out. It was still 1/8 to 1/4 inch too wide so I got out my trusty wood shaver which I picked up last weekend for $6 and shaved that edge down to the right size.
It wasn't a *perfect* fit by any means but close enough for government work.
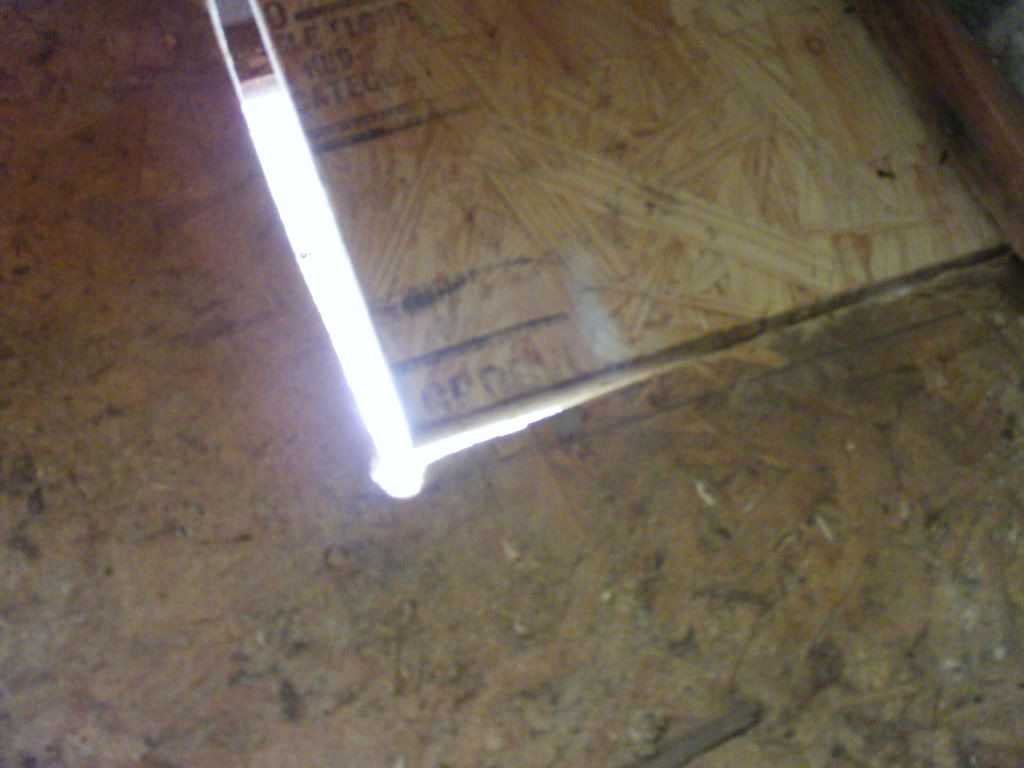
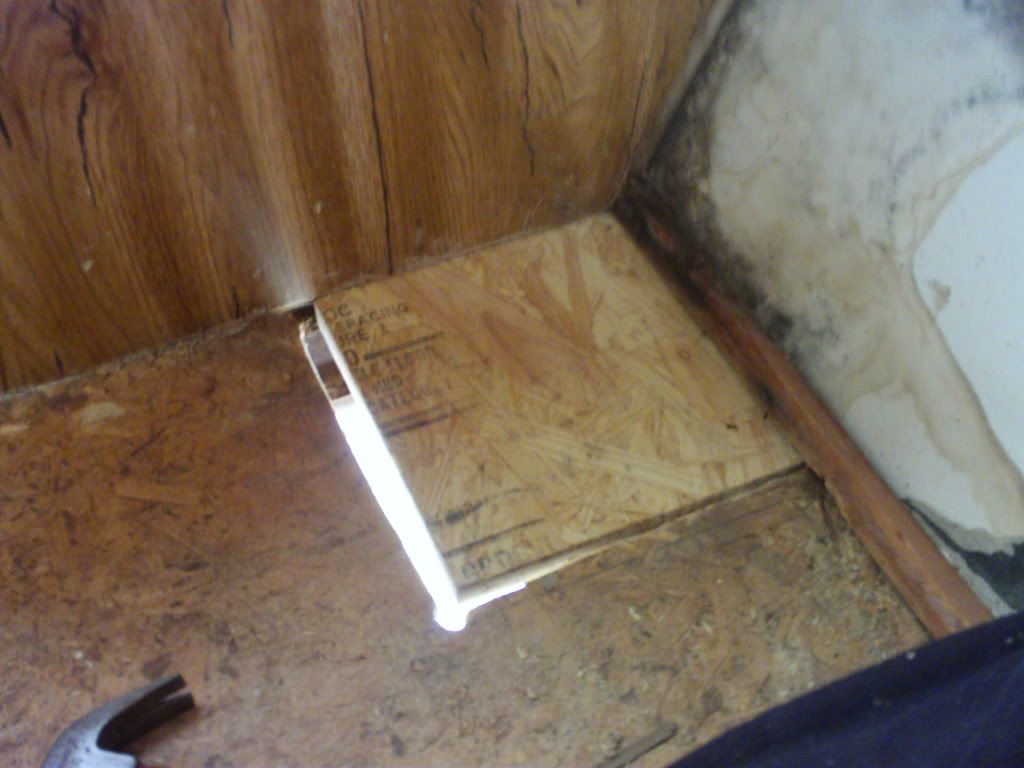
I used some spray foam to fill in the crack and the large hole that I drilled to get the jigsaw blade in. Underneath, I drilled some holes and screwed the aluminum edge in the corner to the new wood. I trimmed the foam when it dried and will top it off with some wood filler the next time I pop her up. Once that dries, I'll sand it all down level so it will be ready for the new floor.
A different angle of the patch
For some reason, I forgot to snap a pic of the finished patch but will do so the next time I pop her up. A storm was brewing and it was starting to get dark Sunday evening so I was rushing a bit to lower the camper. My daughter was outside with me all afternoon and I hollered for her to help me pick up trash and such. She said she was in the middle of something and couldn't right then.
After I got the trash picked up and the camper stowed away, I saw the *something* that she was working on.
As the days start getting longer (especially after we "spring ahead" for daylight savings time) I'll be able to pop up Frostbite after work on weekdays and get more work done in a week.
Friday, February 19, 2010
Still sick but this weekend looks promising
Yes, I still have a head cold; congestion, slight cough, little to no energy (ok, this one is a little hard to identify because I am fairly lazy but I'm pretty sure it is a side effect of being sick). However, the local weather lady said the weekend should be sunny and in the mid-50s. Compared to the past month, that is like summertime.
My goals for Saturday is to *correctly* measure and fix the hole in the corner of Frostbite, rewire the lights with the fancy new light kit I bought last weekend, and then paint the inside of the back wall. If that is successful (Hey, have a little faith), I'll head to Lowes on Sunday and try to get some insulation to replace the water damaged cardboard I ripped out last week.
Depending on the cost, I might try to pick up some paneling as well. I decided to not remove the paneling on the sides of the box. It is attached with a series of large nails that go through the entire side wall. These were used to attach the bar on the outside where the outside table attaches. It seemed like a whole lot of trouble for little benefit. There is no water damage to the side panels except for a little discoloring along the bottom in the opposite corner of the hole. This would be underneath the seat in a storage area anyway so it is out of sight (I'll inspect this side closer and see how easy it is to remove and replace since it is not attached as firmly as the opposite side with the outside table fitting.) If I can simply paint the woodgrain paneling white, it will still look good. I hope.
Wish me luck! I'll detail my efforts in my next post.
Tuesday, February 16, 2010
Measuring beforehand might help
You know, I would have a lot less headaches if I would measure things correctly before I cut. This has tripped me up so many times in the past, you would think I would have learned my lesson by now.
Well, I haven't.
I managed to get inside Frostbite on Saturday and did a bit of work. I cut out the rotted wood and made a nice square for the replacement piece to fit into.

Well, I haven't.
I managed to get inside Frostbite on Saturday and did a bit of work. I cut out the rotted wood and made a nice square for the replacement piece to fit into.
I measured the square (no it's not actually square since I didn't measure and draw lines before I cut it out, so it's really sort of trapizoidal) and then attempted to cut out a piece of flooring to fit.
FAIL
No problem, I have plenty of wood. I tried again, more carefully this time.
FAIL #2
OK, for one thing, the jigsaw I bought at Fred's this morning has a problem in that the guide built into the front that I use to follow the line on the wood doesn't match where the saw actually cuts. My second cut was too big so, rather than measure, I guestimated using the jigsaw that doesn't saw on the line anyway and cut off too much .
Twice.
I did notice after my second failure with this admittedly simple operation that the wood I was using for the patch was too think. Again, I didn't measure the thinkness before going to Lowes to get the wood. It *looked* about right at the store.
On a positive note, I did rip out all the water damanged insulation at the end of the box so it is ready to be rewired, painted, and new insulation installed.
I even purchased a trailer wiring kit at our local AutoZone so I am ready to get that going next. I also managed to get back to Lowes to get new wood to patch the corner. This time I did find some plywood scraps near the woodcutting area which they sold to me for $1. The pieces were thinner than the last board I bought and it *looked* about right. No, I STILL didn't manage to measure the thickness of the existing floor.
I really don't know why I keep doing these things.
AGAIN?!?!?! #2
Yep, this weekend turned out to be a bust. I was still sick with a head cold and it started snowing on Sat and hasn't stopped yet.
Frostbite seems to have a winter curse
I did raise her up on Sat. and did a little work. On a positive note, I installed the fixed door and, coupled with removing the awning on that side, it seemed to fit OK. It's not a perfect fit as there is a bit of a gap around the top but it is the best fit I have observed. I'm hoping that some better side to side leveling with the BAL levelers I plan to purchase will make it fit even better in the future.
I'll post pics of what I did in my next entry. I didn't even bother to raise her up on Sunday or Monday because I was sick and it was miserably cold.
Stupid weather.
Friday, February 12, 2010
Daddy's Little Princess Ball
Last Saturday, after the spirit-crushing tax affair, and after the supply run to Wal-Mart and Lowes, I had to run back home to get ready for the Daddy's Little Princess Ball that evening. It was an event hosted by our local Rec Center for Valentine's Day. My daughter told me about it 2 weeks ago and said she wanted to go so I signed us up.
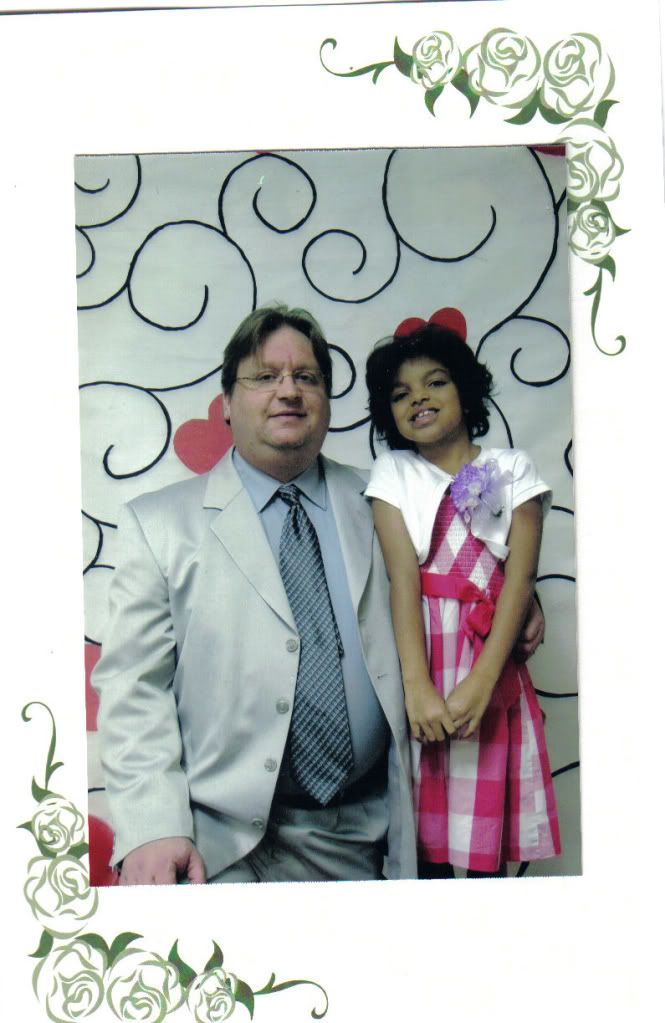
Not really sure what to expect and noticing the word "Ball" and "Princess" in the title I opted to wear a suit. Caty wore a dress she and her mother found at Wal-Mart earlier that afternoon. It was a good thing too because almost every other dad was wearing a suit so I luckily managed to avoid embarrassment at the very beginning. The girls got a flower to pin on their dress. I took a stab or two at it and then found a woman walking past to help me get it on my daughter without piercing her lung. The girls also got a tierra. It was quite the to-do. They even had a photographer.
I quickly realized that I put the flower on my Daughter's dress on the wrong side because it rubbed painfully against her when her shoulder pressed against me. I had to switch and let her lead. No matter, really. I don't really know what "leading" is in regards to dancing anyway other than it felt even more awkward to do everything left handed. We got along fine through the tune. Caitlyn didn't seem very impressed with slow dancing which was unfortunate for her since that is the only dancing I planned to do for the evening.
Now my daughter and I have opposite personalities when it comes to being outgoing. She is very much an extravert and I am . . . well, the opposite of that. When the song ended, the thump, thump of some modern up-beat tune started. I turned and started for the tables desperately looking for the "loser" table where I could sit with like-minded dads.
"Daddy, NO!," said my daughter. "Dance!"
She had already started without me.
I attempted to tempt her with the refreshments table which was loaded with cookies and punch and such but she wouldn't be deterred. I realized grimly that my plan to monopolize the slow songs avoid everything else was falling apart.
ahh, dancing. My life up to this point has been devoid of me having to dance and I have had a great life so far. I was far "too cool" to go to my high school prom.
Translation: I was too scared of girls to actually speak to them for more than a couple of minutes at a time much less risk the humiliation of asking one out on a date.
This evening proved that I wasn't missing anything.
My strategy was to worm my way to the center of the dance floor and try to get lost in the crowd so as not to be comic fodder for those lucky jokers sitting down and watching. My dance "style" for lack of a better word is actually non-existent but generally involves moving my arms and legs off beat, unnatural, and without any sense of rhythm. I am quite sure that when I "bust a move" so to speak, I look like a mentally disabled zombie with Parkinson’s disease.
My daughter was jumping, twisting, and swinging her arms around without a care in the world. I'm lucky she is only eight and too young to be embarrassed by her goofy father.
Mercifully, the song ended and I succeeded in getting Caitlyn to the refreshments and we found a seat at the table. We weren't there 30 seconds until the DJ announced that it was time for YMCA. Oh, joy.
"Oooh, Daddy, Come on!"
She was already halfway to the dance floor by the time I turned my head to beg out of it.
This was going to be a long night.
I somehow managed to stumble my way through the Killer's Whole Lotta Shakin', humiliated myself with the "Funky Chicken," massacred the Twist, and committed aggravated murder on the Limbo. One of the Dad's holding the bar thankfully took pity on me and raised it up as I was going under probably just so he wouldn't have to call an ambulance.
Towards the end of the evening, the DJ called for everyone to line up to do the hustle, electric slide, something like that. I can't remember exactly. It was line dancing though and I knew what that meant. I had been suckered into this before at a professional conference in Denver, CO where I learned that I don't have to ability to follow another person's dance steps. A line of folks have to do the same thing at the same time for it to work. The person teaching is usually facing you and doing everything opposite to the way you are to do it. I can never reconcile that for some reason. One thing about line dancing is that the joker that is not with everyone else REALLY stands out. No hiding my zombie moves in the middle of the dance crowd this time.
Line dancing for me is like someone shining a spotlight on me and saying over the P.A system, "Hey look at that goon! He never learned left from right, Hahahahaha." That's what it feels like anyway. Fortunately, my daughter was directly in front of me and, if I can just follow her, I should be OK.
The DJ asked for volunteers to show everyone how to do the dance.
Before I could say "No, no, Caty. Stay with me!" She was jumping and waving her hand wildly. "Ooh, Ooh, Me, ME, ME."
I was left alone.
I was a trooper though and stuck it out. I discovered that I didn't have to abandon my zombie technique either. After bumping into and kicking all of my immediate neighbors, I sort of had it down by the end of the song.
The evening ended with a nice slow dance to Louie Armstrong's What a Wonderful World. That was cool.
Not really sure what to expect and noticing the word "Ball" and "Princess" in the title I opted to wear a suit. Caty wore a dress she and her mother found at Wal-Mart earlier that afternoon. It was a good thing too because almost every other dad was wearing a suit so I luckily managed to avoid embarrassment at the very beginning. The girls got a flower to pin on their dress. I took a stab or two at it and then found a woman walking past to help me get it on my daughter without piercing her lung. The girls also got a tierra. It was quite the to-do. They even had a photographer.
I'm the goofy one on the left
The gym was decorated for Valentine's day. There were streamers, balloons, decorated tables and chairs, a DJ spinning tunes, and a large dance floor. As luck would have it, the DJ was playing a slow dance song and Caty wanted to dance so we took the floor immediately. Slow dancing I can do. Now when I say "do" I mean that I can move in such a non-conspicuous way that I blend in with everyone else and avoid attention being drawn to the fact that I can't dance. Hold on to the girl, move from foot to foot sort of in time with the music, while slowly turning in a circle. What I have just described the the extent of my knowledge of dancing.
I quickly realized that I put the flower on my Daughter's dress on the wrong side because it rubbed painfully against her when her shoulder pressed against me. I had to switch and let her lead. No matter, really. I don't really know what "leading" is in regards to dancing anyway other than it felt even more awkward to do everything left handed. We got along fine through the tune. Caitlyn didn't seem very impressed with slow dancing which was unfortunate for her since that is the only dancing I planned to do for the evening.
Now my daughter and I have opposite personalities when it comes to being outgoing. She is very much an extravert and I am . . . well, the opposite of that. When the song ended, the thump, thump of some modern up-beat tune started. I turned and started for the tables desperately looking for the "loser" table where I could sit with like-minded dads.
"Daddy, NO!," said my daughter. "Dance!"
She had already started without me.
I attempted to tempt her with the refreshments table which was loaded with cookies and punch and such but she wouldn't be deterred. I realized grimly that my plan to monopolize the slow songs avoid everything else was falling apart.
ahh, dancing. My life up to this point has been devoid of me having to dance and I have had a great life so far. I was far "too cool" to go to my high school prom.
Translation: I was too scared of girls to actually speak to them for more than a couple of minutes at a time much less risk the humiliation of asking one out on a date.
This evening proved that I wasn't missing anything.
My strategy was to worm my way to the center of the dance floor and try to get lost in the crowd so as not to be comic fodder for those lucky jokers sitting down and watching. My dance "style" for lack of a better word is actually non-existent but generally involves moving my arms and legs off beat, unnatural, and without any sense of rhythm. I am quite sure that when I "bust a move" so to speak, I look like a mentally disabled zombie with Parkinson’s disease.
My daughter was jumping, twisting, and swinging her arms around without a care in the world. I'm lucky she is only eight and too young to be embarrassed by her goofy father.
Mercifully, the song ended and I succeeded in getting Caitlyn to the refreshments and we found a seat at the table. We weren't there 30 seconds until the DJ announced that it was time for YMCA. Oh, joy.
"Oooh, Daddy, Come on!"
She was already halfway to the dance floor by the time I turned my head to beg out of it.
This was going to be a long night.
I somehow managed to stumble my way through the Killer's Whole Lotta Shakin', humiliated myself with the "Funky Chicken," massacred the Twist, and committed aggravated murder on the Limbo. One of the Dad's holding the bar thankfully took pity on me and raised it up as I was going under probably just so he wouldn't have to call an ambulance.
Towards the end of the evening, the DJ called for everyone to line up to do the hustle, electric slide, something like that. I can't remember exactly. It was line dancing though and I knew what that meant. I had been suckered into this before at a professional conference in Denver, CO where I learned that I don't have to ability to follow another person's dance steps. A line of folks have to do the same thing at the same time for it to work. The person teaching is usually facing you and doing everything opposite to the way you are to do it. I can never reconcile that for some reason. One thing about line dancing is that the joker that is not with everyone else REALLY stands out. No hiding my zombie moves in the middle of the dance crowd this time.
Line dancing for me is like someone shining a spotlight on me and saying over the P.A system, "Hey look at that goon! He never learned left from right, Hahahahaha." That's what it feels like anyway. Fortunately, my daughter was directly in front of me and, if I can just follow her, I should be OK.
The DJ asked for volunteers to show everyone how to do the dance.
Before I could say "No, no, Caty. Stay with me!" She was jumping and waving her hand wildly. "Ooh, Ooh, Me, ME, ME."
I was left alone.
I was a trooper though and stuck it out. I discovered that I didn't have to abandon my zombie technique either. After bumping into and kicking all of my immediate neighbors, I sort of had it down by the end of the song.
The evening ended with a nice slow dance to Louie Armstrong's What a Wonderful World. That was cool.
Thursday, February 11, 2010
Rows and Rows of Goo
I've been sick the last couple of days. Back at work today but doing so only after getting doped up good this morning. Hopefully it will last me through the day.
On Saturday, after the disappointing tax affair, we went to Wal-Mart for Supplies. I needed an assortment of goo among other things. First, I need some paint, preferably mildew, mold, water resistant paint like that intended for painting bathrooms. I need some type of goo to remove caulk. I need some goo to fill in cracks and holes in the corners and roof of Frostbite.
There is a LOT of goo for sale at Wal-Mart. Three whole rows of it actually. I perused the paint. There is flat, semi-gloss, satin, high gloss. Nowhere were the words "This would be good for use in a bathroom/shower" written on any labels. ALL of them had "mildew resistant." NONE of them had "Mold resistant." There was a section marked 50% off that had some paint that was mixed up for folks that was the wrong color and such. I grabbed one by Kilz that looked white. It has $5.75 printed on the label so I though it wouldn't hurt to get at $2.60 or so. I grabbed 4 cans of white spray paint at 96 cents each.
With paint covered I moved on the caulk. There was many many different kinds. One actually said on the label: "Not recommended for campers and RVs." That's helpful. Unfortunately, none of them had "Recommended for Campers and RVs" on the label. I guessed and got 1 silicone tube and 1 tube of some *other* type of caulk that could be painted. The caulk labels suggested that there should not be more than a half inch gap deep between what it to be caulked. Remembering that the corners were separated by this much and I could not see the bottom when looking down into the cracks, I picked up some water proof foam spray. I thought I would spray this down into the cracks to help form a sort of base for the caulk. I have no idea if this will work or not but it was only $3.50 for a can of it.
On to the solvents, There was a heap of nasty looking stuff with skulls and crossbones on the containers sure to cause an equal assortment of cancers and other ailments. I noticed "Denatured Alcohol" and remembered Dusty's suggestion (At least I *think* that was the stuff.) The label said it was good for cleaning glass and for use as a fuel. I picked it up anyway along with some rubber gloves and a face mask.
I topped it off with some paint brushes, a small paint bucket, painter's tape, brackets, wood screws, and some rags. The clearance paint rang up at $5.75. I pointed out the red label "REDUCED 50% OFF" and was told by the cashier that the price reflected the discount. It did have "Now $5.75" on it but was printed on the actuall label, not a sticker, so I am pretty sure I got rooked on that one. We spent more time in the checkout line than it took us to shop but eventually moved on to Lowes.
At Lowes, all I wanted was some wood to replace the floor in the corner of Frostbite. There were no scraps so I had to buy a large sheet and get it cut. I think I may be able to build table tops out of the excess which will be a lot. I only really needed a 1' by 1' piece for the floor. This seemed initially like a lucky break for me but I did think later that this wood might be heavier than I want/need for table tops. We'll have to see.
I didn't do any other work on Frostbite this past weekend because, as previosly mentioned, it was darn cold and the wind was blowing hard and, frankly, I didn't want to get out in it. This coming 3-day weekend should be better I hope.
Tuesday, February 9, 2010
A Word from Starcraft
I did manage to contact the Starcraft Company last Friday. Their website only offered a phone number not an email as I had hoped. I discovered some useful facts. First, I cannot order parts directly from Starcraft. Instead, I have to order through a licensed dealer. They gave me the name and number of a new dealer in Nashville. However, they did suggest that it would be better to call the Starcraft parts dept. to get the actual part number and such that I need to order as dealers apparently don't like to be bothered with this and typically ask customers to call Starcraft anyway.
I asked about a parts catalog or something that I could get but was told that they didn't have anything for customers. I then explained that I will be forced to describe parts that I need in very layman's terms and they would have to decipher what I say to identify the part I need.
They said they had no problem with that.
I thought I would start with the bent bar hook in the lift system. It turns out that part is called the "Safety Hook." After a few minutes on hold, the parts guy came back and told me "oh, that part was made in the old blah blah blah (I don't remember the name) factory in Illinois. It's been closed down a long time." You're going to have to get one made yourself.
Translation: jerry-rig it
I then tried with the roof gasket. Yes, it was made in the same blah blah blah factory. The rep said that he would research and see if there is a recommended alternative. He took my number to call me back with the info. I won't be holding my breath.
I suspect that I'm going to grow to hate that blah blah blah factory.
On a positive note, they are going to send a user manual free of charge.
He did say that the one part he can guarantee to be in stock is the lift cables themselves which will come in handy once I inevitably manage to break them all trying to jerry-rig the safety hook.
AGAIN?!?!?!
Woke up this morning with snow on the ground. My daughter's school is closed. The snow has been replaced by rain this morning which turned everything into slush. They are calling for it to turn back into snow by noon. Jeez, I need to look at my driver's license and make sure I am still living in Tennessee.
This weekend in a three-day weekend for me because of President's day on Monday. While the temps aren't supposed to warm up much, I think it might be clear and sunny. Hopefully the wind won't be as strong as it has been. I hope I can get inside Frostbite and do a little damage this coming weekend.
Stupid weather.
Monday, February 8, 2010
Paying Uncle Sam
The weekend was a wash out. It was spitting snow, cloudy, and cold, cold. I wasn't jazzed about freezing inside Frostbite especially since I hadn't put the door back in yet. It was also very windy which, on top of making it feel even colder, threatened more damage to the roof and lift poles in the now empty camper. I opted to wait until next weekend.
Hoping it would put me in a better mood, I decided to do my taxes so I could start spending my refund before I get it. Last year I got about $1300 back and this on top of short selling a rental house I owned and the bank writing off nearly $30k to make up the price difference. I paid my accountant, "Ms. Lynne" at H & R Block nearly $400 to do this for me.
I've always been one to do my taxes with Turbo Tax and last year would have been no different except that, after entering my circumstances with the rental house, the program itself suggested that I go to a tax professional as it could no longer help me. Worried that an additional 30K untaxed added to my income would sink me, I had a couple of appointments with Ms. Lynne and she still managed to get me a nice refund.
Despite Ms. Lynne's success last year, I'm still a cheapskate so I was in front of Turbo Tax again on Saturday Morn. After a good bit of cussing and a couple of mini-strokes I had our taxes completed and I was to get a $545 refund.
In additional to being a cheapskate, I am also sort of greedy. I truly hate finances and have very little interest in learning wise ways of managing my money. I have grown accustomed to having tax returns in the 1K plus range. Cleverly I thought, I wonder if Ms. Lynne could do better? I convinced myself that she could and I made an appointment that afternoon to see her.
Long story short, Ms Lynne was as pleasant as ever and took her time with us. When all was said and done, she has secured a tax refund for us of $640 dollars.
Her fee was $199.
@#$%!
We didn't have $199. No problem, they can just take it out of the return money when it comes in.
For an extra 30 bucks.
!#$@#
A thought which never occurred to me until that moment was wondering if the fee was based on the time speant on the tax return. I glanced at my watch and realized with a shudder that we had been there an hour and a half. In less than a day, our tax return had gone from the 1 to 2K in my head, to $545 with turbo tax, to $399 after the accountant fees.
Lesson learned: Just use Turbo Tax and accept what it gives you, jeez.
Thursday, February 4, 2010
O Ye of Little Faith
It could be my imagination but I have been sensing the tingling of negative vibes around me. My wife has asked me on more than one recent occasion “So. You think you can put it back together?”
Translation: “Let’s face it, Kevin. So far, your . . . “work” for lack of a better term has resulted in turning a $1000 working camper into a $25 empty box with rusty wheels.
Mymother seamstress, when I suggested that we should add a valance of some type that circles the roof above the curtains (I have seen these in pictures of popups and they look great!), told me “I would wait and try these out to see if we need any adjustments.”
Translation: “Let’s face it, Kevin. You’re pretty much an idiot with these things and chances are you will continue to destroy this . . . “camper” for lack of a better word until nothing is left standing to hang curtains on.”
My own father told me during my last visit “You know, Kevin, for what you have planned, you could be talking about a year or two of work.”
Translation: “Let’s face it, Kevin. This thing is doomed to failure. If, and that’s a big, big IF, you somehow manage to beat the odds, pull off a miracle and not set the thing on fire, it will take 2 years for you to save enough money to have professionals fix the thing right.”
To all you naysayers I say:
Bah!
I mean these folks, so they tell me anyway, are reading my blog. How they could be any less than 100% confident in this project is beyond my understanding.
Now, I know there 2 other folks besides Dusty and those mentioned above who are following this blog that are far handier than I am with this stuff yet they remain suspiciously quiet. I’m starting to get the impression that they are here with me just for laughs and eagerly awaiting my gory, detailed descriptions of this project going down in flames. I'll do it to. Win or lose, do or die, success or failure, my project and this blog are intimately connected.
I'm committed to this thing. I'll do it or die trying. I don't care if I have to replace every splinter and screw in the thing and it costs me $20K. Frostbite and I are now engaged in mortal combat; a hand-to-hand, fix bayonets, chew out the other guy's guts and spit them out kind of combat. No way is some over-the-hill, seen-better-days, pos, dump heap of a wood box on wheels is going to beat me. Frostbite with the weight advantage might have me stunned with a Throat-Punch followed up with a particularly crafty Gutwrench-Brainbuster combination move. I may be down on the mat writhing in pain and Frostbite is climbing up the corner ropes for a Flying Elbow Drop but I can hack it.
Now I realize that I am essentially learning to swim by diving head first into the deep end but what I lack in skill and knowledge I make up for with dumb luck and blind, unwavering faith in the idea that it "can't be that hard."
This weekend I'm going to sneak up on Frostbite from behind, grab her around the throat and stun her with the Cobra Clutch quickly followed up with a Tombstone Pile driver which will hopefully render her unconscious.
Not ready for the pin-down just yet but by the end of the weekend it will be ME climbing the corner ropes for the Flying Elbow Drop. Just you wait and see!
Translation: “Let’s face it, Kevin. So far, your . . . “work” for lack of a better term has resulted in turning a $1000 working camper into a $25 empty box with rusty wheels.
My
Translation: “Let’s face it, Kevin. You’re pretty much an idiot with these things and chances are you will continue to destroy this . . . “camper” for lack of a better word until nothing is left standing to hang curtains on.”
My own father told me during my last visit “You know, Kevin, for what you have planned, you could be talking about a year or two of work.”
Translation: “Let’s face it, Kevin. This thing is doomed to failure. If, and that’s a big, big IF, you somehow manage to beat the odds, pull off a miracle and not set the thing on fire, it will take 2 years for you to save enough money to have professionals fix the thing right.”
To all you naysayers I say:
Bah!
I mean these folks, so they tell me anyway, are reading my blog. How they could be any less than 100% confident in this project is beyond my understanding.
Now, I know there 2 other folks besides Dusty and those mentioned above who are following this blog that are far handier than I am with this stuff yet they remain suspiciously quiet. I’m starting to get the impression that they are here with me just for laughs and eagerly awaiting my gory, detailed descriptions of this project going down in flames. I'll do it to. Win or lose, do or die, success or failure, my project and this blog are intimately connected.
I'm committed to this thing. I'll do it or die trying. I don't care if I have to replace every splinter and screw in the thing and it costs me $20K. Frostbite and I are now engaged in mortal combat; a hand-to-hand, fix bayonets, chew out the other guy's guts and spit them out kind of combat. No way is some over-the-hill, seen-better-days, pos, dump heap of a wood box on wheels is going to beat me. Frostbite with the weight advantage might have me stunned with a Throat-Punch followed up with a particularly crafty Gutwrench-Brainbuster combination move. I may be down on the mat writhing in pain and Frostbite is climbing up the corner ropes for a Flying Elbow Drop but I can hack it.
Now I realize that I am essentially learning to swim by diving head first into the deep end but what I lack in skill and knowledge I make up for with dumb luck and blind, unwavering faith in the idea that it "can't be that hard."
This weekend I'm going to sneak up on Frostbite from behind, grab her around the throat and stun her with the Cobra Clutch quickly followed up with a Tombstone Pile driver which will hopefully render her unconscious.
Not ready for the pin-down just yet but by the end of the weekend it will be ME climbing the corner ropes for the Flying Elbow Drop. Just you wait and see!
Good Advice from Dusty
First off, thanks for resisting the urge to write "no, No, NO You Idiot!" in your comments. I do appreciate your interest in what I am doing and willingness to chime in and share some of your knowledge.
The wheel bearing info is wonderful but I’m not diving into that just yet. I’ll refer back to your comments when I’m ready. Regarding the lift system, I fear I might already have a pdf of a photocopy of that guide. It is for lift systems in 1985 and later Starcraft campers and mentions on the front that it also covers *most* 1983 and 1984 campers. I just have to hope that my camper falls into the *most* category.
Also, the lift system itself is not broken in that the roof goes up and down ok. It's the rod that hooks to the hitch when it is raised all the way and holds the roof up. I'm hoping that it is detachable and replaceable via Starcraft. I did some poking around though and wonder if installing an electric wench meant for popups would work. Do they stop and hold the cable when raised or do they also depend on some type of hook?
I'll have to look into this further.
Money's a little tight this weekend so I'm just going to get essentials for what I hope to do or at least get started with.
* Silicone caulk & gun
* Solvent for removing caulk
* 1 gal. White bathroom mold resistant paint for the inside of the box walls. Note this this will be covered by insulation and paneling which is why I'm not getting a glossy type paint.
* 1 2 ft square piece of wood (you had the type pegged exactly, Dusty)
* Brackets and screws to install the wood piece
* New insulation (the type dusty suggested. I just can't remember how to spell it at the moment)
* A light wiring kit for trailers per Dusty's suggestion. That was a good idea. The wires on lights of the trailer now are all the same color.
If I could at least finish removing the inside panels, remove water damaged insulation, and clean and paint the inside walls it would be a step in the right direction.
If the weather cooperates, I can remove old caulk and re-caulk the corners and roof of the camper.
If all this goes off without a hitch, I can at least start to repair the hole in the corner.
This afternoon when I get home, however, I am going to call Starcraft and inquire about parts and manuals.
Wednesday, February 3, 2010
big plans, BIG PLANS! Part II
Ok, the outside. Initially I plan to just do a good cleaning. Here is a basic list:
* I will use some type of solvent to remove all the old caulking and goo. (I will have already done this on the corners around the lift poles in the pre-phase work *hopefully*)
* I will try to clean the outside as much as I possibly can. I'll have to find the right kind of goo that will do the best job.
* re-paint the outside panels white. Now I am completely unsure as to what type of paint I need for this. I would like it shiny white. Going to a real paint shop is not out of the question.
* remove the current detail stripes and stickers on the outside. I am divided over replacing the word "Starcraft" on the camper. I have no particular allegiance to this company but my wife thinks she would like to keep it. Maybe replacing the Starcraft "star" design with a blue snowflake would be cool. I haven't decided yet.
* re-paint the trailer base, hitch, fenders, and bumpers the same color blue as bluebell
* add detail stickers or stripes of some type that is the same color as bluebell.
* add the word "Frostbite" on the back in some type of cool font the same color as bluebell.
* I would like the metal lip around the roof and box to be shiny again. Not sure if cleaning and polishing will do the trick or not. Replacing the metal is probably out of the question since it would require taking off the roof, I suspect. I'll decide then.
* replace the four locks that hold the roof to the box when the roof is lowered with shiny new ones. I've seen these for sale so that should be easy.
* replace the battery box on the hitch that holds the 12v battery. The top is completely broken and the battery is exposed to rain and snow which is probably why it isn't working. I probably shouldn't replace the battery if it is not covered properly so a new box will come before a new battery.
* replace the door latch on the lower door. It works but it is loose in the hole and I don't have a key for it. I'm hoping they are not too expensive.
* replace the vent on the top of the roof. The cover has a good 6-8 inch crack in it. I have shopped for these and see that they do come in a standard size (14in). I am tempted to get the ones with a fan built it but that would require that I wire it to the electric system. I'm hoping that won't be too complicated. This one I will probably do in the pre-phase since the cracked vent is surely contributing to the water leak inside.
Finally, I need to do something about the lift system. I am going to relate some damage that I had to have done myself since I brought Frostbite home. There is a long bar that is attached to the main lift cable that is cranked along with the cable when raising the roof. There is a gap in the lower part of the hitch that the bar, once the roof is the correct height, falls into and hooks. This is what holds the roof up.
Well, that bar is bent now at a good 25-30 degree angle. I don't know exactly how it got bent but I suspect that it got hung up on the opening underneath when I was raising it. Instead of sliding forward, it bent. I am very conscious of not using too much force when raising it because it always raised easily.
Apparently, not conscious enough as recently, I hit resistance when I know I shouldn't have. I went underneath and that is when I noticed that the bar was bent and not going through the opening at the front of the trailer. I had a neighbor kid turn the crank while I was underneath guiding the bar through the opening. The roof raised but the bent bar would not fall down and hook where it needed too. The bend in the bar kept it raised several inches.
Now I can get around this by just raising until it gets to where the bar *should* hook and then hooking the trailer safety chains around the crank to hold it in place. However, I would like there to be a working hook. When the weather clears I'll be able to get underneath and take a better survey of the situation. The main cable attaches to a short horizontal bar to which four smaller cables are attached. Each of these cables lead to the four posts in the corners via pulleys underneath. I noted that these cable are nice and silver and didn't appear frayed which has to be a good thing. I'm not 100% sure but I think the bar with the hook is attached to this horizontal bar somehow. I'm really, Really hoping that the hook bar is attached this horizontal bar with a screw and nut *crosses fingers* but it could also be welded there. If it is attached with a nut and bolt, I can remove it and replace it. If not, I'm sort of stuck.
Now I am faced with a problem. I am terrified of un-attaching all of the cables to remove the hook bars. First, the lift system is working. It might stop working when I reattach it because it is probably the most complicated and important part of the entire camper.
One idea I had was to saw off the hook bar (after making sure to paint the spot in the main cable where the hook bar *should* hook which indicates that the roof is raised to the proper height) and get a strong cable with a hook of some sort on one end and attach that cable somehow to the horizontal bar that connects the four lift pole cables on the other end. I could attach this cable to the main cable with plastic zip ties or something so it would pass though the opening underneath when the roof is being raised.
I am not a welder and, while I am not afraid of getting the equipment and giving it a shot, I'm not too jazzed about risking the roof falling down on my family inside on my first try at the skill. Also, I have a better than average chance of setting the camper, myself, my house or all three on fire.
This setback is most frustrating because I must have caused it myself. The lift system and hook was working fine when I bought the camper.
Don't worry. I'm sure I'll find a way to break all the corner lift cables before I'm done. I've already found and printed a file that details how the cables are run through the lift poles.
It's complicated to say the very least.
There is an element of inevitability to this, I fear.
Tuesday, February 2, 2010
big plans, BIG PLANS! Part I
Given the current lull in my work on Frostbite (Thank you, stupid @#$ TN weather!). I thought I would summarize my plans for her renovation. I know I've mentioned these throughout my previous posts but I think it would benefit me to list them all in one place.
I've separated all the work into two major phases:
Phase 1: the inside of the camper
Phase 2: the outside
My goal in this is to get Frostbite "campable" meaning that I can take my family out camping for a weekend in it and enjoy the new "dry" and comfortable inside. The outside might still make us look like the Beverly Hillbillies when we are traveling but who cares about that?
Unfortunately, I will have to initially address the roof problems. That would be sort of a "Pre" Phase 1 fix. Obviously, I don't want to get the inside fixed up and have the new stuff water damaged.
Here is what I am going to do on the inside:
1. Cut out and replace the 1 to 1 1/2 ft square of wood in the back corner that is definitely water damaged. If you remember, I poked right through with a wall scraper. Not 100% sure how to best do this but I'll get a piece of wood similar to what is already there and hope to be inspired.
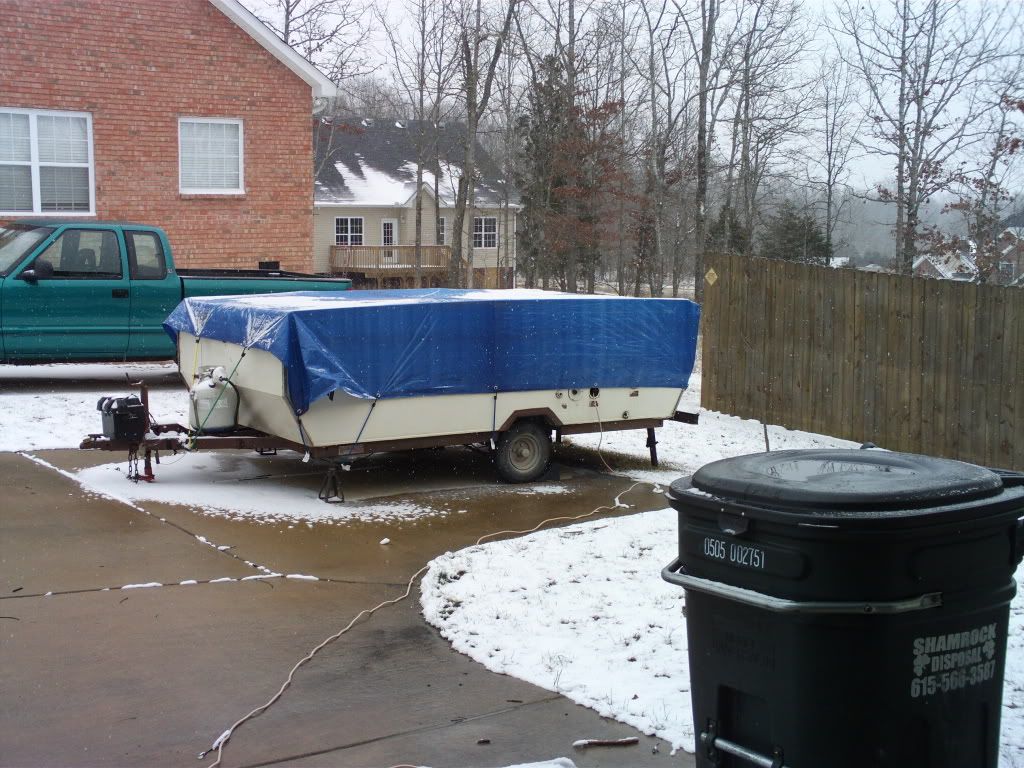
2. Fix the lighting. With all the inside paneling out, the wiring to the trailer lights will be exposed and I hope to take the opportunity to get the wiring correct and actually running inside the camper. Currently, *someone* rewired the outside lights by running the wires outside the camper. From the connection on my tow vehicle (Bluebell) the wires are bundled and run hanging underneath the length of the camper to the back where each wire is run outside into each of the lights. Here is what I am talking about:
2. Replace all the wood paneling surrounding the box. I had originally planned on just painting the paneling white but since I found some water damage at the back, I figured I may as well go ahead and rip it all out so I can then rip out all the insulation. I'm going to clean the area first with a bleach solution to kill any mold then paint the inside of the outer wall with some type of mold resistant paint like you would use in a bathroom. I will then replace the cheap cardboard insulation (currently water damaged in parts) with something else. Not sure what I need here but I'm going to go to Lowes and hopefully be inspired.
I am also going to clean and repaint all the wood braces. Some of the inside wall braces "appear" to be water damaged but they are actually just water stained. The wood itself seems very solid.
With that done, I'll attach new white paneling around the box.
3. Paint the ceiling white. I'm thinking of getting a paint sprayer because I pretty much suck at painting. I can do a roller ok but usually pretty sloppy regarding edges and such. I'll definitely get some painter's tape and a drop cloth and we'll see what happens.
4. I'm thinking of using some type of clear coat inside just for the shininess aspect and to give extra protection to the paneling from spills and such. I have no idea how many coats of paint I'll need or how many coats of clear coat. Definitely more that one, of course. I suppose it will make itself obvious how many as each coat dries. Hopefully.
5. With the inside box complete and the ceiling painted, I'm going to attempt to fill in all the screw holes in the floor that I can find with wood filler. I'm thinking of attaching the boxes to the inside with L-brackets instead of using screws directly through the wood so the old holes won't match the new boxes anyway which brings me to my next improvement.
6. I am going to rebuild the inside boxes. The boxes themselves are made from paneling and dowels. Some of this paneling is water damaged and stained. All of the table tops have a bit of water damage in the corners and would need replaced anyway. Using the existing boxes as patterns for the new, I think I can do it. Additionally, I think I will also replace the cabinets underneath the sink and create a space for a small microwave to be permanently installed. I intend to use a standalone air conditioner that is vented through the floor and there might be a way to build a permanent place for it to be as well.
There is also a jerry-rigged space under the stove for the fridge (BTW, I finally took it inside and plugged it up. It works!) that I hope to improve upon.
7. As the boxes are built, I will paint them white and clear coat them while they are still outside the camper and install them as they are finished.
8. Now I realize that this one is technically "outside" work but it really needs done before I tug Frostbite anywhere. I think I will replace the tires with new ones. I've checked and this is not all that expensive. Additionally (I know I am crazy for thinking I can do this) I plan on replacing and repacking the wheel bearings. I've printing out a step-by-step how-to from the internet and I think it is something I can do. I also hope to get underneath with a wire brush and scrape the rust from the axle and lift bars. Hopefully, they won't disintegrate on me and I'll find real metal underneath. After that I will paint the axle and lift rods with some type of rust replacer or something. I figure that has to be better than just leaving them rusted.
That would take me through Phase 1.
There is, of course, the "Pre" phase one where I need to remove existing caulk and then re-caulk the roof, corners, and any other seams I can find outside. Dusty also pointed out something that I didn't even know existed, a Roof Gasket. I haven't checked it yet but I am pretty sure just based on everything else in this camper that it needs replaced as well. I'll have to research and see if I can get a replacement or if there is something else I can use in its place.
Coming up next: The outside
I've separated all the work into two major phases:
Phase 1: the inside of the camper
Phase 2: the outside
My goal in this is to get Frostbite "campable" meaning that I can take my family out camping for a weekend in it and enjoy the new "dry" and comfortable inside. The outside might still make us look like the Beverly Hillbillies when we are traveling but who cares about that?
Unfortunately, I will have to initially address the roof problems. That would be sort of a "Pre" Phase 1 fix. Obviously, I don't want to get the inside fixed up and have the new stuff water damaged.
Here is what I am going to do on the inside:
1. Cut out and replace the 1 to 1 1/2 ft square of wood in the back corner that is definitely water damaged. If you remember, I poked right through with a wall scraper. Not 100% sure how to best do this but I'll get a piece of wood similar to what is already there and hope to be inspired.
2. Fix the lighting. With all the inside paneling out, the wiring to the trailer lights will be exposed and I hope to take the opportunity to get the wiring correct and actually running inside the camper. Currently, *someone* rewired the outside lights by running the wires outside the camper. From the connection on my tow vehicle (Bluebell) the wires are bundled and run hanging underneath the length of the camper to the back where each wire is run outside into each of the lights. Here is what I am talking about:
Man, there has to be a better way.
2. Replace all the wood paneling surrounding the box. I had originally planned on just painting the paneling white but since I found some water damage at the back, I figured I may as well go ahead and rip it all out so I can then rip out all the insulation. I'm going to clean the area first with a bleach solution to kill any mold then paint the inside of the outer wall with some type of mold resistant paint like you would use in a bathroom. I will then replace the cheap cardboard insulation (currently water damaged in parts) with something else. Not sure what I need here but I'm going to go to Lowes and hopefully be inspired.
I am also going to clean and repaint all the wood braces. Some of the inside wall braces "appear" to be water damaged but they are actually just water stained. The wood itself seems very solid.
With that done, I'll attach new white paneling around the box.
3. Paint the ceiling white. I'm thinking of getting a paint sprayer because I pretty much suck at painting. I can do a roller ok but usually pretty sloppy regarding edges and such. I'll definitely get some painter's tape and a drop cloth and we'll see what happens.
4. I'm thinking of using some type of clear coat inside just for the shininess aspect and to give extra protection to the paneling from spills and such. I have no idea how many coats of paint I'll need or how many coats of clear coat. Definitely more that one, of course. I suppose it will make itself obvious how many as each coat dries. Hopefully.
5. With the inside box complete and the ceiling painted, I'm going to attempt to fill in all the screw holes in the floor that I can find with wood filler. I'm thinking of attaching the boxes to the inside with L-brackets instead of using screws directly through the wood so the old holes won't match the new boxes anyway which brings me to my next improvement.
6. I am going to rebuild the inside boxes. The boxes themselves are made from paneling and dowels. Some of this paneling is water damaged and stained. All of the table tops have a bit of water damage in the corners and would need replaced anyway. Using the existing boxes as patterns for the new, I think I can do it. Additionally, I think I will also replace the cabinets underneath the sink and create a space for a small microwave to be permanently installed. I intend to use a standalone air conditioner that is vented through the floor and there might be a way to build a permanent place for it to be as well.
There is also a jerry-rigged space under the stove for the fridge (BTW, I finally took it inside and plugged it up. It works!) that I hope to improve upon.
7. As the boxes are built, I will paint them white and clear coat them while they are still outside the camper and install them as they are finished.
8. Now I realize that this one is technically "outside" work but it really needs done before I tug Frostbite anywhere. I think I will replace the tires with new ones. I've checked and this is not all that expensive. Additionally (I know I am crazy for thinking I can do this) I plan on replacing and repacking the wheel bearings. I've printing out a step-by-step how-to from the internet and I think it is something I can do. I also hope to get underneath with a wire brush and scrape the rust from the axle and lift bars. Hopefully, they won't disintegrate on me and I'll find real metal underneath. After that I will paint the axle and lift rods with some type of rust replacer or something. I figure that has to be better than just leaving them rusted.
That would take me through Phase 1.
There is, of course, the "Pre" phase one where I need to remove existing caulk and then re-caulk the roof, corners, and any other seams I can find outside. Dusty also pointed out something that I didn't even know existed, a Roof Gasket. I haven't checked it yet but I am pretty sure just based on everything else in this camper that it needs replaced as well. I'll have to research and see if I can get a replacement or if there is something else I can use in its place.
Coming up next: The outside
Monday, February 1, 2010
Poor Frostbite
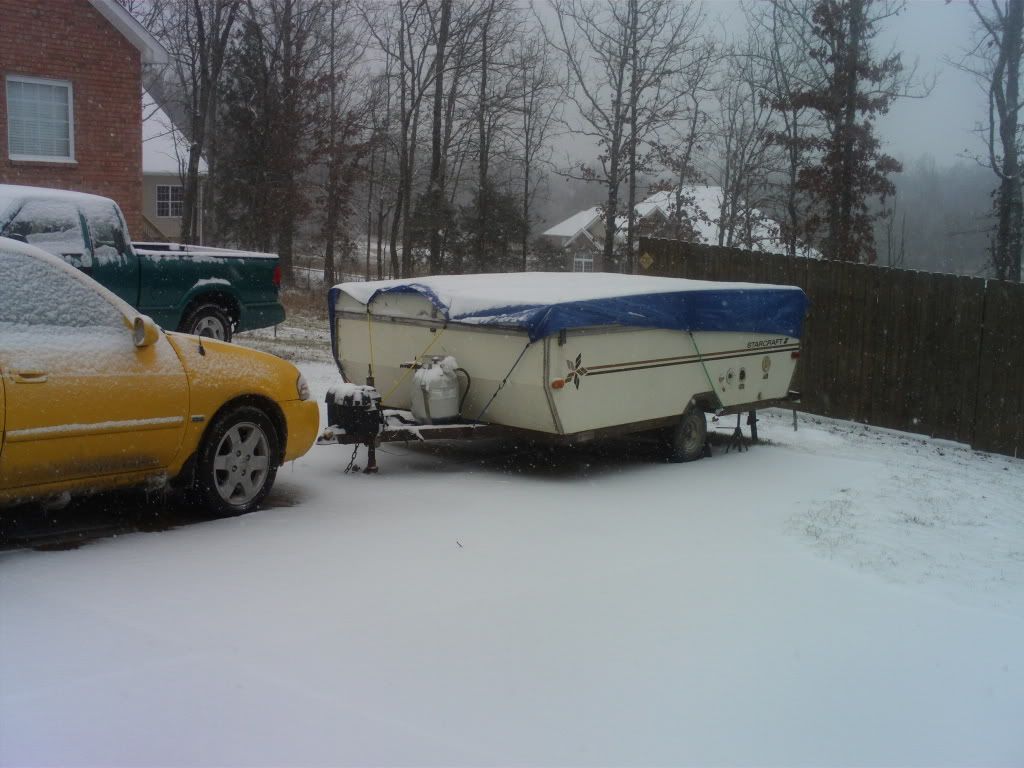
Snowed in Again!
Took this picture on Friday around 1PM. It continued to snow and sleet for 24 more hours. I went out Saturday and pushed 5 or 6 inches of snow and ice off the roof just to relieve the weight and to get it off before it melts.
No work this weekend. I didn't even get to Lowes to buy supplies.
Subscribe to:
Posts (Atom)