Friday, April 30, 2010

New Floor Install Part 2

I laid out another box of tiles this week.  This is going slower than I originally thought because my efforts to plug all the holes with wood filler prior to laying down the floor have come up short.  I'll lay down a few tiles making sure to sand and clean a tile-sized section of floor before doing so and then discover a hole or indention that I didn't notice before. 

I then fill the hole with wood filler and have to let it dry before laying down the tile.  I am reluctant to tile around it since I might get the spacing off by doing that so I just stop for the day and then pick up the next day when the wood filler has dried.

I also discovered that the fancy new clippers I bought to trim the tiles to fit in non-square areas actually cracks the tile when I use them.  I'll have to try my razor blade utility knife and see if that works any better.

Here is the floor so far:


Slowly but surely, it's coming along nicely.

I did pick up some white plastic edging which I can use on the boxes when I start putting them back together.  However, they will not work for the floor/wall edging.  I'm thinking about putting all the boxes back in first and then use real house edging for the visible edges underneath the bunkends.  This will be sort of challenging since the end walls are angled.  Hopefully, the hardware store sells moulding for that circumstance.  I'll have to check with my go-to girls at the Tool Box.

Thursday, April 29, 2010

Professional Work vs. My Work

Here is an example of the difference between tackling a repair myself and a professional tackling the same thing.  Now not all of my fixes turn sour but this one sure did.  If you remember, I attempted to repair the screen on Frostbite's door.  It turned out like this:


What an idiot!

The epoxy glue that I thought dried clear, didn't dry clear at all.  The tear in the screen was fixed though but now I've got this cement-like strip that makes further repairs almost impossible.

A trip to my go-to girls at the Tool Box and $15 dollars later, the door looked like this:


Very nice!

I've already installed the properly repaired door so that's another one to mark off my list.

Wednesday, April 28, 2010

OK, Back to Work

It did rain all last weekend.  In fact, it rained off and on through yesterday.  Yesterday, afternoon during a brief break in the rain, I popped up Frostbite mainly because my camera was missing and I thought I might have left it in there.

I did.

I also found this:

DAMMIT!

Now, it did rain hard for a couple of days solid and there is only about 1/2 a cup of water on a single bunk.  The canvas was a bit wet.  There were no other signs of water leaking in anywhere.  I did notice a hole in the plastic window:


I'll use some clear tape or something to fix it up.  But is this what caused the inside water?  Who knows??  The camper was popped down.  The roof was set correctly on the bottom box.  I can't see how water could be blowing up from underneath the lip of the roof to get the canvas wet enough to leak through it.  Even if it did, why didn't the damn waterproofing goo stop it all?

I will immediately start by spraying the goo on the inside along this edge so that both sides are treated.

Another, more horrifying, possibility is that the roof is actually leaking and the water just happens to run to that particular area of the canvas to leak out.  BUT, notice that the water runs to the opposite side of the camper once it gets onto the bunkend.  Why would the water not run to that side from inside the roof before it leaks out?

stupid water

I'll keep trying.  I can say that the amount of water found inside is less and less each time so we, at least, are moving in a positive direction.  This nonsense has to stop before I put in my new curtains and matress covers though.

Friday, April 23, 2010

Calling for Rain All Weekend

I *might* be able to get in Frostbite today after work and lay down some more tiles.  However, the weather lady is predicting rain all weekend.  It will be good, I suppose, to get another rain test on Frostbite, but it would have been a nice weekend to work.

I could give her a real good rain test and pop her up in the rain so I can work inside her.  I would feel much better about doing this if I could spray the rest of the canvas with the waterproofing stuff I got from WalMart.  Remember, I just sprayed the bottom edge of one side to address a specific leak.

If it's not going to rain for a few hours this afternoon/evening, I'll go ahead and spray as much of the remaining canvas as I can and hope for the best.

Thursday, April 22, 2010

New Floor Install Part 1

Well, I decided to start putting down the new floor yesterday afternoon.  I had previously gone over the entire floor filling in holes with a wood dowel and wood filler but realized once I started with the floor that I had missed some.  I opted to clean and sand only 1 tile's worth of floor before putting a tile down.  If I ran into a hole that needed fixing, I would address that and then skip putting down the tile until the next day.  It's working so far.  I've put down 14 tiles.


I'm going to save the custom cut tiles that will need to fill in around the wheel wells and the door for last.  I might look for a heavy duty threshold cover the the door that will protect the tile edge and cover the gap.  I plan to hit Lowes this weekend to look for panel and floor edging which will make the whole thing look a lot better.

Also, my new roof vent arrived yesterday.  I didn't measure it but it sure looked like the right size.  I'll get that switched out this weekend as well.

Wednesday, April 21, 2010

Big Lots saved the day

I managed to stop by Big Lots on the way home from work yesterday and found matching floor tiles.  It is fortunate that the pattern I chose is so unpopular that even Big Lots cannot sell out of it.  I picked up three more boxes.  No, I still haven't measured to see exactly how many tiles I need.

I seemed like more than enough.

I will *hopefully* start putting down the new floor this week.

I have been shopping online for air conditioners, though.  There are some 10,000 to 12,000 BTU units that, for a bit more money, are also heaters.  That would be very, very handy as I wouldn't have to bring along another heating source when the nights get cold.

They come in various sizes, the most important being the height.  It would be nice if I could permanently install the unit in Frostbite so it wouldn't have to lay on it's side when the camper is popped down.

I suppose I'll have to measure the wall height inside the camper first.

Tuesday, April 20, 2010

Measuring beforehand might help . . . Again!

Yes, my standard practice of using mental estimation only instead of actually bothering to measure something the correct way has failed me again.  Two months ago I bought the flooring tiles for the new floor in Frostbite.  I bought it at the same time we bought the materials to redo the curtains and matress covers.  It matched perfectly.  I bought three boxes.

It wasn't until this weekend when I was actually ready to start putting down the floor that I happened to count the tiles.  There were 12 in a box and I had 3 boxes for a total of 36 tiles.  I laid them out on the floor to get an idea of the coverage and ,at that point I stupidly realized, that I didn't have enough.  I had not only underestimated the number I needed but I underestimated by over half. 

Here are 12 tiles laid out on the floor:


Two boxes of tiles won't even cover half of the floor.  I immediately though, hey, that's ok, I can just cover the visible floor initially and leave the floor covered by the boxes until I get new tiles.  That way if I can't get the same pattern, it won't be a major flaw.

This seemed like a good idea until I realized that I couldn't even get 36 tiles to cover the exposed part of the floor once the boxes were in.  It was close, only 2 tiles short, but enough to spoil the idea.

I'm going to drop by Big Lots on the way home from work today and *hope* they still carry the same pattern so I can get 3 more boxes.  Cross your fingers.

Man, nothing is simple!

Monday, April 19, 2010

The Back Wall

I targeted the back wall on Sunday and put all the new materials I bought last week for this project into action.  First, I installed the insulation:


I had bought some adhesive that worked with foamboard but the pieces I cut fit into the squares so tightly that I opted not to bother with it.  I hope this wasn't a mistake but I couldn't think of any added bonus of having the stuff glued in.  If I should ever need to get to the taillights again, I would have to rip out the insulation and destroy that piece if it was glued in.  Remember, my goal in this is to have Frostbite fairly easy to take apart again if I need to.  Right now, I can get to the taillights simply by prying out the insulation piece that covers it and pop it back in when I'm done.

Next, and this was the tricky part, I had to cut two panels to fit over the wall.  Armed only with a jigsaw and a toolbox, plastic bin, and my foot as a sawhorse, I measured and marked the back of the panel very, very carefully and managed (just!) to get two pieces that fit on the first try.


It's not a perfect edge by any means but close enough for government work.  They fit nicely onto the wall:


I installed them with some wood screws.  The bottom edge *could* have been a little taller.  It barely made it to the wood bar that was just above the floor.  I am not sure, though, that I have any more paneling cut at the necessary 73 inches to try again.  Unless, of course, I opted to use two parts and have a hotrizontal seam somewhere along the width of the thing. 

I hope to get some edging type material to fill in the center seam and the bottom seam.  Surely they make such a thing.

Here are a couple of close ups of my work:


Notice how the white paneling and the white painted wood paneling look perfect together.  This was a complete accident as I never even thought to try and match the two.  Yet another lucky break for me!

** Next up: A gross miscalulation/underestimate regarding the floor

Friday, April 16, 2010

The Roof Vent is on it's Way

I contacted Corinth RV Center in MS and talked to the parts lady.  The Starcraft part is $37.  I decided to go ahead with the Starcraft part even though the online part was $2 less just because there *might* be some issue with the generic part that makes it a pain to install on Frostbite.  I thought it best to stay with the manufacturer's part.

Should be a nice weekend so I hope to get in Frostbite this afternoon and start filling the holes in the floor with wood filler.  I read a tip about using toothpicks and wood filler to fill in the holes.  If I remember, I might go by the grocery store and pick up a box of toothpicks to try it out.

Tomorrow, I'll sand down any mended holes that aren't smooth and level and then I will start putting down the new floor.

Thursday, April 15, 2010

Roof Vent Update

I phoned Starcraft and was told that the roof vent that I had previously measured at 11 1/2 inches square was actually 9 inches.  The measurement is done from the hole in the roof not from the edges of the vent as I had done.  Also, I was told that yes, they did have some in stock but they couldn't promise that, if they ran out, they would have more to replace them.

I can't actually order the vent from Startcraft directly.  Orders have to originate from a licensed Starcraft dealer.  The closest dealer to me is in Corinth, MS.  I mentioned that I was just outside of Nashville but was assured that Corinth was the closest.  They could "drop ship" the item directly from Corinth to my address so I wouldn't have to go pick it up.  The rep. I spoke with also was unable to quote me a price.

I called the Corinth dealer and was told that the parts lady was sick that day so I gave her my work phone and hope to be called sometime this morning.  The price better be good.  After searching a bit for a 9 inch vent instead of an 11 1/2 inch vent, I had better results.  I found a vent here:

http://www.rvpartscenter.com/prodselect.asp?SID=9&DID=54&CID=331


for $35.  The Starcraft price better be cheaper than that or I'll just order it directly and not bother with the drop ship nonsense.  The hand crank and everything else about the vent in the picture look exactly like the one in Frostbite now.  I am still a bit worried as the vent is titled a "9 inch" vent but the ad text mentions a 9 1/2 x 9 1/2 inch "cut out" which I have no idea what that means.  It would be more comforting if 11 1/2 inches were mentioned somewhere in the ad.  There is an install accessory kit sold extra that I'll probably get as well.  I assume that it contains material to seal the area between the vent and the roof.

Wednesday, April 14, 2010

Roof Vent Blues

Now that my roof issues are behind me, I decided that it was time to look into replacing the vent on the roof.  Despite how terrible it looks, water is not coming into the camper from this area, we have already established that.  The clear tape that is apparently holding this thing together is doing a fine job.

How lovely

I operates splendedly from inside.  The twist crank that raises and lowers the cover is in good shape and the inside screen is intact and rip-free.  However, I don't think I'm alone in thinking that a brand new vent would sure look better than this one. 

I've looked into new vents a bit and they range from $30 to $300 depending on how fancy one wishes to go.  The high end one have electric fans that run off the internal camper wiring.  Some of the REALLY fancy ones have rain detectors that will close the vent automatically if it starts raining.  Pretty cool.

I'm just looking for the old fashioned (read: cheap) ones, myself.  Fortunately, they are sold in lots and lots of places online.  They seem to be a standard 14 x 14 inches and are easy to install.  This sounds perfect except for one amazingly frustrating thing:

My vent is 11.5 x 11.5 inches.

I did a quick internet search for this size and came up empty.  I'll attempt more in-depth searches soon and I might even call Starcraft and cross my fingers hoping that the factory that makes these vents didn't burn down in the 80's.  That would be nice unless they wanted $100 for a $30 vent just because of the size.

The other option that's difficult for me to even contemplate, is enlarging the vent opening in the roof to hold the apparently *standard* sized vent.  This, of course, would require that I cut on the roof.  This is something that I left off the table soon after getting Frostbite home.

But hey, what's the worst that can happen?

Monday, April 12, 2010

Waterproofing Frostbite

Armed with my new knowledge about the source of the water leak in Frostbite, I attempted to address the problem with canvas waterproofing spray.

I checked with my go-to girls at The Tool Box and they told me that I would need to check at Camping World or Dick's Sporting Goods in Nashville as they didn't carry anything like that; not ever via a special order from their supplier.  She did add that they *might* have something at Wal-Mart.

I was going to Wal-Mart anyway so I decided to at least check there first.  I found a silicon type waterproofing spray meant for camping equipment and bought 2 cans.  This might not be the right stuff but I figure I couldn't hurt anything by giving it a shot.  My daughter is holding the can in the photo:


A closer view:


I followed the directions on the can and this is the result on Frostbite:


I decided to just do this part initially because it is an area where I know water is leaking through the canvas.  If it works (I supposed I'll just spray a water hose at it and see if the water beads up or soaks in), I'll spray the rest of the canvas.

When I lowered Frostbite, I was careful to notice how the lip of the roof fit over the box.  This time, without any special pushing on either side, the roof set down square on the lower box.  A finger test on the side where the gap previously was verified that the canvas was no longer exposed to the outside.  This is just one of those things I'll have to check whenever I lower the roof.

I am now 99% confident that the leaks are addressed.  Time to lay down the new floor, rebuild the boxes, and install them back inside Frostbite.

Now I just need to remember how it all fits back together.

Painting Complete. Finally!

Of course I'm only referring to painting the ceiling and inside walls.  This weekend, I did pick up all the supplies needed to fix up the back wall that I destroyed in getting to the taillight wiring and the water damaged area.  I purchased some white paneling and a sheet of foam board insulation.  Later this week, I'll install those and the inside walls will be complete.  I will install the new paneling with SCREWS instead of staples so, if I ever need access to the taillights and wiring in the future, I can remove the panels by simply unscrewing them rather than having to destroy them again.

Here are some pics of the newly painted roof:


Yes, it's a work of art

Here are the inside walls:


The front wall


The door side wall with my helper

The galley wall

Now, I'll be the first to admit that I'll never be a professional painter but this is BY FAR the best paint job I have ever done and, most likely, will ever do.  Next up is filling all the holes I can find on the floor with wood filler.  Once that is complete, I will finally be able to put down the new floor. 

Things are starting to come together nicely now.

Friday, April 9, 2010

Some Good News and Some Bad News

Thunderstorm test results

Let's start with the bad news first.  I opened Frostbite up just enough to get inside and saw this:

Dang it!

On a postivite note, unlike the last thunderstorm test there was no water on the opposite bunk


yay!

or in the center of the floor


WooHoo!

The good news is that I have finally found the source of the water.  The rain just stopped earlier in the day so there was not too much time for the water to dry up.  I ran my hands all along the roof and especially around the troublesome vent.

nothing.  Dry as a desert.

Just like the last leak inspection following a thunderstorm, there was a puzzling wet strip on the canvas about six inches long near where the canvas is attached to the galley wall.


Hard to see in the pic but the strip is center frame about an inch above the metal rim

Trust me, this was the ONLY water I could find except for the small puddle on the bunk.  It was as if the water magically appeared here on the canvas. 

There was noting obvious or interesting about the canvas from the outside and again no sign of water ANYWHERE except for the strange wet spot on the canvas.


Here is the same spot from viewed from the outside

Frustrated, I had to lower Frostbite so my wife and I could go and pick up my daughter.  Once it was down and latched, I went around to look at the spot again and it all started to make sense.  I'm sure some of you have already figured out the problem but please forgive my ignorance in these matters.  I found this:


That large black space you see between the two metal pieces is where my roof is not touching the wall.  I reached in and ran my finger along the gap and felt, you guessed it, wet canvas.

aaaaahh!

Further exploration uncovered why the gap was there.  Here is a picture of the right hand corner, this is the side where water comes in:


Here you can see where the roof hangs over the right edge about a quarter inch.

Here is the left hand corner:


aahHaa!

The roof is actually sitting ON TOP of the edge it should be slipping over.

Now this poses two problems that have to be solved.  First, the roof should set square on the bottom box.  I never gave it any thought before and, for all I know, a little pressure on that side while lowering it the last foot or so is all that is needed to make it sit square.  I'll explore this a bit when I get home this evening.  Also, the camper may not be side to side leveled perfectly which might cause the roof to lean to one side while being lowered. 

The next obvious problem is the canvas.  Remember, the gap between the roof and the box does not directly expose rain to the inside.  There is a large piece of canvas in between that should generally be considered somewhat waterproof.  My canvas has apparently lost that ability long ago.  I would have found this one out the hard way once I moved past the popped down rain test and on to a popped up rain test so it's a lucky break that I found this out now.

I'll task my go-to girls at the Tool Box to find me some goo that can be sprayed or painted on canvas to make it waterproof again.  I assume such a thing exists.

It better.

Thursday, April 8, 2010

Let's Talk Air Conditioners

Let's face it; it gets hot in the South during late Spring and Summer. Our camping friends up North have the luxury of mild summers. Due to the frustrating fact that there are so many used campers for sale that, for some incredible reason, do NOT have air conditioning, I can only assume that air conditioning is not much of a consideration for those folks.

I don't even have to use my wife as an excuse for getting AC because I, Personally, refuse to camp in a sweatbox. Been there and done that, thank you. No, Frostbite will have AC starting the first day she is enlisted for camping service.

There are several options available for adding AC to a popup that fall into three basic modifications: Roof AC units, Window units, and the new stand alone, portable AC units. I have researched and examined the pros and cons of each.

Roof units are, of course, mounted on the roof. Popups equipped with AC from the factory all have these. They are generally 6000 to 12000 BTU. I've read in numerous sources that the 10000+ BTU units are the minimum needed to be effective during peak summer camping without shade.
 

 Now, these roof units are fine is they are already built in to the camper. Replacing a broken one with a new one is a job that even I would take on. Installing one on a camper that didn't have one to start with is another story.

The first consideration is the cost. While not mind numbingly expensive, a professional installation of these things will be at least $600.

The second consideration is the weight. Popup camper roofs must have additional supports to hold the extra 60-80 pounds of the AC unit. If it doesn't have these braces, they will have to be installed along with the AC at an additional cost. There is a chance, of course, that a particular popup model has AC as an option when it is purchased and the roofs of all models of a that brand have the needed braces already installed in case AC is added later. A little research will, hopefully, uncover this.

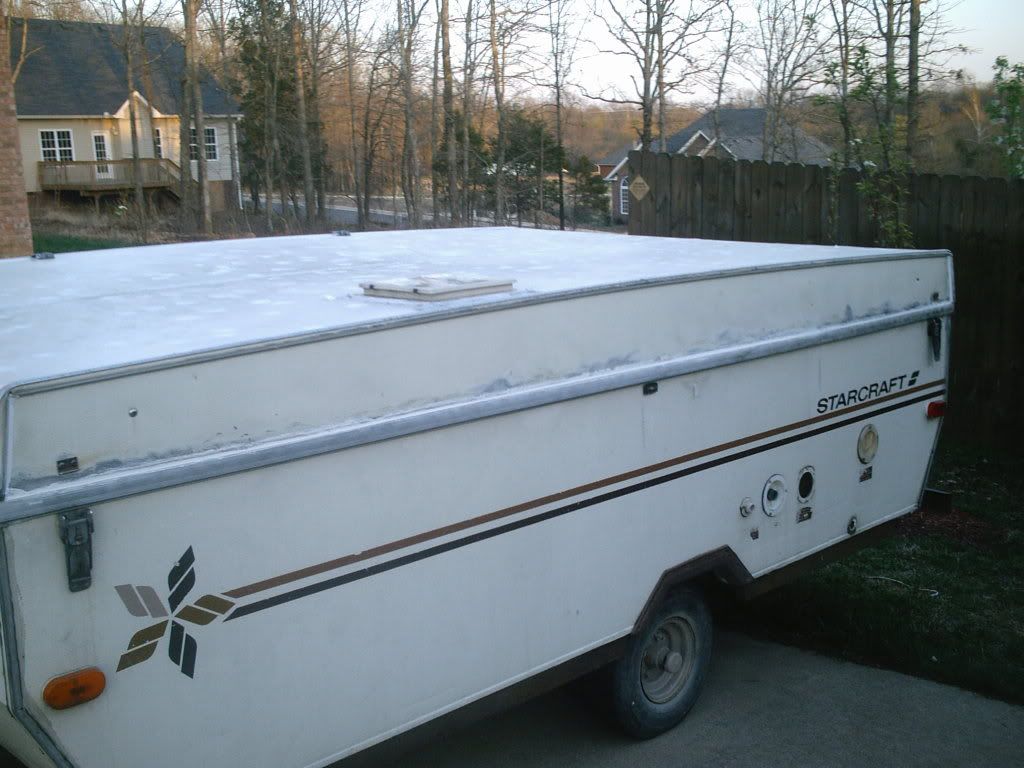
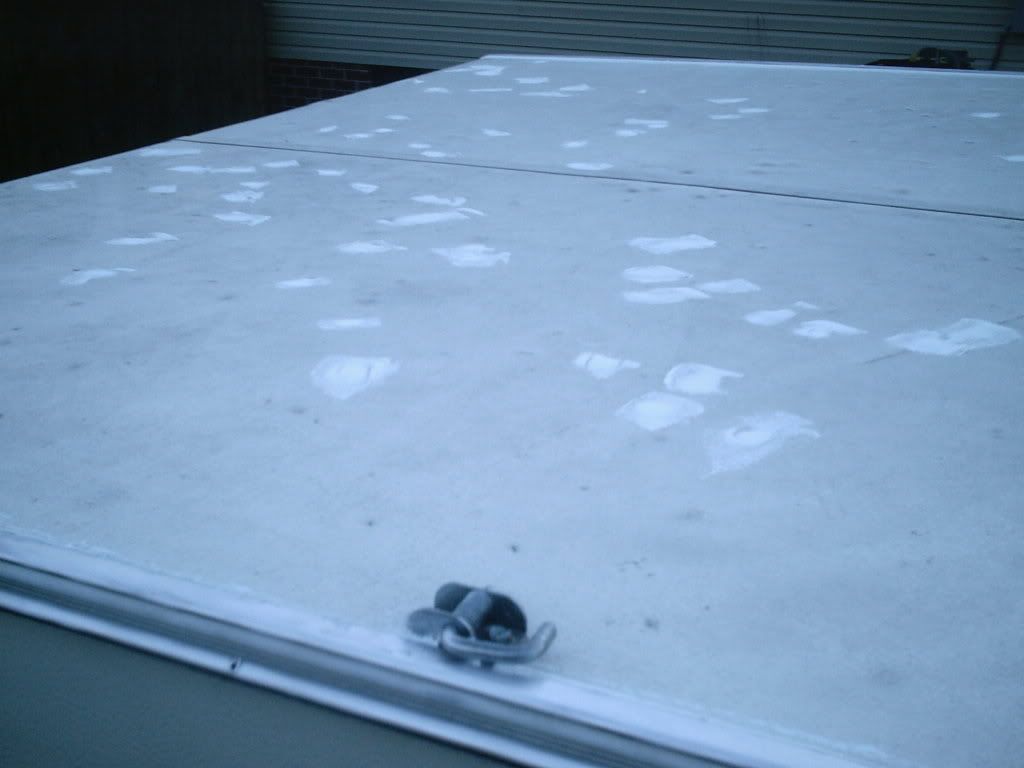
In the case of Frostbite, the roof is nearly 30 years old and, even if the needed braces are present, I am not ready to trust an added 70 pounds on the roof and lift cables. I'm only willing to push my luck so far.

The cheapest option by far for adding AC to a popup is installing a window unit. There are many ways of doing this but all involve cutting a hole either in the side of the hard wall or the canvas. Many folks install these at the tongue end of the camper near the floor underneath the bunk end. Other modifications include cutting a hole in the canvas on one of the sides of the popup and use window unit support kits attached to the hard wall to hold it in place.

These units are relatively cheap and can be found for under $100 most anyplace. There are some cons, though. First, cutting a hole anywhere in the hard wall or the canvas of the camper is a major and permanent alteration. Opportunities for water leaks abound. 

Another con is location. AC units installed in the tongue end of a popup are on the floor which will keep your feet and ankles nice and cool but the cold air might have more trouble reaching up towards head and chest level where you need it. Also, the hot exhaust is going directly underneath one of the bunk ends with might make for a hot night for those sleeping on that end. 

AC units installed through the canvas have the added pain of having to be installed and uninstalled when the camper is set up for camping. For some this might not be a problem but I wouldn't relish having to heft the thing around so much every time I camp. 

A final knock against the window unit option is the look. The somewhat ugly back of the AC unit will always be visible to folks whenever the camper is set up at a campsite. The word "shack" comes to mind. Now, I'll be the first to sacrifice looking good for being cool but there are other options. 

That said, there are plenty of folks who use this option for cooling their popups. Some report more success than others in regards to cooling effectiveness. However, I am quite sure that a window unit modification beats not having AC at all hands down. 

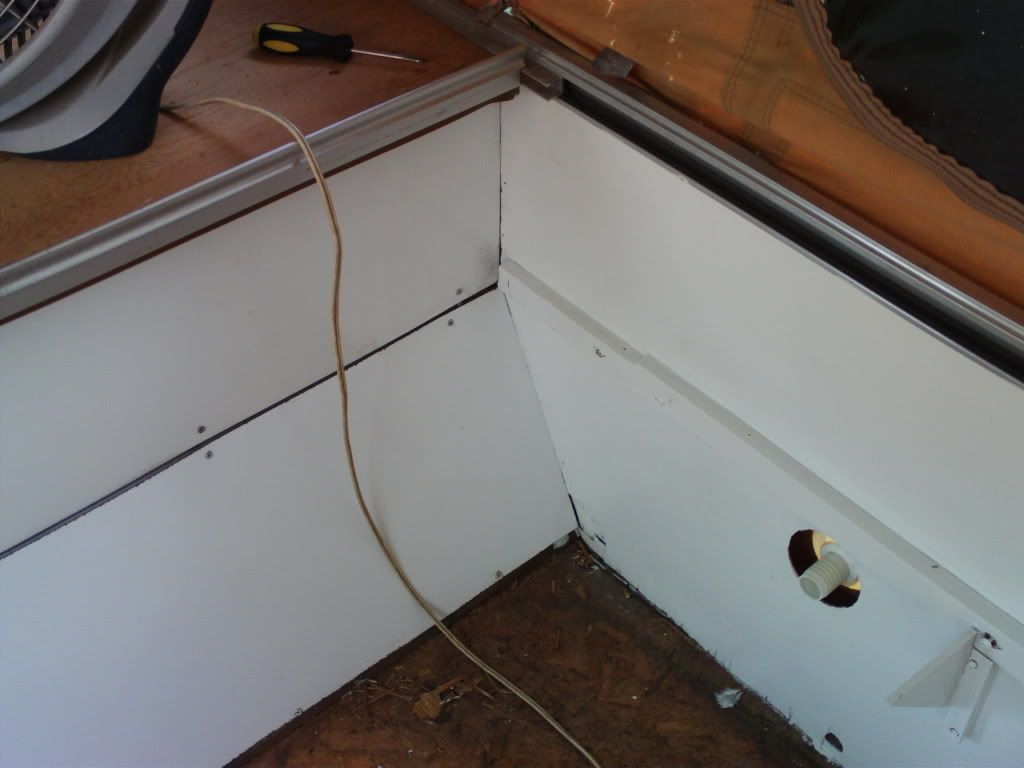
A final option is the portable air conditioner. These units are self contained and vent the hot air and water via hoses. A good bit more expensive than the window unit option, installing one of these units has the added perk of not requiring much if any alterations to the camper itself. The hoses can be vented through a hole in the floor. If you absolutely have to cut a hole in your camper, the floor is the safest place to cut one. I have read about folks simply zipping the exhaust hose into a closed window.

There are some cons to these units as well, though. First, the exhaust air hose can get very hot which can work against the very thing you are trying to do which is cool the inside of the camper. It is generally recommended that the exhaust hose be insulated to help combat this issue.

Second, these units are not as effective in cooling the inside as well as a roof unit. Cold air falling from the ceiling is just more efficient than cold air blowing across the floor. These portable units do have the benefit of sitting higher than the window units. 

I have decided to opt for this middle option for Frostbite. There are pros and cons of each option I know and I'm sure there are plenty of folks who are perfectly happy with the window units and I'll confess that I'm a bit jealous of the folks with the snazzy roof units. This is just my personal preference given the circumstances I'm faced with. 

Don't worry; I will be sure to let you know how it works or how it fails. If it fails to cool to my satisfaction, I'll keep trying things until it does. There are some other tricks in addition to the AC unit to help keep pop-ups cooler as well that I'll get to in future posts.

Wednesday, April 7, 2010

Another Thunderstorm Test!

The weatherlady is calling for thunderstorms this afternoon.  I left the tarp off of Frostbite confident that my caulking efforts have successfully addressed all the leaks.  I have yet to check with my go-to girls at The Tool Box so I don't have the goo that I will roll over the roof for the final waterproofing.  However, if there is still a big leak, which, of course, I'm sure there is NOT, then the goo won't magically fix it.  I just want the goo to back up and protect the caulking.

We'll see how it goes.

I did get inside Frostbite after work yesterday and put on another coat on all the walls.  They are all staggered so some have 3 coats, some have 2, and the roof has 5.  I ran out of paint after I rolled all the walls so I ran out to Freds to get another gallon so I could do the trims with a brush.  I got what I thought was the EXACT same kind of paint, Fred's Semi-Gloss Interior wall and trim.  However, when I started painting the trim I noticed that this paint was whiter than the previous.  I checked the paint cans and realized that the cans were different.  Each was Fred's brand Semi-Gloss Interior wall and trim but had different images on the labels.  I can't explain it.  Stupid paint. 

I sort of like the whiter white a bit better anyway and hope that rolling a 5th coat on the roof will even out the colors.  If that works then surely another 2 coats on the walls will even it out as well.

I'll take pictures when I'm done.  I'm hoping to finish painting the inside this week and, assuming the thunderstorm test is successful, put down the new floor on the weekend.

Tuesday, April 6, 2010

Signs of Life

This post is not Frostbite related but it was a big event at our home this weekend.  We have a large triple trunk cherry tree in front of our house.  The builder actually went to the trouble of building the house around it which, of course, commonly damages the roots to such an extent that the tree dies anyway.

It's in the center of our front flower bed.

Last fall, my wife and I noticed that it was completely bare of leaves far before all the other trees in our yard.  To be honest, it looked quite dead.  We are accostomed this this, somewhat, as we have been responsible for the death of a large number of plants and trees of all types.  Since this tree towers over our house we knew that, if it was dead, we would have to have it cut down.


I decided to wait until spring so we could see if it came back at all.  Partly because I am a cheapskate and know that having a tree of this size cut down is probably expensive and partly because I have no idea how to tell if a tree is dead or not, especially in the fall.  This past weekend, however, we were very pleased to notice that is was covered with budding new leaves.


Hopefully the new leaves are visible in this photo

One less thing to worry about. 

I do hope to open up Frostbite and add a coat of paint to everything when I get home from work today.

Sunday, April 4, 2010

Let the Painting Begin!

Armed with "painter's tape, I proceeded to tape up all that didn't need painting.  Such as this:


And this:


I tried using my fancy new paint sprayer and quickly discovered a couple of things.  First, the latex paint that, according to the label on the can, "did not need thining"  was was actually too thick for the sprayer to work properly.  Ignoring this and forging ahead anyway, I discovered point #2.  Paint sprayers are quite messy.  I sprayed the canvas, the windows, and the floor of Frostbite in addition to my glasses, arms, hair, and face before giving up the idea of using the sprayer inside Frostbite.

I decided to go "old school" and use a paint brush and roller.  After two days and three coats, the ceiling looked like this:


And this:


Pretty snazy!

While waiting for the paint to dry, I started on the inside walls:


This is after 2 coats


Another wall after 2 coats


The front wall after 2 coats and the gally side wall after 1 coat

Now, I realize that the 1-coat pics clearly demonstrate my lack of painting abilities.  However, because I buy cheap paint requiring several coats, I realized that multiple coats  better hide my rotten painting style.

Don't worry.  It's all going to look perfect when I'm done.  I will probably put in coat number 4 on the ceiling and will probably add coats up to 4 on the inside walls.

Hopefully, I can use the print sprayer on the individual boxes OUTSIDE before I installl them in Frostbite.


Caulking Complete

I got to work on Thursday afternoon finishing the caulking on the roof.  The right side was finished.


As well as the rest of the roof:


I realized that I had bought 2 different types of caulk.  Both paintable but the second tube was a type that dried clear which was especially cool as it better disquised my mistakes.  I also cut this tube with a smaller hole so I didn't squirt so much out at a time.  I would have used this type from this start had I known it would look so much better.

Nevertheless, with my caulking prowerness firmly established, I proceeded to paint the interior with the assumed knowledge that my roof could not possibly leak NOW.

My daughter helped me at various stages in the process:


My daughter and Frostbite

At least whatever help riding a kick scooter around the driveway can offer.

My go-to-girl at The Tool Box has promised to do some research so I can order a can of goo that I can paint on the roof to further seal it in.  Hopefully, this goo will also be white so I can kill the sealing and painting with one blow.

Next up: The painting begins.

Saturday, April 3, 2010

Meet Tinkerbell!

Here she is in all her glory

Two weeks ago we I brought my daughter with me to the Tool Box and they had a cat and a heap of kittens living inside the store.  Initially, I refused explaining to my daughter that we already have TWO CATS! and don't have room for any more.  By that evening, however, my wife and I relented and decided that another cat would be easier than another bunny.

We picked her up yesterday.  My daughter is doing a smashing job of taking care of the kitten and making her feel at home.  She woke us up this morning with a "poop report" excitedly talking about Tinkerbell's latest accomplishment in the litterbox. 

Tinkerbell will be living in my daughter's  room away from our other 2 cats for a while.  We'll let them have supervised visits at first before she gets free range on the whole house. 

So far, everything is going well.  Here are some more photos:


A pocketfull of trouble


That little bed is actually from one of her stuffed animals sets.


Tinkerbell