I truly hoped I could find a way to do a better job in the future. I noticed at our local Fred's a couple of months ago that they had a collection of caulking "tools" for lack of a better word. They were really just square pieces of plastic with edges cut into the corners at various sizes. This was one of those "As seen on TN" type things. The commercials were quite impressive but I admit I'm easily convinced by these things.
These tools were $20 and the cheapskate in me screamed louder than the "this would be cool" voice (yes sometimes that happens with me) and I resisted the urge to purchase them.
Two weeks ago, back in Fred's, I noticed that there was only one box of these caulking tools left and they were on the clearance shelf for $9.95. I thought, jeez, that's less than 10 bucks! (I know it's not really but I'm easily mentally fooled by the 5 cent difference.)
The "this would be cool" voice told the cheapskate voice to kiss it's butt and I bought it.

This is pretty cool!
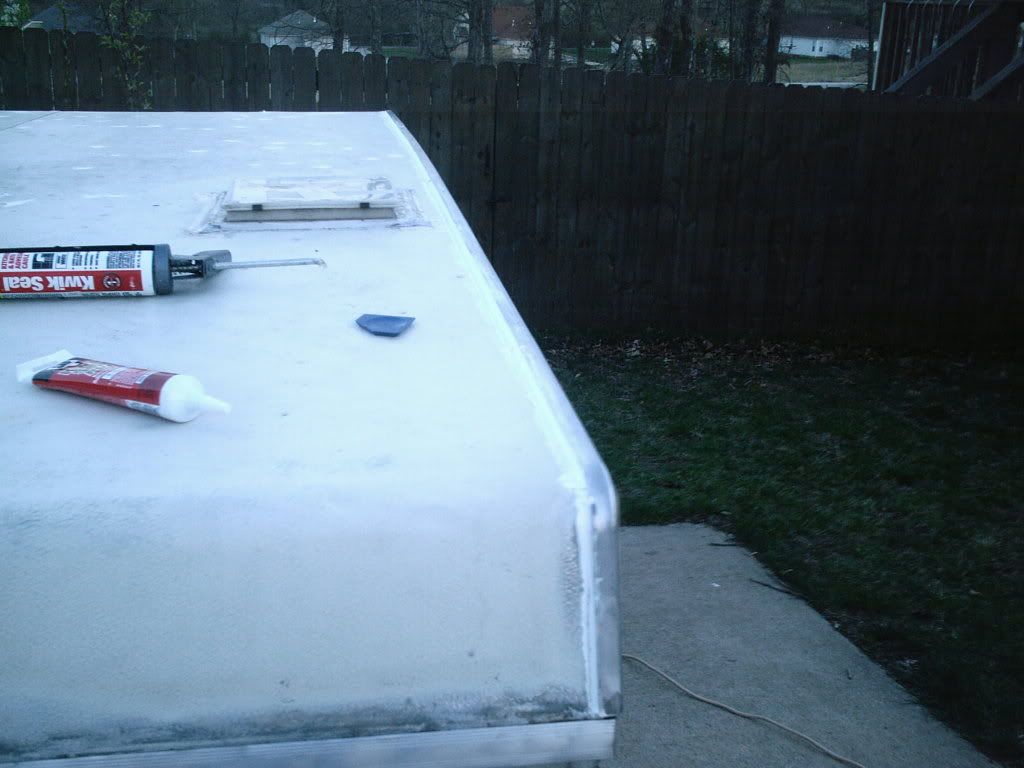
I promptly started the caulking process. After permanently destroying a towel and getting 90% of the caulk on myself, the ground, my tools, and most everything else present in my general work area, I managed to get the other 10% of the caulk in the right place.
Here is the left roof seam:
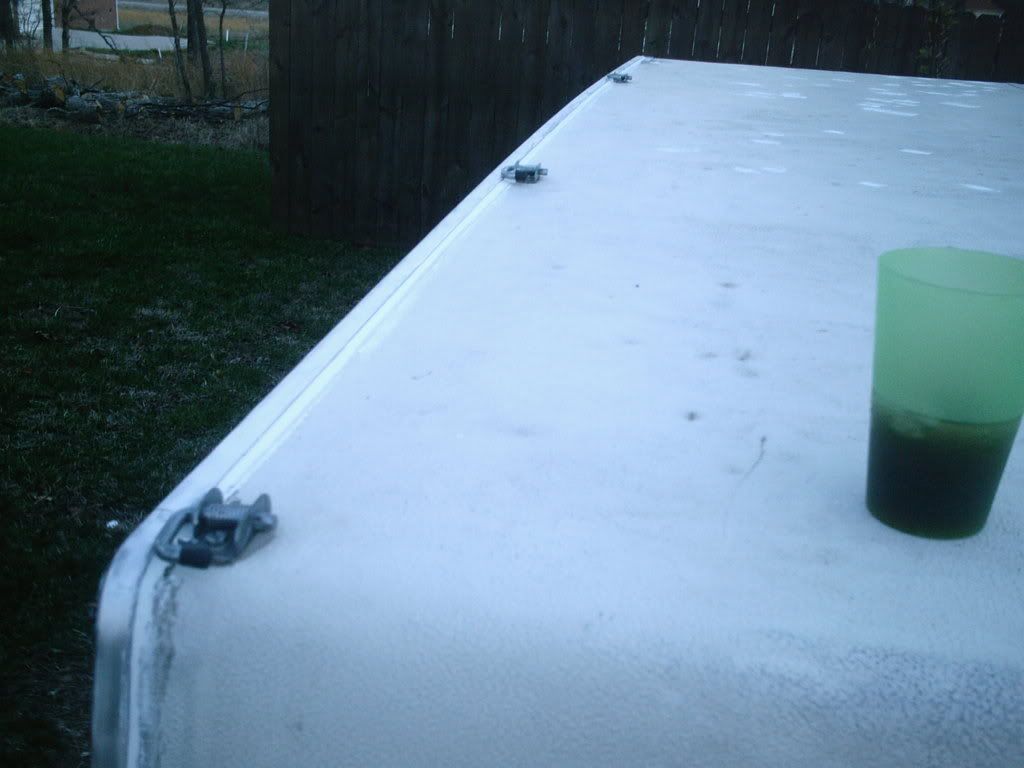
And here is the right seam:
Ok, now I would never claim that this is the best caulking job in the world but I can say that this is the best caulking job I have ever done and probably will ever do so it's best to just be happy with it. Personally, I was quite pleased.
I already mentioned the excess caulk being a problem (I realize now that the hole I cut in the caulking tube was far too big) and I thought of a clever way to get rid of it. I have mentioned in previous posts about how much hail damage was done to the roof. It looks like it spend the night outside when it was raining golf balls. I started dumping the excess caulk in these holes and scraping it smooth across the top. The caulk I used for this is "paintable" (at least that is what is printed on the side of the container) so I'm hoping that there is a chance for the roof to at least appear flat again once it is painted. Here is a shot of my craftiness:
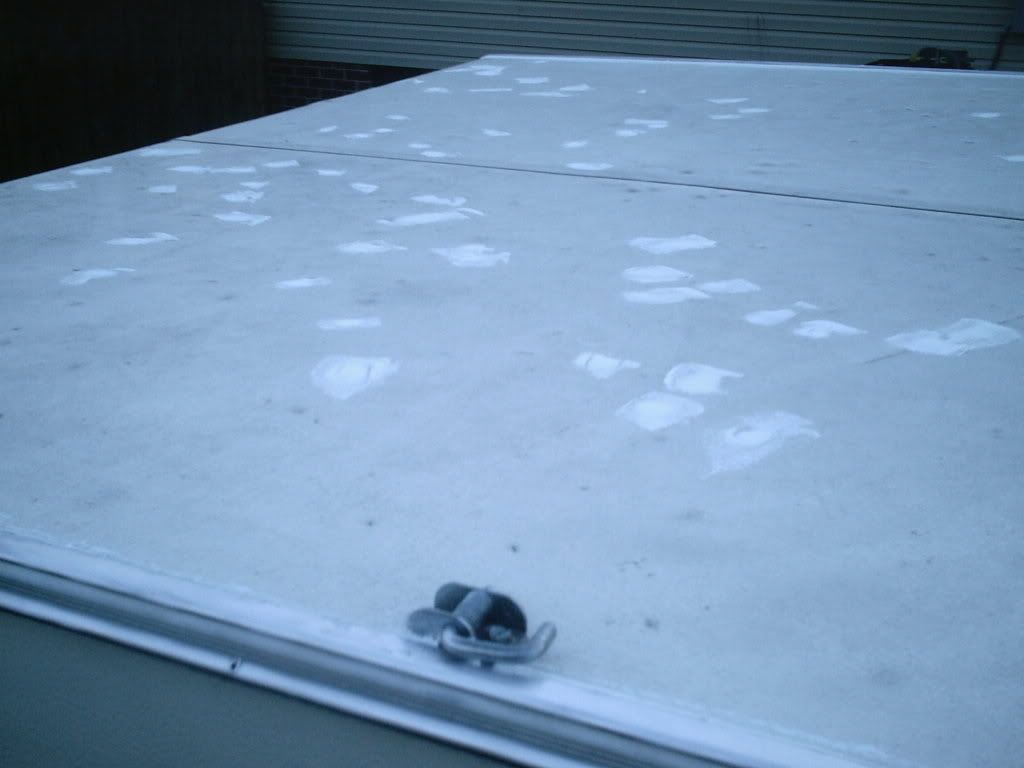
Pretty crafty
I still have the center seam to caulk which will be a particular challenge since I can't reach it from the sides and I know that my big butt has no business actually getting on top of the roof. The current hail damage would pale in comparison to the boulder sized dent I would probably make in it.
I also need to caulk the edges where the roof comes over the sides, front, and back. I'll have to get to these another day though since it was starting to get dark by the time I finished two seams.
My go-to-girl at the Tool Box is currently researching what type of waterproofing goo would be best to paint the roof with. I intend to have her "special order" me some and then maybe, just maybe, we'll have this thing licked.
I'll be ready for another thunderstorm test at that point.


If you have to get on the roof, consider using a piece of plywood or a wide board to spread your weight over a bigger area of the roof. It should prevent dents in the metal.
ReplyDeleteThat's a good idea. I am hoping that I can use my 6ft ladder on the side and just *lean* in toward the center to caulk the center seam.
ReplyDelete