Thursday, January 28, 2010

An Update from my Seamstress

2 weeks ago we went to Memphis and then out with my Mother to pick out material to redo the bed and seat cushions and the curtains in Frostbite. We found some great material at a great price at Hancock’s Fabrics. They were having a Martin Luther King Jr. day sale and we found some remnants that we liked. We bought 8 yards of material for the bed and seat cushions and 10 yards for the curtains. For the bed and seat covers, 8 yards was all we could find.

In my typical fashion, we didn't know exactly how much material we needed because I didn't think to measure them before we left. Nevertheless, 8 yards was all we could find and the color was perfect so it would have to be enough. The 2 bed cushions were not completely cloth covered anyway. The bottoms were a vinyl that I figured we could reuse.

I got a phone call from my seamstress last week and was told that she had failed me and was unable to make 8 yards cover everything. She said that she would have to use some of the curtain material on the cushions as well.

In my mind all I could see was a couple of covers with large mismatched, triangle-shaped patches of different materials. A Frankencushion, if you can imagine.

She sent me some pictures today and I was pleasantly surprised. She used the curtain material around the edges. Remember that we didn't bring her the cushions themselves; Just the covers. It may look like they have cushions in them but she just propped the covers up that way for the picture. The 2 beds are done and she is starting on the seat cushions next.

She didn't mention it but I'll go ahead and assume that all of the curtains are done too along with all those little plastic doo-dads that allow the curtain to slide into the slot that circles the roof.

I think I will ask her to sew me up a circus tent next . . . just for laughs.

Great job!


A Blizzard is Coming

I'm going to always remember 2010 for at least 2 reasons so far.  First, we got Frostbite on Jan. 2.  Second, we've had the crappiest, coldest winter that I can remember.  Here is the forcast I just copied from my google home page:

Nashville, TN
Mostly Cloudy
45°F
Current: Mostly Cloudy
Wind: NW at 6 mph
Humidity: 52%
Thu
Partly Cloudy
43°

 27°

Fri
Snow
33°
 23°

Sat
Snow Showers
28°
 14°

Sun
Sunny
34°
 20°

 
Yes, they are calling for snow tonight, tomorrow, and Saturday.  Below freezing temps all weekend.  Frostbite is earning her name.
 
Obviously, I can't clean and caulk the corners or fix the roof.  I'm assuming that the various goos involved are not meant to be applied when it is so cold.  Frostbite will be protected somewhat by the tarp all weekend and I'll be sure to keep the snow brushed off the roof as much as possible so it won't collect anywhere when it melts.
 
I may raise her up on Saturday and try to take off more inside panels and remove water damaged insulation.  I'll probably also try to get to Lowes at some point and pick up the goo I need for the water leak repairs, some new paneling to replace what I have ripped out, and maybe wood and moulding for the new table tops I plan to build.
 
This winter is lasting forever.  It's not supposed to snow that much down here, dang it!

My Dancing Days are over

My secret dreams of becoming a ballet dancer have been crushed. I know I am fairly accident prone which is the reason why I stay off the roof of my house and only own a 6 foot ladder. Not only do I have a higher than normal chance of falling off the roof but, if I do fall, I'll probably find a way to do it head first. This is something I know about myself.

Last night, I basically fell out of my back door. Now I just have 2 steps down to make when going out of the back door into the garage. I stepped out with my left foot and managed to miss them both. Fortunately, my knee broke my fall. Once I was able to get up, I limped inside immediately so I could complain to my wife.

She offered the obligatory sympathy and suggested that I "be more careful." Why do folks always say that? It's not like I can go back and do it again "more carefully."  My daughter offered the most help when she rubbed my knee and said "aww, poor daddy."

In hindsight, turning on the garage light before stepping out into the darkness might have been a good idea.

I remember telling my wife, "Man, I'm gonna feel that tomorrow." Well, tomorrow is here and my knee is completely pain free. My hip however is another story. It hurts to move my leg in pretty much any direction. Raising it enough to put on pants this morning was a challenge.

I have a sneaking suspicion that had I been 20 years older, I would have broken my hip, or at least still be lying there in the garage the next morning.

Tuesday, January 26, 2010

Where did all the damn water come from?

Now I know full well that I am not the most handy fellow out there regarding these things but I think I am safe in making this assumption:

Fixing water damage is pointless unless you first address the source of the water that caused the damage in the first place.

I've already pointed out a couple of places on the roof that are highly suspect.  I will fix those once I know for sure what the roof is actually made of.  I made a post on the popupportal forum inquiring about this.  You can find it here:

http://www.popupportal.com/index.php?topic=32959.0

I just want to be sure that I put the right kind of goo on the roof.  I'm assuming that different materials require different goo.  I suspect that I can use Silicon Caulk on the roof to fill in the holes and around the vent (I will probably look into replacing the vent entirely.)  However, I've been told that Silicon cannot be painted so I will need to paint first. 

Herein lies the problem.  I had hoped to finish the outside (paint, decals, etc) AFTER I finish the inside.  I must repair the roof damage first though but that requires using Silicon before painting.  I intend to paint the roof white and you can get Silicon in colors, white is one of them.  What happens if you paint Silicon anyway?  Does it dissolve?  Turn black?  what?

I'll probably have to answer this question myself by doing it anyway.  I do NOT want to spend money on the outside of the camper until I am sure that the inside is finished and the wheels and axels are checked out.

Anyway, here is what I suspect contributed to the water damage in addition to the roof:


Corner 1


Corner 2


Corner 3


Corner 4

As you can see from the pictures, the caulking has completely eroded from the base of all of the lift poles and the caulking is cracked and gaping in all the corners.  I have no way of knowing how this camper was used in the past.  I assume that it was used fairly regularly for camping due the all the wear and tear inside.  If the camper was popped up at anytime when it was raining, you can see that water can just pour into all the corners. 

I'm hoping recaulking these areas will greatly improve if not resolve the water leak problems.

Unfortunately it has turned cold again here in TN.  The weather folks are calling for a "Winter Storm Watch" on Thursday-Friday this week so it looks like I will be stuck with putting the tarp on and off and cutting out the water damaged wood and insulation this weekend.

I also realize, believe me with a knot in my stomach, that I should probably rip off the side panels inside as well since there is surely water damaged insulation on the sides too.  On the bright side, if I can find nice white paneling, I won't need to paint the inside walls, just the wood boxes.  What's the worst that can happen?

A Solution?

I've been searching through the threads in the popupportal forum and came across this post by a member named Big Air T which is very encouraging:

Rotten floors in the corners are pretty common on these, if you're pretty handy you can fix it. I just got done doing all 4 corners on mine (1 at a time) & here is how I did it; put the stabilisers down firmly, pull cabinets, then I used a jack with an angle cut 2x4 on it under the roof latch on that corner (only raise the corner about an inch or less) measure the distance in from the walls to the main frame rails mark the floor above the center of the frame, pull any screws or bolts in the cut line, then cut with a circular saw, the ends I used a sawzall, there will probably be staples & or screws on the bottom side of the walls holding them to the floor & holding the aluminum siding to the floor, then I cut a piece of plywood or OSB decking & slip it in between the wall & frame then you might need to shim the floor to make them match (I had to because I was using 3/4" flooring & Coachmen used 9/16", had it laying around) I advise using the self drilling trailer flooring screws otherwise you can use elevator bolts, carriage bolts or counter sink socket head bolts 1/4" is big enough bolting into the frame, now you will screw through the floor into wall, rewrap the siding & staple or screw it to the floor, then caulk it up & move on to another corner. It may sound complicated but it really isn't. If you have any questions just sned me a note. Hope this helps.


Tim
 
http://www.popupportal.com/index.php?topic=31053.0
 
Now if I can just get this translated into English.

Monday, January 25, 2010

Dries clear my butt!

On Friday evening, I decided to bring in the door and try to see where it is falling apart.  During the first phase of tearing the inside apart, I found a metal piece in the back of one of the cabinets that looked suspiciously like it went with the door.  I lugged it all inside and put it all on our dining room table.  It was my grandmother's table that they owned since I was a kid, at least as long as I remember. 

I put a few newspapers down underneath.

I removed all the clear tape that I feared was the only thing holding it together.  It wasn't.  In fact, I'm not sure what purpose it served.  I removed the two plastic panels that covered the screen.  I got out the suspect missing piece so I could figure out where it goes if it goes with the door at all.  My fat slob of a cat is sniffing the piece in question in the pic below.


It did fit nicely onto the end of the panel just behind the fat slob of a cat.  It didn't want to stay though.  So I decided to glue it.  I got out my fancy Big Lots epoxy.  I tried to mix the two materials equally into the paper cup and stirred it around with the popcicle stick provided for the purpose.  I glued a single corner of the panel.  I couldn't get both corners to stay together at the same time so I opted to glue one, let it dry, then glue the other.  Seemed to work ok.


There was also a 3-4 inch tear in the screen along an edge.  Can you glue screen to aluminum?   My "go-to" girl at out local hardware store told me last week that epoxy is good if you need a glue that dries clear.  I figured that since I already had the glue out and since it "dries clear," I'll give it a shot.

The next day, see if you can guess where the repair is :


Now I wonder if you can paint glue gray?

Born Again

I'm pretty sure I overexerted myself yesterday. Getting up this morning was like being Born Again. I don't mean the Christian, God, Jesus, Holy Ghost, Born Again, I mean literally being Born Again. Having to leave a warm, comfortable, carefree place of rest and relaxation (my bed), being forced into the cold environment in an extremely uncomfortable position (standing) and having to painfully use muscles that had never been used before, made me realize why newborn babies immediately start screaming after this experience.

It feels like every muscle in my upper body has been pulled. Is that even possible? My finger muscles even hurt. I obviously have a lot of muscles in my back and upper arms that are reserved only for emergencies because I don't think they have ever been used before.

I explained all this to my wife this morning as I was getting up. She generally gets up about twenty minutes after I do but I thought she would appreciate an early notice of my condition. Clearly unimpressed, she mumbled, "You’ll be fine" and rolled over.

I made it to work today by walking like a 120 year old man in imminent danger of cracking in half and bursting into a poof of dust.

Tearing 'er Apart part II

I had the whole weekend to work on Frostbite. *Most* of the weekend anyway.  Saturday and Sunday afternoons.  My goal was to finish taking out the inside boxes and hopefully take up the floor.  I expected to have a nice clean square that I could then paint and lay down the new floor.

Sometimes what you want and what you get are two different things.

I did succeed in this effort.  After removing every visible screw inside the thing, I eventually discovered that a lot of the wood inside was stapled together.  I pryed and ripped until they all came out.  I intend to replace those connections with screws when I attempt to put it all back together. 


I opted to leave the panel holding the converter as there were only 2 ways that I could see to remove it.  One, I could cut the panel itself in half and remove the converter box or two, I could disconnect all the wires coming from the converter box.  I opted to leave it together for the time being.  The panel holding the converter box is not attached to the floor so I would still be able to pull the floor up underneath.


I was even able to enlist the help of my daughter in sweeping out all the junk before we started to pull the floor up.  She helped me a bit with that as well but quickly discovered that it was fairly hard work and left to play outside until I found something she could help me with that was more fun.

After 2 hours of pulling and scraping, the floor did come up.  Notice in the above picture with my daughter how everthing still looks semi-ok.  I was at the very brink of having my cleaned out box ready for painting.


The floor underneath seemed ok.  There was that bit of black in the back left corner.  I wonder what that is?  Could it be a slight discoloration due to the camper being 27 years old?  Maybe someone spilled some coffee and it stained the floor?  *crosses fingers*


Dammit!

Yeah, that white spot in the photo is the outside.  I poked at the dark wood gingerly with my wall scraper and managed to poke right through the floor.  Assuming the worst, I decided to rip out the two pieces of paneling that covered the length of the back wall.  Here is what it looked like:


Double Dammit!

I sat there on the floor with a beer (my first of the day) and pondered the situation.  The water damage to the actual floor seems to be limited to about a 1 to 1/2 foot square piece in the left hand back corner.  I allowed a few inches past the visible damage in this measurement to play it safe.  The wood in the other corners is solid, believe it or not.  The lift pole in that corner (the source of the leak by my estimation) is actually sitting on the metal frame not the wood.  This has to be a good thing! Of course, there may be a lip in the metal of some sort that the wood fits into but I won't know that until I cut out the damaged part.

The large water stains in the back wall is on the insulation between the paneling and the outside wall.  I ripped out a large piece of the insulation on the left hand side which is visible in the above photo.  The inside of the outside wall is stained too but, since it is fiberglass *I think it's fiberglass anyway*, the stain is just a stain that can be painted or painted after spraying it with some type of goo. 

The insulation can be ripped out and replaced.  The insulation itself seems to be just 2 thick sheets of cardboard with a thin layer of something black between them.  Surely I can find thin insulation like this or even substitute some other type of insulation if necessary?

The damaged wood in the corner can be cut out and a new piece fit in.  If wood was intended to be underneath some metal lip in the frame, why can't I cut a small piece to fit under the lip and jam tap it in there with a hammer?  I can cut another piece to fit the larger hole.  Attach it to the rest of the floor with screws and brakets, liquid nails, or a combination of the two.  Caulk as necessary underneath and inside.

Remember, my workshop is my driveway.  I have no way to lift the camper up off the ground or take off the roof.  Repairs will have to be made on the camper as it sits from inside or from sliding underneath.

In my mind, this seems possible.  The plus side of all this is that the inside wiring to the outside lights is now exposed so it should be easier to get the lights wired correctly.

Wednesday, January 20, 2010

Tearing 'er Apart part I

After testing the water, instead of testing the gas system which would have made sense as it was the last "system" I needed to test, I opted to start removing all the interior items. I needed to paint the interior, rip up the old floor, put down the new floor, and re-paint and repair all the inside items. It made sense to me to take everything out. I assumed it was all just screwed down somewhere, somehow.

I do have experience taking things apart and learned a valuable lesson in the process. Around age 9 or 10, I decided to explore the family tape recorder by taking it apart and putting it back together. Armed with only a screwdriver, I managed to dismantle the entire tape recorder with relative ease.  In no time, I was surrounded by electronic pieces, plastic pieces, washers, and an array of tiny screws.

Lesson learned: taking something apart is much easier than putting it back together.

My parents, however, didn't appreciate the educational aspect of my endeavor nearly as much as I did when I grimly realized that putting it back together was impossible.

Anxious to see my knowledge in action again, I armed myself with a screwdriver and set to work. THIS time was going to be different. I would keep the screws together and sorted and matched with the piece that was being removed.

I quickly discovered that what appeared to be simple wooden boxes inside that could be unattached and carried out onto the driveway were not actually simple wooden boxes but rather some sort of puzzle designed to challenge someone to take all the pieces off in a specific, pre-defined, non-obvious order. There were wires, pipes, and supports threaded throughout the insides of these "boxes" that has to be unattached.

My original dream of sorting and keeping the screws and pieces together was dispelled when, after 30 minutes of unscrewing every screw I could find, I realized that I was dropping all the parts into the same bucket.

Deja vu

@$#%

Here are some pictures for your amusement. I'm fairly certain I can get it all back together.

Of course, not counting all the left over parts and the fact that it no longer worked, I put that tape recorder back together too.


A Late Night Epiphany

An epiphany for me is usually defined as when I suddenly realize something that for most folks is simple logic and common sense. One such epiphany occurred with me late last night.

Sometimes I have trouble sleeping. I have no problem getting to sleep. I usually go to bed between 9 and 10pm because I try to get up at 5am so I can be at work at 6:30am. I am a morning person and generally do my best work before noon. I also like ending my work day at 3PM.

My sleep problem comes from the fact that I often wake up between 2 and 3AM and can't get back to sleep. Usually I run through software problems in my head and have managed to find many solutions during my late night study sessions. Last night, however, my thoughts turned toward Frostbite.

The roof/door issue has been troubling me. If you recall from a previous post, I mentioned that it "appeared" that the roof on the door side was 4 to 5 inches too low. The opening for the door was too small for the door I had. I could push the roof up by hand and force it in there to make it fit but it seemed, even to my non-mechanical mind, that it was not a good thing that the little aluminum door had to then support the weight of the roof on that side of the camper. This, I surmised, could be the reason why the door was falling apart in the first place and my plans to re glue and rebuild the door would still result in the door being tore up because of this.

I was thinking of getting some metal rods that I could use as props to help support the roof on that side when the camper was up but knew that I would have trouble doing this because it would take 2 people with a good bit of strength to make it happen. One person would have to push the roof up by hand like a weightlifter while another person would have to push and wedge the support poles into position. My wife, while always more than willing to help, definitely does NOT do well if that help involves using a lot of strength.

I was mulling this around when the epiphany hit. One feature of this camper that I had mentioned only in passing in earlier posts is that it has an awning. You can see it on the roof in this picture:


It has its own problems that I haven't gotten to examining fully. The awning is rolled up in a bag and the zipper must be broke on the bag because it is completely open. A bungee cord on each end is holds it together. The bag and, I assume, the awning itself is attached to the roof. It is actually ripping from the roof about 5 or 6 inches on one end. I've been putting off opening it up because I'm not sure there is enough room between Frostbite and my neighbor's car.

I'm sure by now you can guess how this relates to my problem with the door but it took three weeks for it to occur to me. The awning rolled up is, by my estimation, 50 to 70 pounds. Also, the awning is generally unrolled and set up when the camper is popped up. I've been just rolling the whole thing back onto the roof and popping up the camper. I am now 99% certain that the added weight of the awning is pushing down on the roof on the door side not only making my door not appear to fit but probably contributing directly to why it is nearly destroyed.

The New York Dude didn't warn me about this but, since the camper was put up with the awning rolled up on top just like I have been doing it when we first went to see the camper, he may not have been aware of it either.

I am stuck a bit in that I really don't want to have to set up the awning every time I pop up Frostbite to work on her. Even if I just unroll it, the awning would cover the door and make going in and out a pain. I wonder if I could unroll it and then drape it back over the entire roof but then worry that the weight would then be spread out over the entire roof making it sag evenly an inch or two and my door still wouldn't fit properly. I wonder if I could take the thing off of the camper entirely until I get the inside and outside finished. I opted for this option and will cross the bridge of putting the awning back on when I come to it.

Very, very pleased with this realization, I attempted to go back to sleep and finally drifted into a deep, dream inducing slumber about 20 minutes before my alarm went off.


Tuesday, January 19, 2010

Assessing the Damage - The water system

What a difference two weeks can make!  On Monday, MLK day (I was off work for the holiday), the temperature was in the 50's.  I raised Frostbite (noted the rain leak in previous post) and decided to test the water system before I started tearing her apart.

Over the weekend, we obtained seat/bed cover material, curtain material, and tiles to redo the floor.  I sort of wish now that I got a picture of the material but I didn't think of it.  I've got my seamstress hard at work in Memphis where I left all the material to be crafted into new curtains and covers for Frostbite.

I'm thinking now of the order I need to do things (fixing the roof with at least a tarp has rocketed to #1) and basically came to this conclusion.

1. sand & repaint the inside and ceiling.  I opted to do this BEFORE replacing the floor in case BECAUSE I assume that I will be a sloppy painter.  I plan to remove all the interier peices (storage boxes, sink, etc) so that I can rip the floor out entirely.

2. paint/replace tables, removed pieces.  Once I get all the guts of the inside moved outside (in pieces) I can fix what problems I find and paint the pieces seperately.  This seems cleaner and more thourough to me.

3. Lay down the new floor

4.  Replace all the removed pieces of the camper.

Now this technique is not without it's flaws and there are more than a couple of potential roadblocks that will foil this near perfect plan.  This will be explained in more detail later.

FIRST, however, I wanted to test the water system.  I had purchased a new white 25' clean water RV hose from Wal-Mart ($10).  I hooked it to the most obvious hookup on the outside of the camper.  Thanks to some prior research at http://www.popupportal.com/, I had also purchased a water pressure regulater for RV's.  Apparently, State Parks and other campgrounds will crank up their water pressure so it can reach the entire camping area.  Water under high pressure could damage the equipment in an RV.  A "Water Pressure Regulater" limits the water to 50-60 psi thus preventing said damage.


Now, I had never heard of this before due to my ignorance of the subject but had no desire to test it firsthand for myself.  I picked one up at Wal-Mart for $9.00. 

I double checked that the inside faucet was turned off by twisting until it tightened. This allowed me to discover that I do in fact have a pump type water spigot unlike I reported in an earlier post.  When the knob loosens enough, it pops up about 6 inches and allows you to pump it up and down.  That made the water tank make a little more sense.  Maybe it was for drinking water that could be used when camping where no water was available.  Water can be pumped from the tank into to sink. 

Anyway, I turned on the hose, ran inside the camper and listened closely for the sound of running water somewhere inside.

Silence.  good.

I turned on the faucet and water came out perfectly into the sink.  But where did it go then?  The sink filled up.  I turned off the water and was again rewarded with silence.  I looked in the cabinets and followed the green hose that ran from under the sink to the outside wall.  I went outside, unscrewed a plastic top on one of the hookup connections and saw a thin dribble of water start flowing from the pipe.

A slow drain?  I had recently solved this problem with my inside bathroom by putting a thin "sink snake" gizmo down it and unclogging the pipes.  Surely this would work here as well.  The end of the snake was too large to fit in the sink drain so I opted to go at it from the other end.  I ran the snake in several feet but was not rewarded with any clump of goo or a gush of water.  I went inside the camper and sat down frustrated.

Sitting in front of the sink with the cabnet underneath open, I noticed that the drain hose rounded a hard corner.  I reached in and straightened the pipe with my hands and my daughter screamed outside.

She had come out to see what I was doing and closely examining the dripping pipe and probably wondering why I placed a large bucket underneath it.  At least I found the problem.  Lesson learned:  try to check the easy, obviouis stuff first!  I sent my daughter in to change clothes and chalked the water system up as working. 

Score 2 for the New York Dude.

Assessing the Damage - The roof

aah, the roof.  We had a steady 24hr rain all day Sunday and Sunday night.  I opened Frostbite up yesterday (Monday, it's a holiday for me) and discovered that there is a leak.  There was a small puddle in the center of the floor and some water on the inside end of the bed.  The perplexed me for a moment (actually several hours) until I realized that the bed was pushed in when the camper is packed up.  The end of the bed that was wet was directly over the the puddle on the floor. 

I realize that there may well be a leak over the bed.  I haven't done a full rain test with the camper popped up but at least it appeared that there was a single leak that was located pretty much dead center of the roof.  Here is a shot of the roof"


left side


right side

It may be hard to notice from the photos but the roof appears to have either suffered through a massive hail storm or someone was up there swatting flies with a hammer.  There are many many round dents most of which are large enough to hold a thimble full of water.  The fiberglass doesn't appear to be cracked in these holes, just dented in.  There is one hole, however, that is particularly bad:


This can't be good.

For this hole, the fiberglass is definately cracked.  You can see what looks like plastic insulation inside it.  In case you are wondering, yes, it was holding water.  Unfortunately, this is not the only suspect for the origin of the water leak.  The vent cover has some problems too:


As you can see it has been repaired before with clear tape.  There is a 4-5 inch crack in the center which is only half way covered by the tape.  Tape also covers the edges surrounding the vent. where it comes in contact with the roof.  Other than leaking water, the inside crank raises and lowers the vent hood perfectly.  I wonder if these things are standard size and can easily be replaced.

Probably not.

After taking a closer look at the roof, I started to wonder why so *little* water actually wound up inside the camper after a 24 hour rain and decided to consider this a good thing.

For the actual fix to this I am gambling everything on the hope that I can purchase some type of goo that I can spread, paint, squirt from a tube or otherwise apply with some gizmo to the entire roof that will fill in all the holes and cracks, dry to a waterproof state, and be receptive to paint.  I assume that this magic goo exists and will move this one closer to the top of my list of things to do immediately.

For some silly reason it was during the drive in to work this morning that I realized that I should buy a tarp to put over the roof until I get the magic goo.  I heard on the radio that it is supposed to rain tomorrow with a chance of thunderstorms tomorrow evening.  I had the entire day yesterday to get out and buy a tarp but I didn't.

Friday, January 15, 2010

Assessing the Damage - The decor

After goofing around with the door for a bit, I managed to get it working so that it functions as a door and will help to hold the heat from my space heater inside a camper for a bit. Remember, it is still in the 20's outside. The next issue I'm going to address is the decor.

First off, what is already in the camper is in pretty good shape. I couldn't find any rips or stains in any of the cushions (of course they are all various shades of brown so I suppose any stains would be camouflaged a good bit. They are, however, how should I describe this tactfully? ass-ugly. It's not that I dislike the color brown, it's just that the collection of brown used in this camper is not pleasing to my eye (my wife's eye either). I figure, if I'm going to Holder-ize this thing, we may as well redecorate the inside how we like. The browns have to go. The curtains were as thin as pantie-hose and an odd shade of orange. They will have to go too.

My mother is quite handy with a sewing machine and has managed to make clothes and cloth covers for things in the past. I gave her a call and told her what we are planning. She agreed. I'm glad I got her to agree to this without seeing what work was involved because, since she already agreed, she can't back out now. I am her son, after all, and I plan to press that point and suggest that she is sort of obligated because of that. I will buy the material and offered to pay her $200 for the "job." I promised to bring the curtains and cushion covers this weekend. She did say "I don't do zippers" so it looks like we'll have to use Velcro.

I didn't tell her about the little plastic doo-dads sewn into the curtains at the top that slide into the metal slot that circles the top of the camper. How much extra trouble can that be? I needed a sucker seamstress here and didn't want to her give any reason to turn me down.

The cabinet boxes and panels at the end were all wood grain paneling all covered with scratches and deeper grooves. One bed end was particularly bad.


I'm hoping a good sanding following by a good painting will make all this go away. I plan on painting the inside white. I assume that several coats of good paint will successfully cover wood grain.

I didn't notice any water damage, thank goodness, so right now, I am thinking that the box and the wood is sound and that I can just sand away the blemishes, repaint and it will be as good as new.

The floor is a mishmash of browns. It almost looks like it was intended to look like a dirt floor. Of course, that just could be the dirt itself since I haven't swept yet but I would like to lay down a new floor.

We are going to go for a blue - white - chrome type theme. So a mostly white floor with some sort of bright blue (Bluebell blue) highlights or squares in each tile would be perfect. We want the curtains blue and the fabric of the beds and seat covers some sort of blue pattern. We hope to pick that pattern out this weekend.

I am not really that artistic when it come to decorating. My mother however, has a good eye for it so I plan to solicit her opinion regarding colors and shades and how well they go together. This has the added benefit of having someone (instead of me) to blame if it doesn't come out right.

There are 2 tables. You can see them laying on the bed in the above pic. I assume that one goes outside and one goes inside. The legs of both, however, will need to be replaced. They are barely hanging on the table itself and I couldn't get them to fold down. The table tops of both appear OK but I would like to replace the top covering of both and add a metal strip around the edges. I've no idea how to do that but hey, it can't hurt being on the to-do list. There are a LOT of things I don't know how to do. Also, I couldn't get the inside table to connect to the strip that I assume it is supposed to connect to. That will have to be addressed as well.


The sink is white and, after a bit of scrubbing with a brush and Simple Green, actually cleaned up perfectly. I haven't tested the water system at all since it is below freezing outside. I have no idea what risks are involved in doing that so I probably just put if off because it was cold outside and I didn't want to hook up the hose. I remembered the New York Dude, "Everything works," so I'll go ahead and assume that there are no problems there. He was right about the electric after all.

There is the large square plastic tank under one of the bench seats. I don't know what it is for. Fresh water? If so, how does it get to the sink? The sink just has a twist knob not a pump knob that I have seen in come campers. How do I fill it with fresh water? Grey water? If so, how do I get it out of there? I decided to save all the water tests for warmer afternoons.

The stove was a mess. It was covered with what looked to be rust. After an hour or so of scrubbing with a brush and simple green while drinking beer, it did clean up surprisingly well. You can see the post-cleaned stove top in the picture above. I shouldn't have to replace that either.

The cabinet tops are all a textured white. It would be neat to have a shiny metal strip around the edges but that will have to wait until other more pressing things.

My wife came in and sat with me a bit and she almost immediately found another issue. She sat on the end of the bed and, as you can see in the above picture, there is a metal lip at the end of the bed. It turns out that it can pinch the back of your legs something terrible when you try to stand after sitting there. After thanking her for discovering that issue before I did, I promised to fix it. Those foam things that you can buy to pop around exposed pipes to keep them from freezing came to mind. If I cut them to the width of the camper and slip it on the metal lip, would they have be enough padding to prevent the leg pinch? how would that blend in with our new decorating ideas? I'll work on that later.

For some reason, since we bought Frostbite, my wife keeps asking me "Do you think we got our money's worth?" Personally, I don't see how she could have any worries since I gave it such a good inspection before buying the first one we looked at. But she has her doubts.

I tell her not to worry. I tell her we could go camping in her right now. She is "campable." We are just going to give her a face lift and make her more comfortable.

She seemed satisfied with that.

I'm hoping she feels the same way once I have all of her guts spread out on the driveway.

This weekend we will pick out material for curtains, bed and seat covers, and put our seamstress to work.

I wonder if I should give her more than a week to finish the job.

Thursday, January 14, 2010

Assessing the Damage - The door


Ok, got her popped up. The first issue that was obvious was the door. The bottom part of the door, the one built into the box, seemed to work OK even though it was apparently designed for midgets . . . err, sorry, "little people." Inside the camper, the door knob is around shin level.

The door knob was loose and, although it did have a keyhole, we didn't have a key. The New York Dude told us about this claiming that HE never got a key when he bought it. Now I know this thing isn't Fort Knox. Anyone wanting to go inside at a campsite when we aren't around can just unzip a flap around the door, reach in, and unlock it. However, there is something psychologically satisfying about knowing that you at the very least locked the door forcing those committed to getting in to actually "break in." I sort of see it as a clear message to folks that "hey, this isn't public property. If we wanted folks to wander around in here, we wouldn't have locked the damn door!"

2 options I can think of on this:

1. remove the latch, take it to a locksmith, and have a key made.

As I mentioned the doorknob is loose and flimsy. I'm not sure if it's worth investing any money in. How much could a new one be? (man, I'm begging for trouble with that one)

2. replace the latch with a new one.

This would be a good way to go assuming I can put pretty much any latch on it. Are they standard? Will any latch work? Are RV and/or popup door latches special made? Surely, I wouldn't have to find the exact replacement part for the popup. I have a strong suspicion that original replacement parts for a 27 year old popup will be hard to find.

Nevertheless, I decided to research getting a new one.

Now, the top part of the door, the part that folds back and latches to the ceiling of the popup when it popped down, is a different story. This door was once made of aluminum, it has screens and plastic covers that slide in over the screens. There is a lot of clear tape around these covers that I opted not to remove yet since that could very well be what is holding the whole thing together.

There is a large metal plate with a hinge at one end of the door so that, once unattached from the roof, it can fold down and hook to the bottom part of the door. This plate is connected to another hinged place by three bolts the plate connected to the top half of the door has 3 holes (slots really, about an inch long so that the door can slide up or down approximately an inch.

The problem was that the door when folded down did not fit into the door opening. The slots did not allow enough movement to remedy this. It was like the roof was 2-3 inches too low. I thought about it a bit. My head wasn't hitting the roof. It wasn't leaning down on the side. The camper was fully popped up as best I could tell. I mean, the hook that keeps the roof up clicked into place when I cranked it up. Could the cables have "stretched" 2-4 inches? I unscrewed the bolts that connected the top half of the door to the camper ceiling and tried again to fit it into the opening. THIS time it was only about a quarter inch too tall. With one hand I pushed hard up on the ceiling raising the roof a bit and it slipped into place. That seemed troubling since I suppose that the door itself is now supporting some of the weight of the roof.

That can't be a good thing.

Now to fix at least part of this problem easily, it seemed to me that the slots in the plates that allow the door to more up and down needed to be a couple of inches longer. I wonder if I drilled a hole in the metal down from the slot a couple of inches and then took a saw that cuts metal (is that called a jig saw?) and cut the piece out from the bottom of each existing slot down to the new holes I drilled. I would wind up with three slots 3 inches long instead on 1 inch long Could that work?

That would at least solve the problem of getting the door into the opening and folding it back up to the ceiling easily anyway. I still needed to get the rest of the door functional. Screens needed replacing and it would be nice if the panels came out easily (currently they are held in place by tape). The little door also has a tendency to fall apart in my hands when not secured in the camper door opening. I decided to research replacing the door but also to get some epoxy type goo and try to glue it all back together. I don't think I can cause any extra harm to the thing.

Also, and this was especially irritating since it was freezing cold outside, the door didn't fit square in the opening. I know that the leveling of the camper could effect this but I double checked the bubble levels on the camper and it was as level as I'll ever get it.


You can see how big this opening is in the above picture. There is a lock latch at the top which would keep it square at night but that won't be possible during the day with folks coming in and out. I think I'll wait and see how it works when the door is glued back together. Maybe is will auto-magically fit then. Maybe some insulation is needed in the door jamb and that will hold it closed better? Maybe the hinges need WD40 or something?

If the gluing doesn't work and I am unable to find a replacement (I pretty sure I can't since I've already looked and looked), I'll have to build a new door. I *think* I can do this but it would have to be out of wood not metal. This could be possible. I have high confidence.

I'll try the glue first. I found an epoxy (what does that word even mean?) at Big Lots for $7 that claimed to work on metal, plastic, and other things. It was fancier than most glues in that you have to mix two different kinds of goo together in order to make the main goo that serves as the "glue." I figure with that kind of extra work involved, it has to be good stuff.

My Workshop

. . . or rather, my LACK of a workshop.  Currently, my work area for this project will be inside the camper itself and outside on my driveway.  We do have a 2-car garage and Bluebell gets to sleep there every night.  Sonny, however, is banished to the outside.  The extra car space in our garage is dedicated to our "excercise room."  Here is a picture:


The blue arrow points to our treadmill folded up against the wall,  the red arrow points to our crossbow excercise machine, and the yellow arrow is pointing to an ab-lounger (you can just see the top of the chair).  All of this equipment is in near perfect tip-top shape.  Like new even, despite being at least five years old. Where would we exercise if Frostbite was here cluttering up the place?

My wife is not a big fan of our excercise room.  You would think that after four years of living in this house she would accept the fact that some things from the move-in just don't need to be unpacked.

Wednesday, January 13, 2010

Bluebell and Sonny

I've mentioned both so far in my posts so I guess it's time to introduce Bluebell and Sonny.  My daughter names our vehicles.  In fact, she names pretty much everything.  All of her dolls and stuffed animals have names.  All of our fish have names (She won't admit this but I'm pretty sure she can't tell them apart).  Outside bugs she finds all get names (she swears that she recognizes them if she notices them again later.)  My wife and I have gotten used to this and have adopted the vehicle names into our regular speak to such an extent that I'll sometimes refer to Sonny and Bluebell to folks at work.

I'm baffled as to how she came up with these names but here they are:


Sonny


Bluebell

For starters (as if you didn't notice) Sonny is yellow.  When I say yellow, man, I mean Yellow.  It's not canary yellow, taxi-cab yellow, sunshine yellow, it is YELLOW.  If you were to see the raw, unfiltered primary color chart for red, yellow, blue, THAT yellow is the yellow that Sonny is.  If you pick the crayon out of the 64 count box that is labeled "Yellow" THAT is the color of Sonny.

Bluebell is blue.  Not sky blue, dark blue, baby blue, man, it is BLUE.  If you were to see the raw, unfiltered primary color chart for red, yellow, blue THAT blue is the color blue of Bluebell.  If you pick the crayon out of the 64 count box that is simply labeled "Blue," THAT is the color of Bluebell.

We didn't plan it out that way.  It just happened.  Bluebell is also the tow vehicle for Frostbite because, according to the label inside her door, she can tote up to 3500 pounds.  Bluebell's color will be important to know once I discuss our "color" plans for renovating the camper.

Up, up, up and away we go

I put Frostbite up for the first time the day after we bought her.  It was still viciously cold outside (in the 20's) but the sun was up and I *prayed* that there was stll a chace she had electric so I could get a space heater in her.  Ovenight, I decide to desperately hope that the black hole where the electric cord should have been would actually contain a working electrical cord inside it.

I struggled to remember (in reverse) how to put the thing up since my only instruction came from the New York Dude working furiously fast to pop her down the day before talking quickly as he went.  In my standard manner, I asked no questions and took no notes on the process.


Success!

Now it was time to take a more careful look at my purchase.  First thing first.  She went up ok.  All the cables seemed to be intact and she was, by my estimate and the little bubble things on the front and side of the box, fairly level.   This has to be a positive thing.

Thinking next of the electric for the heater I bent down and took a look underneath hoping that the elusive electric cord would be found dangling somewhere.  The bottom, I discovered, was completly enclosed and smooth.  No cords dangling or anything else for that matter.  I also discovered something else.  The axle and bars, which I assume to be a type of shock absorber, were either painted brown or completly rusted.  I hadn't thought to look underneath the thing before I bought it (not that it would have made much of a difference, I might as well have been looking underneath a cow or a nuclear sub for all the meaning it would have for me.)  Nevertheless, I opted to save that worry for later.  It did roll home behind us for an hour afterall.

Time to step inside.  I fiddled around with things until I had it set up as best I could.


Those are my tools in the photo BTW.  It was dirty but I knew that already.  I lifted the lid on a side box and discovered the missing electric cord.  I popped it back throught he hole in the side, plugged it up, connected my heater and it Worked!  Woohoo!  I tested the other 2 outlets and they all ran the heater equally well.  I tested the little lights on the ceiling and, after jiggling the bulbs in the sockets, they came on as well.

Score one for the New York Dude.  The inside electric all seemed to work.  There was a small fridge but it was impossible to know if it was working or not since the outside was acually colder that the fridge would have gotten if it had been on for 3 days.  I'll have to check that later. 

Pleased with this, I sat down and drank a beer.  I even took my coat off since the heater seemed to be doing a smashing job.  My wife came out later and sat with me.  After about 5 minutes, she said "It's cold" and left.  Note to self: Winter camping is probably out.

Assessing my Skills

I am a software developer. In fact, I am currently leading a small development team in the construction of a large scale web application project for the State of Tennessee. I'm actually quite good at it. Unfortunately, it is the ONLY thing I am really good at.

I can build things in software. I can start with just an idea and then design and construct a working, stable, and efficient solution very quickly. I can type 70 words a minute. I can code in 6 different computer languages.  I'll go ahead and brag a bit here and confess that I am self-taught. My college degree is in Criminal Justice NOT Computer Science. Somehow I've managed to sell myself as a developer to employers despite that and I've been developing software and training software developers for over 15 years now.

I started early.  I've always been a computer hobbyist since around age ten. My father bought us one of the first commercially available "home" computers available for sale to regular folks: The Radio Shack TRS-80 (circa 1980-81, I still have that machine in my attic believe it or not). While other kid's dads were teaching them to play baseball, football, build bookshelves, repair cars and such, I spent time with my Dad learning how to program computers. It was wonderful and I wouldn't have had it any other way even if I could go back for a redo.

That said, my current skill set does NOT include the following skills:

• Painting
• Sawing
• Drilling
• Woodworking
• Metalworking
• Mechanical Engineering at the most basic level
• Auto Repair (heck, let's include auto maintenance too).

Basically, all the those skills necessary to do the work with Frostbite, I am hoping to do.

Still have doubts?  Here's an example:

When one wants to hang something on the wall like a picture or some other do-dad, if it is light enough, you can just tap a little nail in the sheetrock on the wall and hang it up. Simple.

If you want to hang something heavier, though, you really need to hang it on a "stud." When I was a young and my father and I were tasked with hanging something heavy enough to need a stud, actually *finding* the stud became the challenge. We would start off pressing our ears to the walls and knocking around on the wall with our knuckles "listening" closely. I don't know what we were "listening" for really but it looked quite important. After doing this for a bit, we pointed to a spot on the wall. THAT was where the stud was.

We drilled through the sheetrock into empty space.

Well, it had to be close. A half inch should do it. After more knocking and listening on the wall to decide to move left or right of the original hole, another spot was located.

Again, we drilled through the sheetrock into empty space.

This was repeated in a line until the actual stud was found. Once we successfully located the stud (it was easy to find now since a line of holes now pointed directly at it), we usually had to find the other one because whatever we were hanging up now had to hide the line of holes we drilled attempting to locate the stud in the first place. Were studs 12 inches apart? 18 inches? 24 inches?

We couldn't remember.

No problem. Another round of knocking on the wall and listening *led* us to another candidate for a hole.

We drilled through the sheetrock into empty space.

This must be what the Captain of a naval destroyer feels like searching for an enemy submarine; keep pinging and dropping depth charges until you blow it up.

Using the above technique which I now call the "Holder-Method" to find the next stud, we eventually had another line of holes that pointed right to it.

Success! If we were really lucky, whatever we were trying to hang on the wall would be big enough to cover our stud-finding efforts.

In our house, wall decorations were generally placed in locations not for there aesthetic beauty but for their ability to cover the damage to the wall we caused during the installation.

Can I learn how to do this work, though? Probably. Do I have the interest in learning these skills? I'll confess, up to this point in my life, No. However, getting Frostbite has lit a spark in me and I try hard to keep blowing that spark until it catches fire. Which is bad mojo to bring up since I should now consider burning Frostbite to the ground as a distinct possibility. It does have a stove that runs off a propane tank. Note to self: Add Propane and gas lines to the list of things I know nothing about.

My wife seems to think that men have some genetic knowledge of how to do mechanical things.  14 years of failures, broken items, and unfinished jobs have yet to convince her that we do not.  If a job requires more specialized tools than a hammar or a screw driver, she is usually out of luck.

Now for the important question: Can I do this despite these handicaps?

We'll see. This blog with either become a shining example of my success or a humiliating record of my complete failure.  Humiliation is a frequent companion of mine, though.  We know each other well.

Now I just need to take an inventory of what Frostbite needs and what changes I want to make. I've got big plans, BIG PLANS!

Coming up:

Popping up Frostbite for the first time.

Tuesday, January 12, 2010

Expenses List

In this post, I will edit and maintain a list of all expenses involved with renovating Frostbite and keep the total posted on the main page.  I'm making a distinction between money spent directly on Frostbite on things that would go with her if she was later sold and tools that I need to do the work.  Money spent on the tools will not be added to the burned money total since, concievably, I could reuse the tools on other projects.  yea, right.

Frostbite:
1/2/2010 - Frostbite - New York Dude - $1000.00
1/2/2010 - 2 plastic wheel stops - Autozone - $9.00
1/9/2010 - 25' RV water hose - Wal-Mart - $10.00
1/9/2010 - Water Pressure Regulater - Wal-Mart - $9.00
1/16/2010 - bed, seat cover material (8 yards) - Hancock Fabrics - $32.50
1/16/2010 - curtain material (10 yards) - Hancock Fabrics - $30.00
1/16/2010 - vinyl floor tiles (3 boxes) - Big Lots - $30.00
2/6/2010 - wood filler - Wal Mart - $2.97
2/6/2010 - white spray paint x4 - $3.84
2/6/2010 - mending plate (bracket) x2 - Wal Mart- $3.14
2/6/2010 - Kwik Seal (caulk)- Wal Mart - $3.47
2/6/2010 - AlexPlus CLR (caulk)- Wal Mart - $2.00
2/6/2010 - Kilz white paint - Wal Mart - $5.73
2/6/2010 - Foam Insulation - Wal Mart - $3.50
2/6/2010 - Denatured Alcohol - Wal Mart - $5.97
2/6/2010 - 7/16in X 4ft x 8ft OSB Sheet - Lowes - $7.31
2/6/2010 - cutting charge - Lowes - $0.25
2/14/2010 - Plywood scraps - Lowes - $1
2/14/2010 - Trailer lighting kit - AutoZone - $20
2/14/2010 - extra lighting wire - AutoZone - $3
2/14/2010 - electric wire connectors - AutoZone - $3
2/20/2010 - Trailer replacement tail lights - AutoZone - $20
3/13/2010 - 2 gal white semi-gloss latex paint - Fred's - $24
3/14/2010 - 1 gal paint thinner - K-Mart - $10
4/10/2010 - White panelboard 4' x 8' - Lowes - $11.85
4/10/2010 - polystyrefoam insulation 4' x 8' - Lowes - $8.88
4/10/2010 - 10.2 oz foamboard adhesive - Lowes - $3.34
4/10/2010 - 2 cans Water Guard spray - Wal-Mart - $9.78
4/10/2010 - 1gal Black Rustoleum Paint - Wal-Mart - $26.88
4/16/2010 - New Roof Vent - Starcraft - $37
4/20/2010 -  vinyl floor tiles (3 boxes) - Big Lots - $30.00
4/24/2010 - 4 cans Water Guard Spray - Wal-Mart - $19.36
4/24/2010 - Misc supplies - The Tool Box - $30.00
5/8/2010 - Exterior white gloss paint - Tool Box - $40.00
6/5/2010 - Plumbing supplies to rebuild 2 table legs - Lowe's - $39.00
6/5/2010 - 1Qt Clear Coat - Lowe's - $10.00
6/7/2010 - Edgestar 12,000BTU AC/Heater + turtle neck insulation sleeve - Compact Appliance - $462.65
6/12/2010 - Misc supplies - The Tool Box - $12.00
6/16/2010 - 3 new tires & wheel bearings - Dickson County Oil and Tire - $293.09
7/2/2010 - Hardwood dowels - Home Depot - $14.70
7/2/2010 - Bicycle lock/trailer lock - Ace Hardware - $9.00
7/13/2010 - Seamstress fee for sewing new curtains and covers - $200.00
7/21/2010 - New Door latch/lock - Adventure RV Center - $30.00

Total: $2539.21

Tools:

1/9/2010 - Epoxy - Big Lots - $7.00
1/16/2010 - sewing supplies (thread, needles) - Hancock Fabrics - $9.18
1/19/2010 - 10x12 tarp - The Tool Box - $7.95
2/6/2010 - Painters Tape - Wal Mart - $2.77
2/6/2010 - 3M Dust Mask - Wal Mart - $2.47
2/6/2010 - Brush cup - Wal Mart - $1.50
2/6/2010 - Caulking gun - Wal Mart - $1.77
2/14/2010 - Wire brushes - Big Lots - $5
2/20/2010 - Wood Shaver - Lowes - $6
3/13/2010 - Latex Paint Sprayer - $30
3/14/2010 - Caulk finshing tool - K-Mart - $2
3/22/2010 - Paint Thinner - The Tool Box -$5
3/22/2010 - 2 wire brush drill attachments - The Tool Box - $7
4/10/2010 - 3 blade utility knife - Lowes - $3.88
4/10/2010 - Tile snip cutters - Lowes - $10.97
6/5/2010 - Assorted paint brushes - The Tool Box - $5.00
7/5/2010 - Trim paint roller - Big Lots - $2.00
7/17/2010 - Assorted paint brushes - the Tool Box - $5.00
7/17/2010 - Drill bit set - The Tool Box - $5.00
7/17/2010 - Rotary Tool - Big Lots - $20.00
7/19/2010 - Hack saw - The Tool Box - $12.00
7/19/2010 - Dremmel attachment for cutting metal - The Tool Box - $7.00

Total: $158.49

Meet Frostbite

Here is Frostbite safe at home after a cold hour long drive from Clarksville. She's got some years on her but she looks pretty good from 20 to 30 feet away where you can't notice all the scars and wrinkles on her face.

Notice that she has been backed up into my driveway. I did this myself after what felt like 30 minutes of blocking traffic, wildly spinning the steering wheel, and cursing like an LA gangbanger.

As soon as I got her perfectly in place and my heart stopped racing, I realized something as I looked up my driveway towards the road. Notice that I said I looked "up" to the road. My house is on a hill. Not a steep hill, but enough of a hill that a lawn mower facing the downhill side can roll down it if left unattended. I know this for a fact but that is another story.

I realized that if I unhooked Frostbite from Bluebell, there was a pretty good chance that Frostbite would, slowly at first but assuredly gaining speed, go careening down the hill over my pear tree, through my wooden fence at the front of my back yard, over another pear tree, through the fence at that back of my back yard, and into the woods behind my house. Being sort of a doomsayer (I think of the worst thing that can happen in any situation and plan for that) and knowing full well that there was an element of inevitablility to this mishap, I then started thinking about how I would back Bluebell through all the wreckage to fetch Frostbite out of the woods. I wondered how much trouble it would be to catch my two junkyard dogs that live in the back yard now free due to the crushed fence, assuming, of course, that they were not crushed by the runaway camper.

Since Frostbite was still safely attached to Bluebell, I had a chance to change the future. This was one lesson I won't have to learn the hard way. Trust me, MOST lessons I learn are the "hard way" so this moment was quite a luxury.

We all piled into my other vehicle, Sonny, and drove to Autozone where I purchased 2 wheel stops for ($9). This makes this the first money spent on Frostbite on top of what we paid for her. I'll be keeping track of the money I've burned spent on Frostbite's renovation on the blog's main page.

OK, I'm about to use some technical speak here so try to stay focused. There are these two metal bar like things in the back, each one has a little square "foot-like" looking thing at the end. They each fold down and the foot-like thingie slides down like a telescope so it rests against the ground. Are these called "stabalizer jacks" or "stabalizer stands?" I don't know. For now I'll just call them "the two legs in back." Anyway, I folded them down and pulled out the foot until it touched the ground.

There are another 2 hand cranked jacks that the New York Dude had at the front corners of Frostbite. I opted for double safety and put them in back along with the two legs for added security from the aforementioned freefall roll down the hill.

With that done, I thought it safe to unhook Bluebell and, as the picture clearly demonstrates, Frostbite was home.

Since the sun was starting to go down and the balmy 20 degree temperature we endured all day was about to drop considerably, I left Frostbite alone to let her get used to her new surroundings. The next day, Sunday, I planned to open her up for the first time and pray that the electricity worked so I could put a space heater in her.


When I walked around her one final time, I did notice that there were several "outlets" and "hookups" on the side. I wish now I had asked the New York Dude what those were for. "Everything works" resonated in my head and I managed to maintain my feeling of confidence. I saw there was what looked like a water hookup which *I assume* was for connecting a hose from the campsite water to the camper. There was another larger plastic connector thing (I could not imagine what that one was for). A small pipe with a knob on top (I don't know what this is for either.) There was a metal, electrical looking, hookup. I squatted down and peered into it. I could see that at one time there was a cover that should have covered the hole but it was now missing. Here, I thought, was where an electrical cord *should* be. Inside the hole was a rolled up blue napkin. I pulled out the napkin and stared into empty blackness.

That can't be good.

Monday, January 11, 2010

Getting Frostbit

We bought Frostbite on January 2, 2010 and it was a cold, cold day. My daughter for some reason was very interested in frostbite, the injury. She asked one question after another all about frostbite. What does it do to you? How do you get it? What does it look like? Do fingers and toes grow back? What do they do with the parts that they cut off? etc, etc, etc.

It was inhumanely cold that Tennessee day. Temps in the teens. I know some Canadian joker will be the first to exclaim "15 DEGREES?!?! That's not cold!. Last time it got up to 15 degrees here we took a picnic lunch to the lake!" Here in Tennessee, however, under 20 is not just cold, it is damn cold. The sort of cold that doesn't happen very often. The sort of cold that make you intimately familiar with just how thin dress pants really are. The sort of cold that makes people living in the south contemplate moving further south. Man, it was cold!

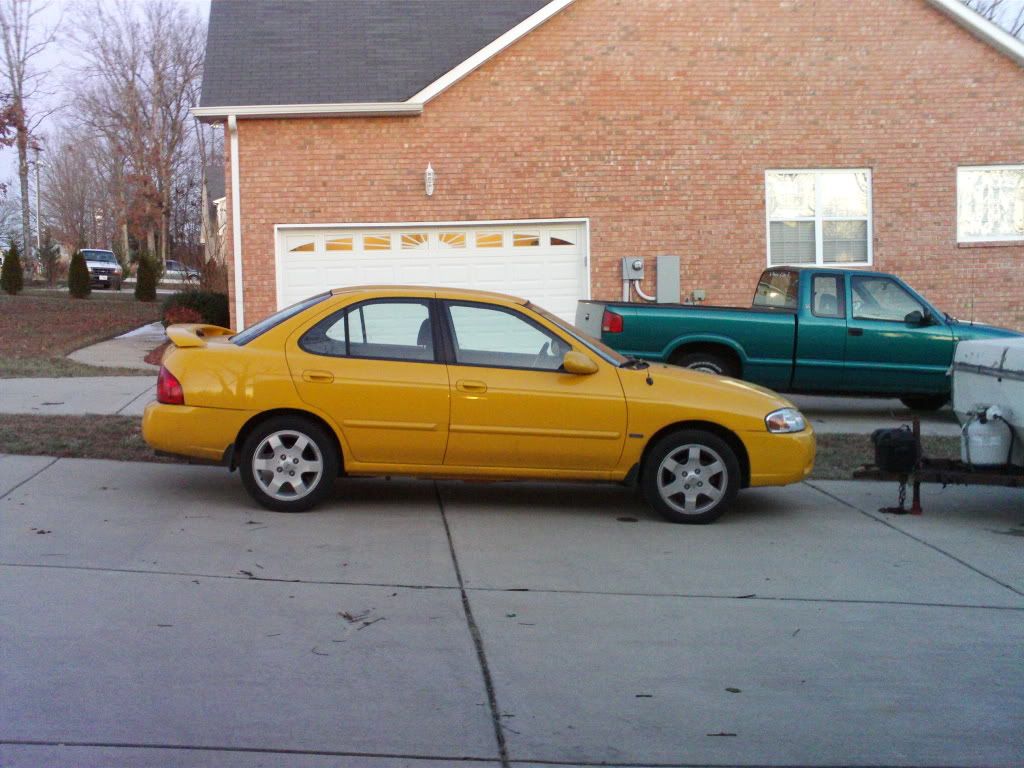
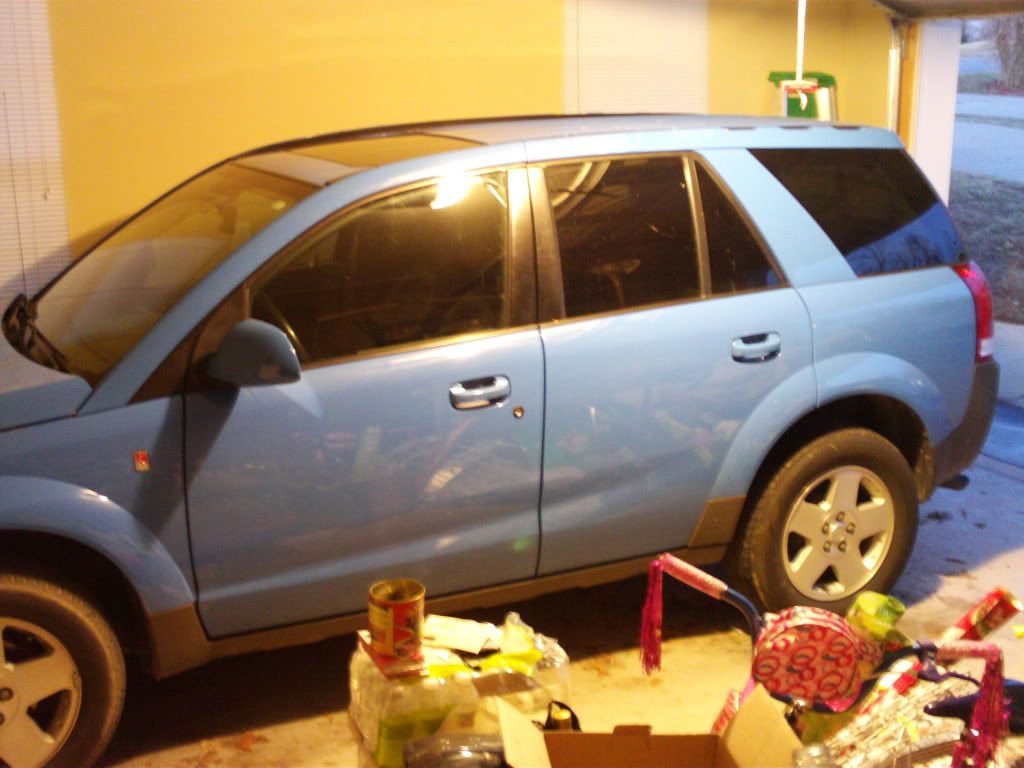
We had a hitch put on Bluebell just 2 days earlier so we could actually go out an look at campers. Personally, I don't see the point of shopping if I'm not able to buy so I didn't call about any campers for sale until I had the money and the means to pull the camper.

Anyway we noticed a new Craig's list ad, we called, "yes, it was still for sale" and "yes, we could come ahead and look at." After a trip to the bank to get cash (just in case) we were off. We drove about an hour away to Clarksville, TN. I alternated between focusing on our GPS directions and my daughter's constant questions and stories about frostbite.

Eventually, we arrived. It wasn't a house at all. It was a business. A fortune telling/palm reading business no less. I met the owner, a gentleman, who was very affable. The camper was set up in the back and we looked it over as best we could despite the insane cold. He had a Yankee accent so I assumed he was from New York City. Down south, the more Yankee you sound, the closer to NYC you must be from. I can't really explain that. I also can't remember this gentelman's name so, from this point forward, I'll just refer to him as the "New York Dude."

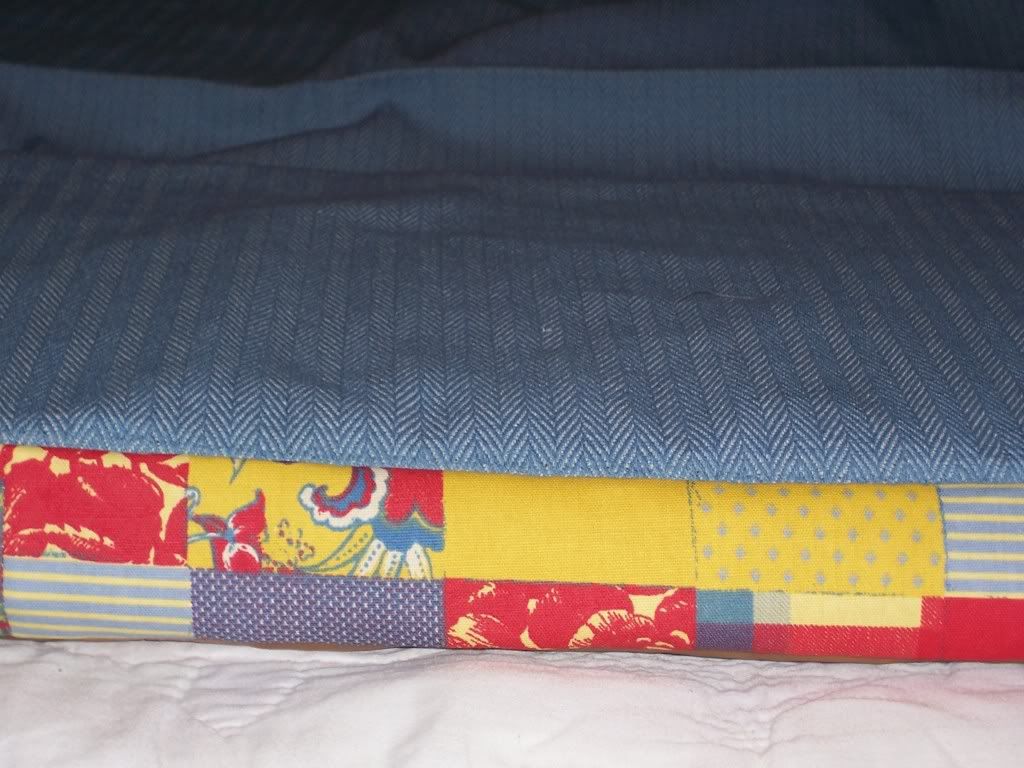
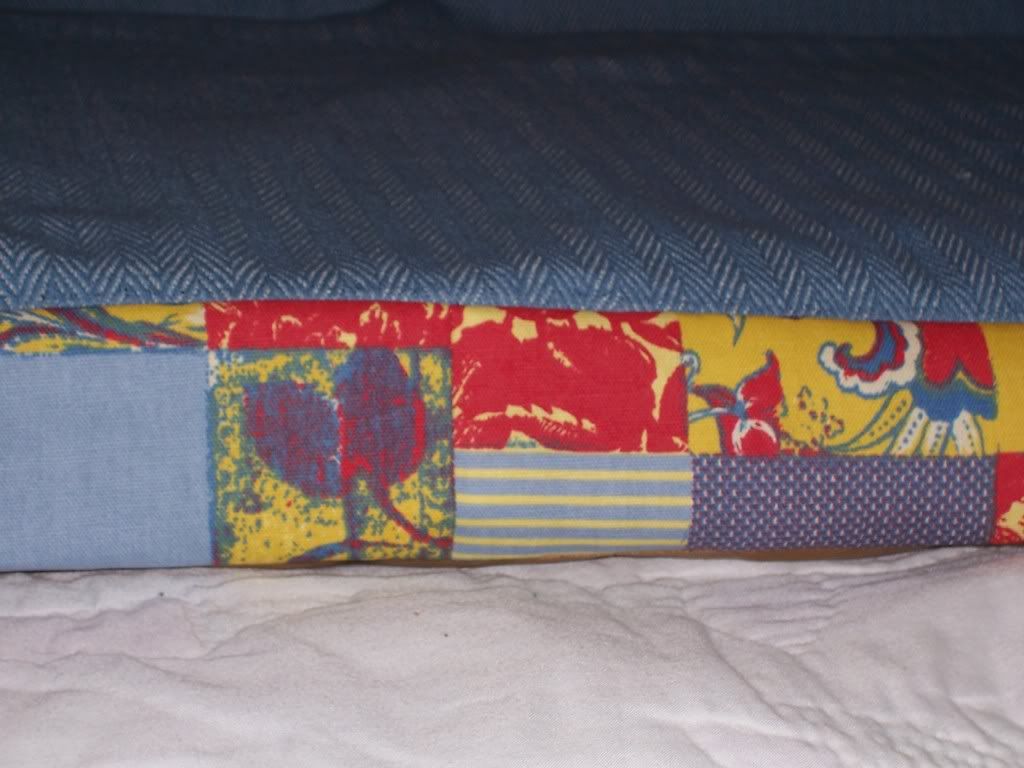
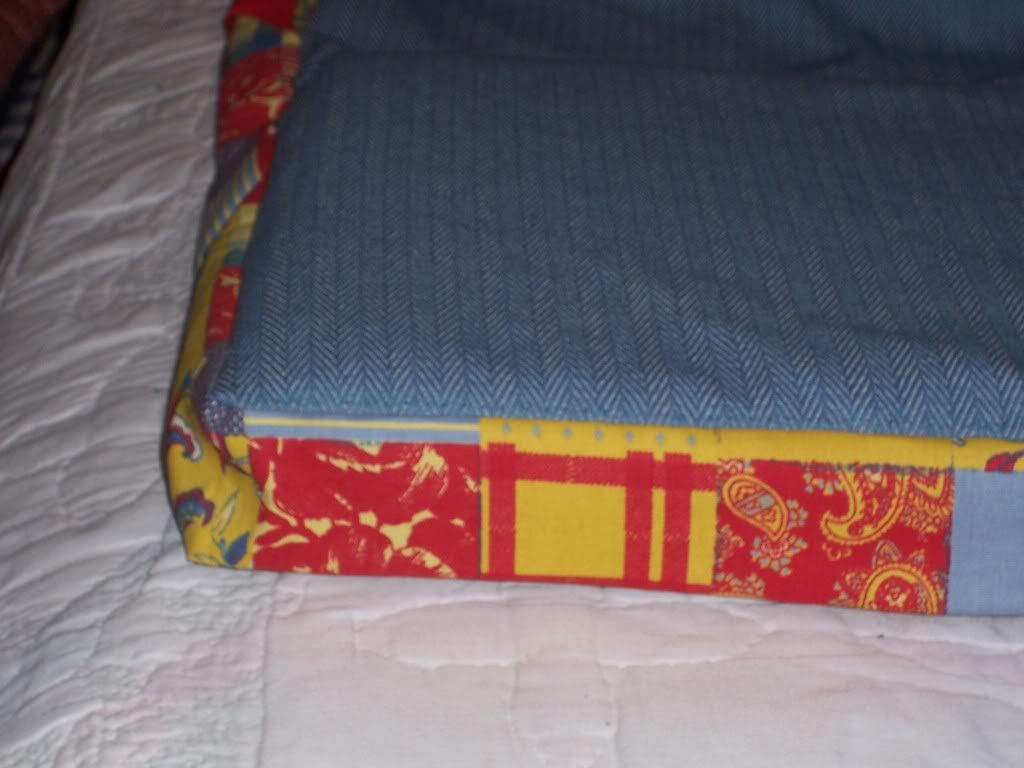
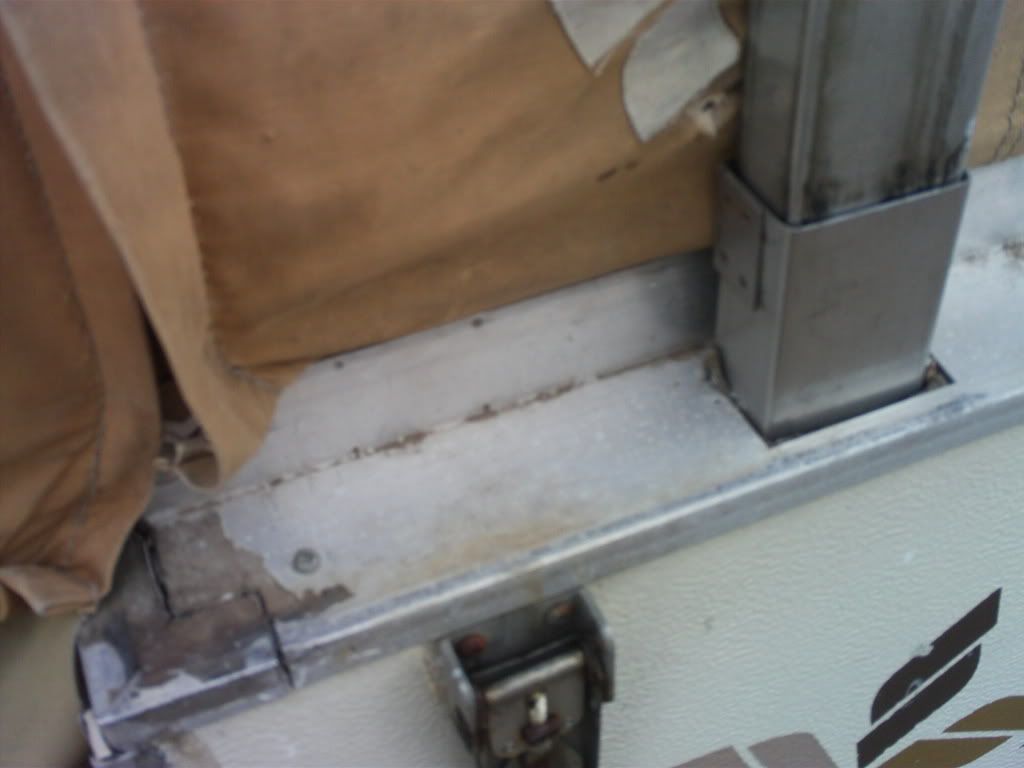
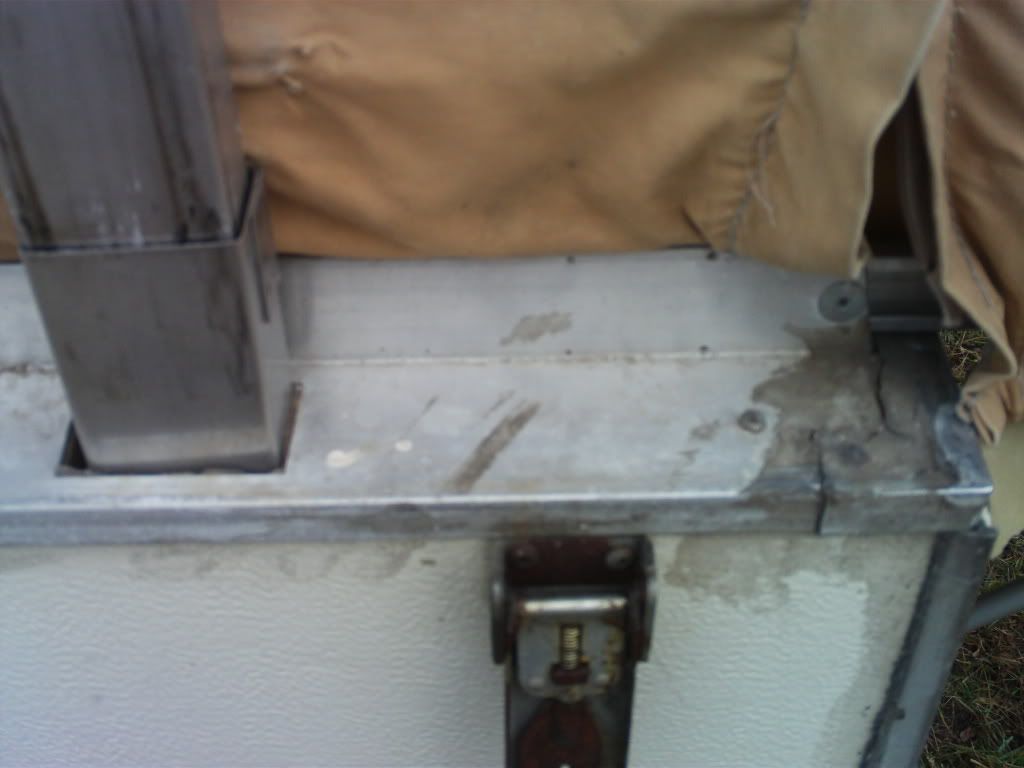
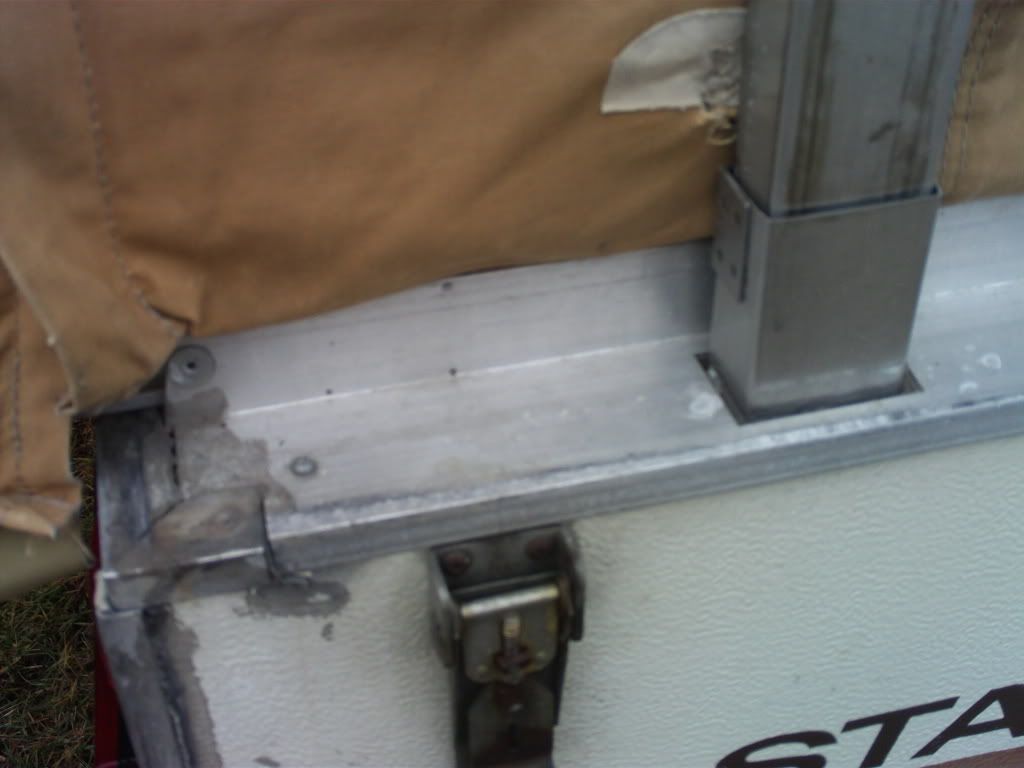
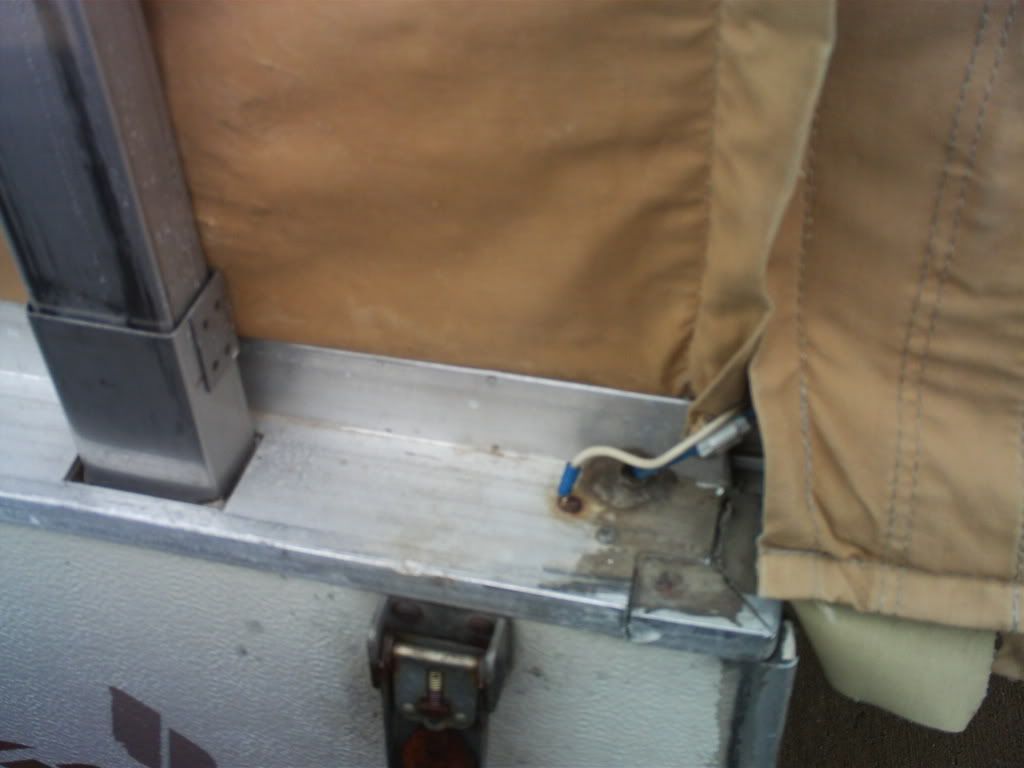
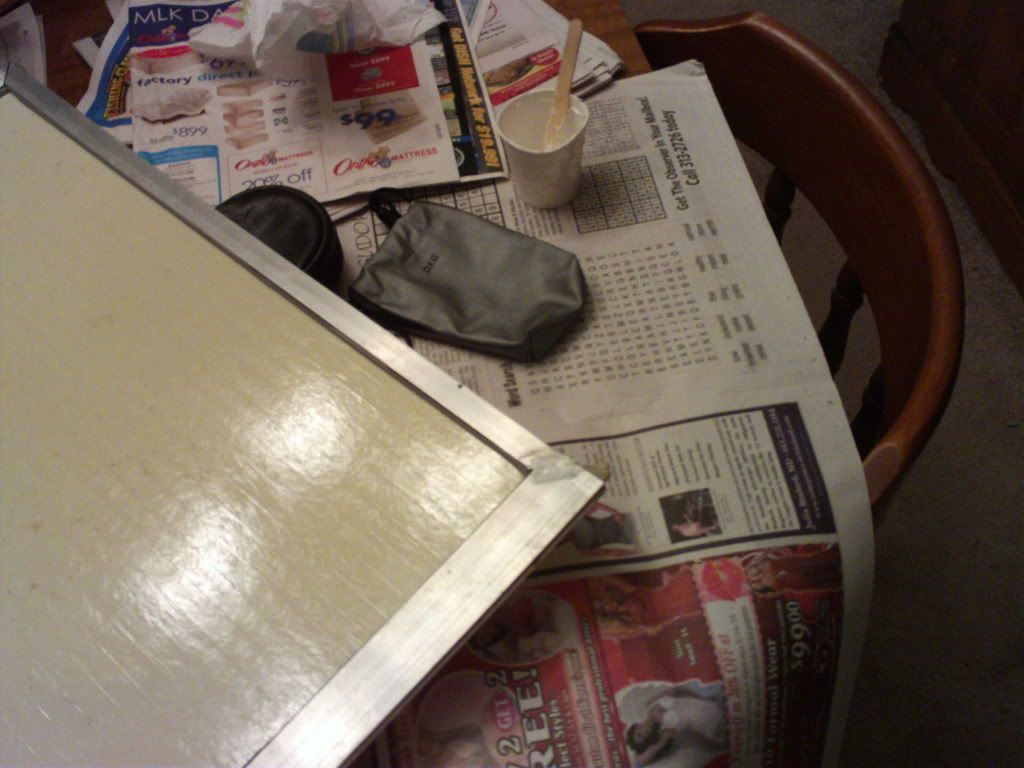
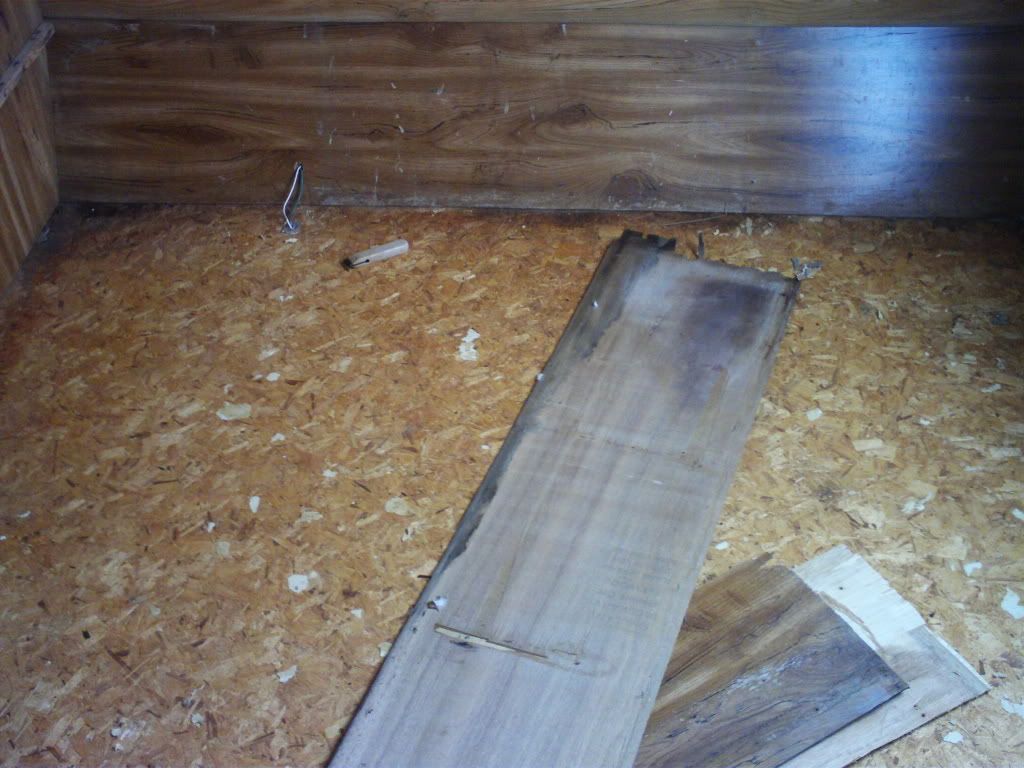
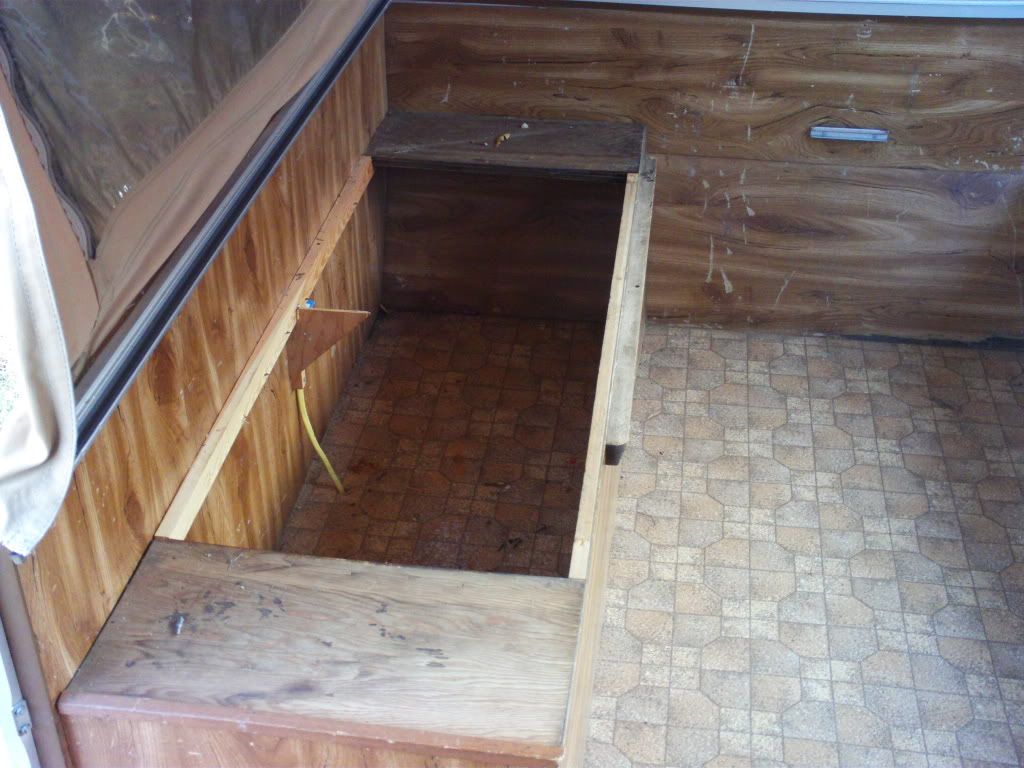
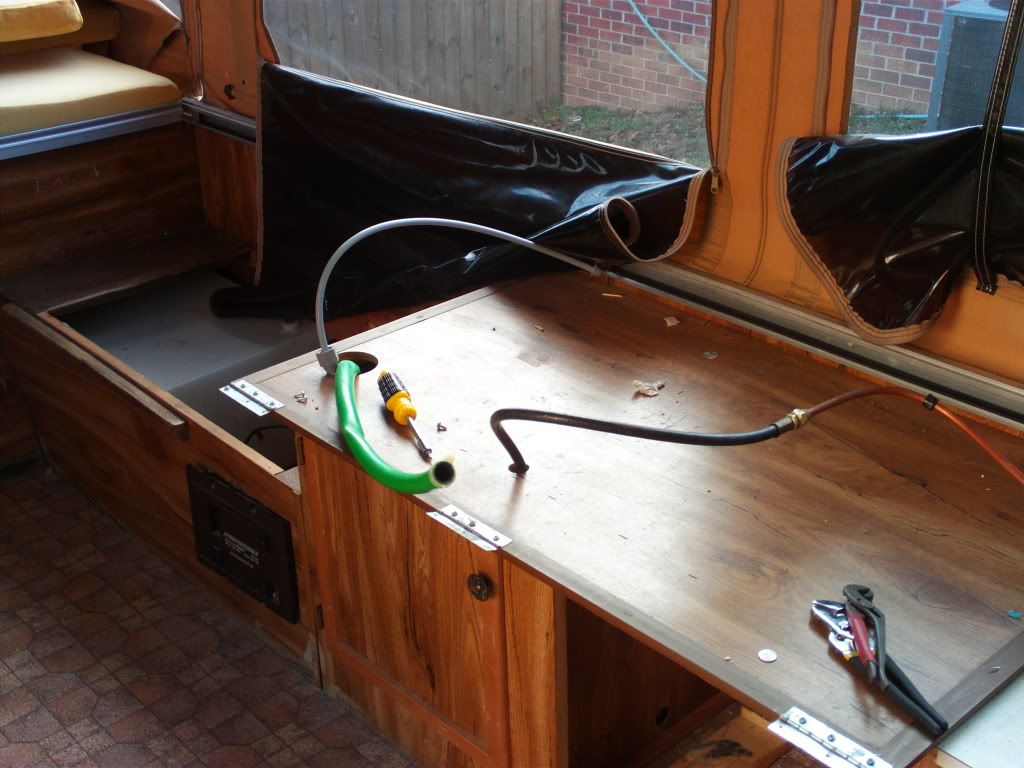
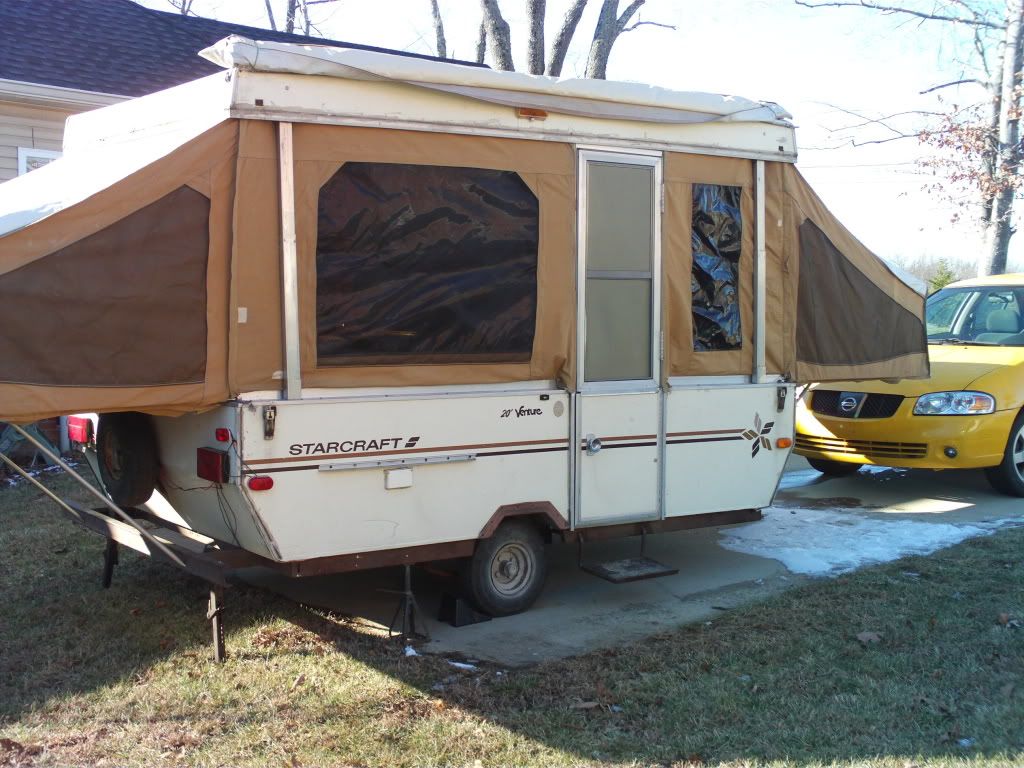
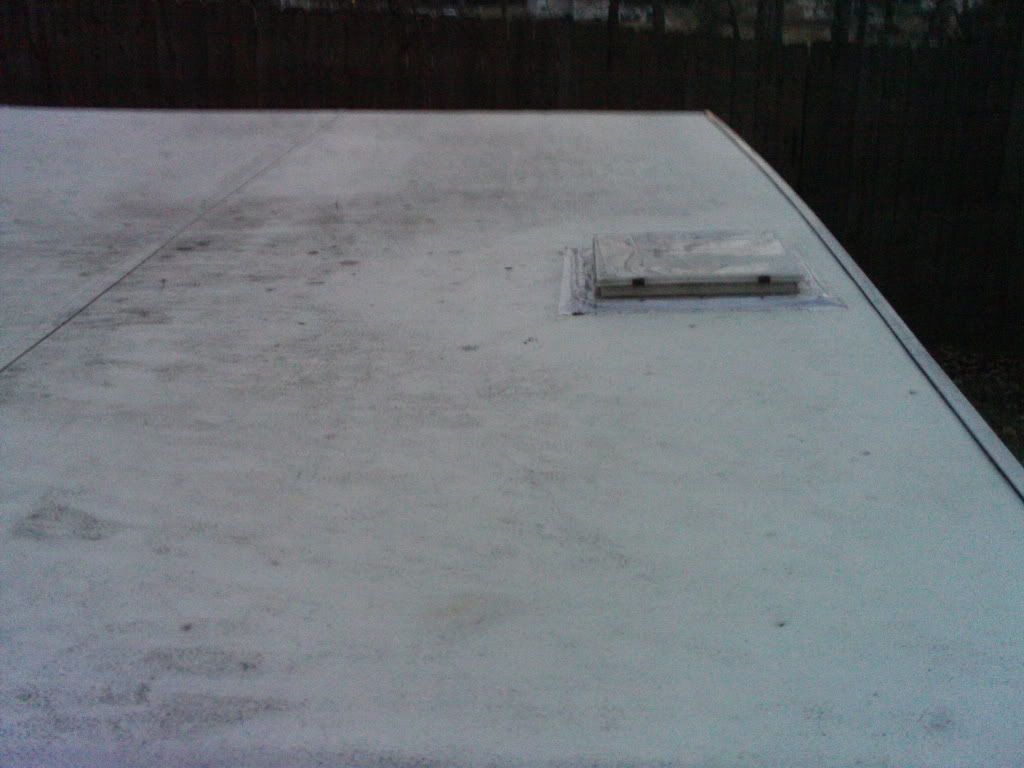
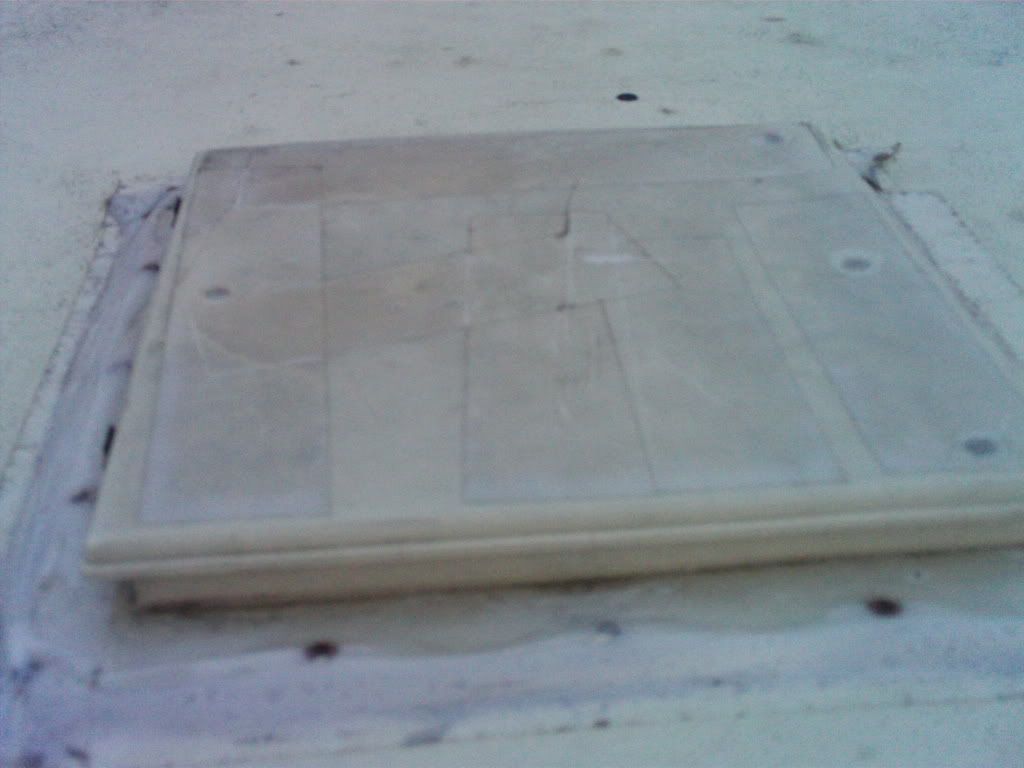
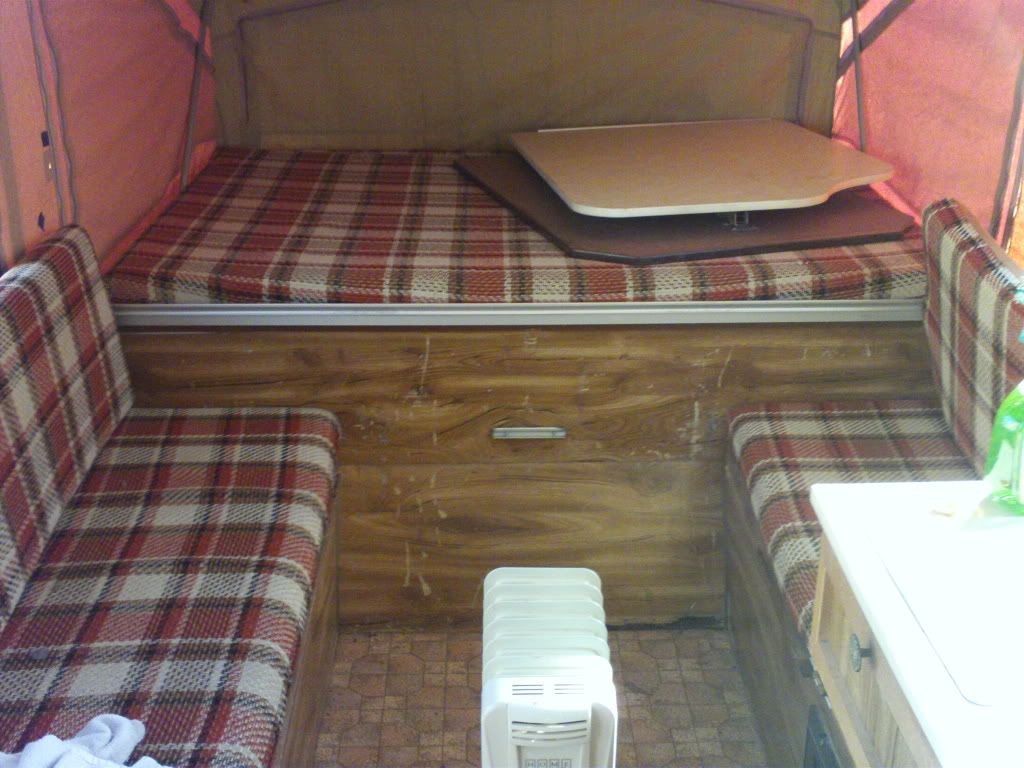
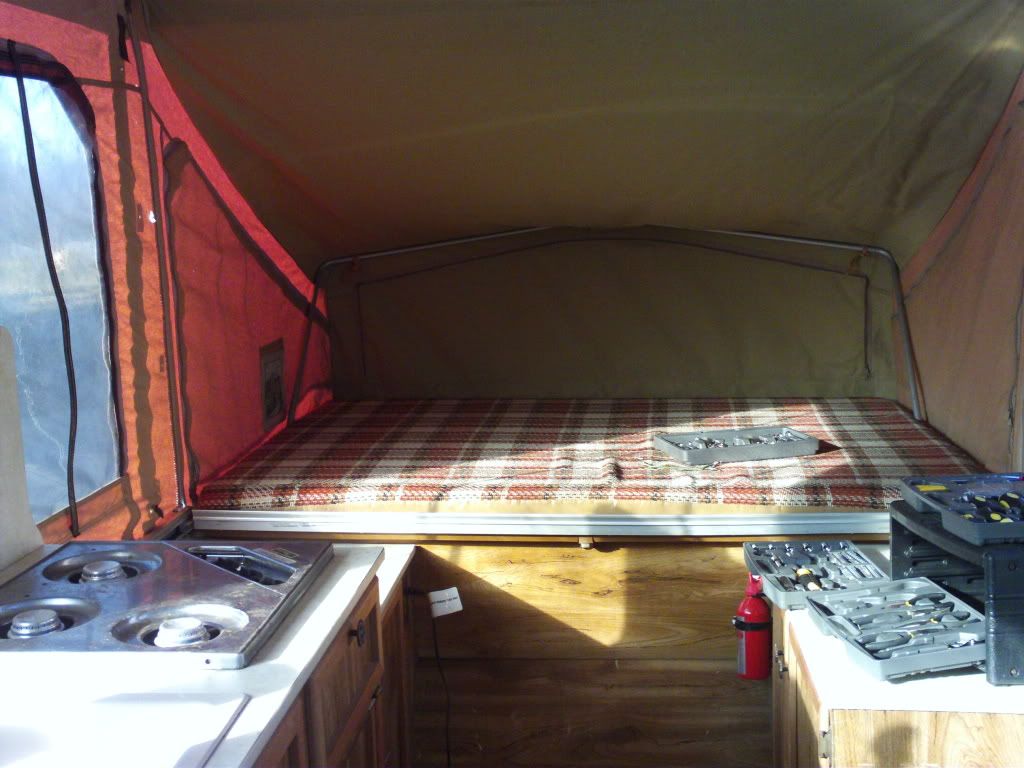
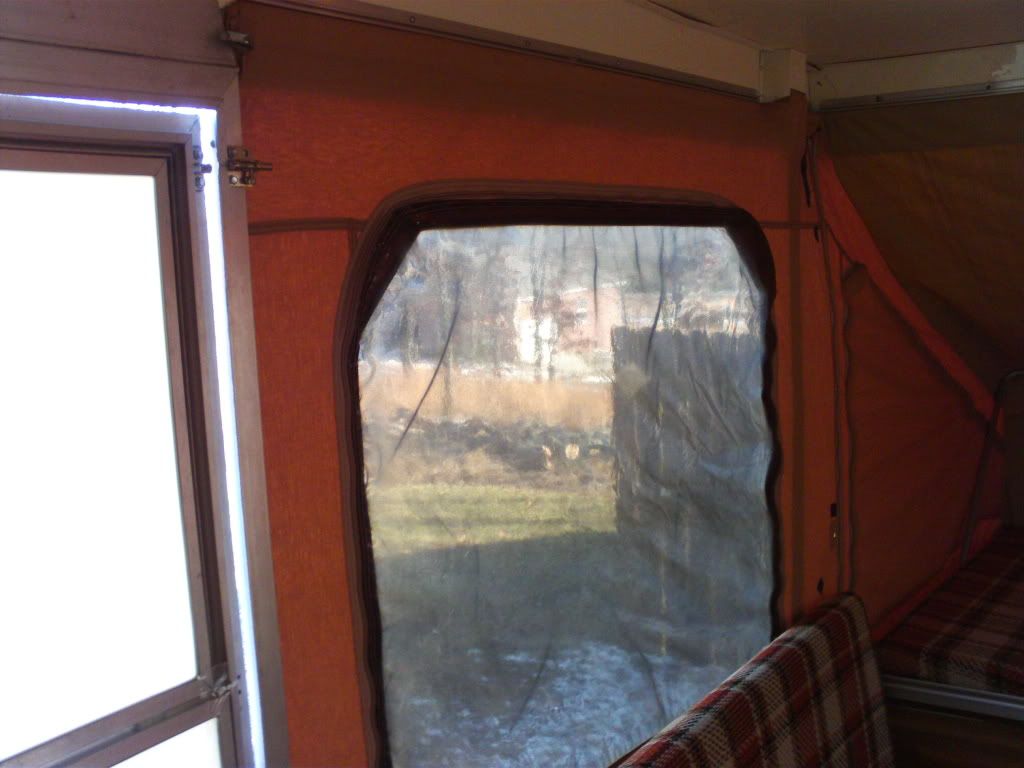
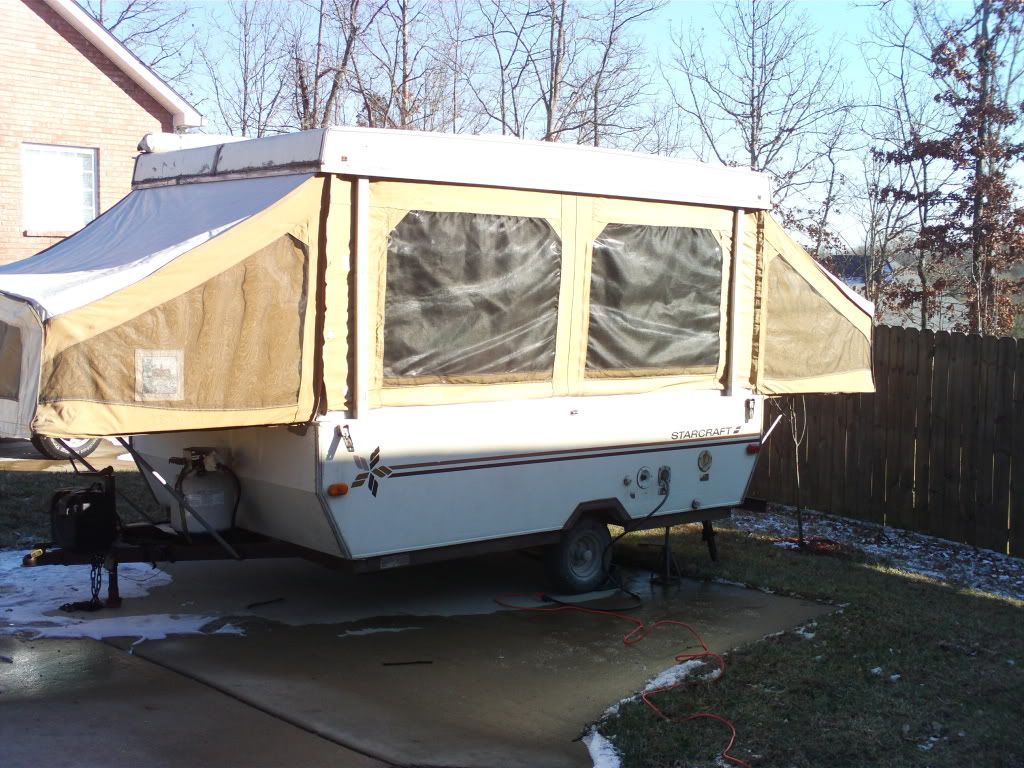
Here's the part where I need to confess something. I made a point to walk around the camper touching things, crouching down to get a better look at things, opening and closing things. I hope it appeared visually like I actually knew what I was doing. The sad fact is I know pretty much 2 things about vehicles in general much less campers: diddly and squat. I described the full extent of my mechanical prowerness in a previous post. This camper has tires that were not flat and while there was a 12 volt battery on the hitch, I was confident that I could replace it should the need arise. The rest of the inspection was pretty much worthless as far as me gathering valid information. It was a 1983 Starcraft 20' Venture. A collection of meaningless facts and tidbits of info that meant little to me other than to make me think "Dang, that thing's 26 years old."

Not exactly a complete evaluation, I know. I did ask the New York Dude and he assured me that "everything works!" I was observant enough to realize that it had no AC, no heat, and no bathroom. There were some scratches and a couple of tears in the canvas and such.

I asked about the electrity (no electricity was hooked up when we were looking at it).

"Everything works!" the New York Dude assured me.

I asked about the propane stove.

"Everything works!"

I ask about the water and sink.

"Everything works!"

I asked about the brake lights and turn signals.

"Everything works!"

Despite the camper managing to have exactly zero of our "Must Haves, no ifs, ands, or buts, Gotta have it" features. The only thing that ran through my mind at that moment was "hmmm. . . Everything works. That's good enough for me."

I asked my wife ,"So, what do you think?" She replied "I don't know. What do you think?"

With that *discussion* behind us, I decided it was time to make an offer. The New York Dude wanted $1200 but asked us to name a price.

My wife whispered "offer him $600" in my ear.

Ignoring that for no valid reason, I said, "I'll give you $900"

The New York Dude pondered that for a moment and said "If you can meet me in the middle a bit and up it to $1000, you've got a deal."

I asked my wife ,"So, what do you think?" She replied "I don't know. What do you think?"

I told him "We'll do it!"

Please don't bombard me with "Bah! What an idiot" or "Hey Genius, you can get one twenty years newer for the same money!" All I can say is "Not ME!" I never fall into deals like that. Besides, a deal is a deal, anyway, I'm not going to whine about anything.

I've gotten rooked on nearly every car, house, furniture set, and every other major purchase I've ever bought and I'm not about to screw up that perfect record now.

I was handed a title at some point and I do remember unfolding it and looking at it. I did not actually READ it, however. Nor did I make sure that ownership was signed over. Nor did I even look to make sure that it was a title for the camper I just gave $1000 cash for.

Funny, I still haven't looked at the title to verify those things. There is a part of me that doesn't want to risk it.

I did remember to ask for a receipt of some type. I followed the New York Dude into the building thinking I would get a semi "official" looking receipt from a business receipt book. Do fortune tellers offer receipts to clients? Can you use a CC to pay a fortune teller? If not, I wonder why?

The New York Dude brought me a plain paper pad and a pen. He told me "Just write whatever you want it to say and I'll read and sign it." oh, great. I scribble something like:

1983 Starcraft popup camper.
Sold for $1000

The New York Dude looks at it and then adds the date at the top (The Date? Doh!) and then adds" Sold As Is" at the bottom (double Doh!). I was starting to fear that my facade of "Educated Camper Buyer" was in danger of crumbling right there. I wanted to leave before it because obvious that I didn't have a clue as to what I was doing."

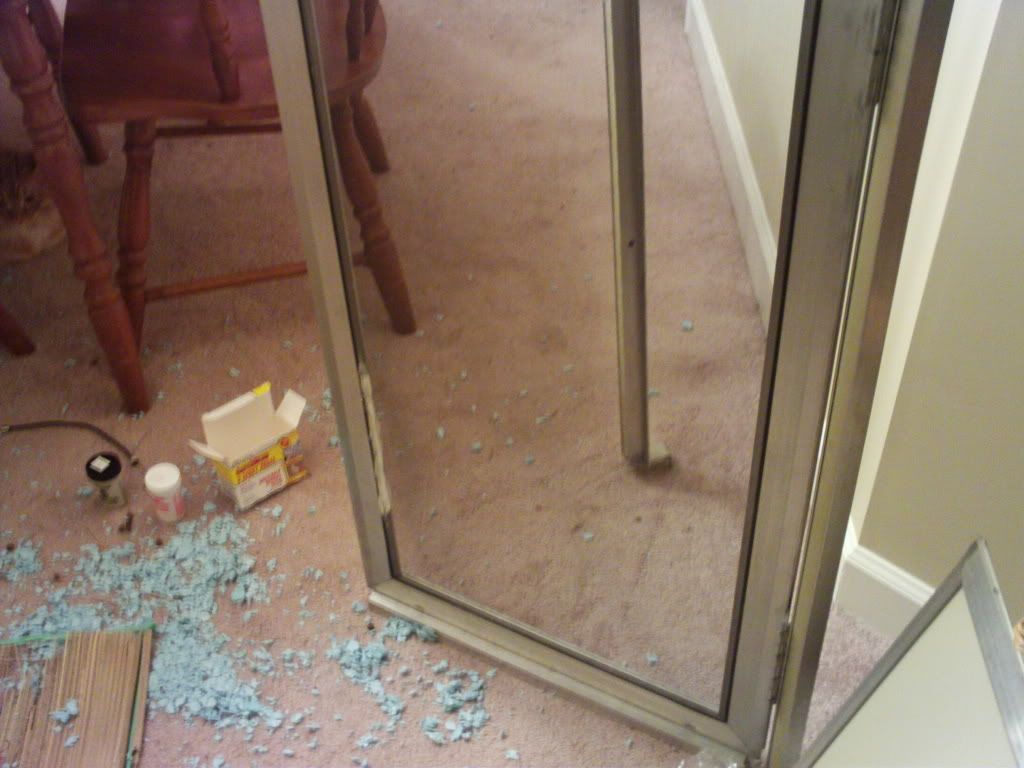
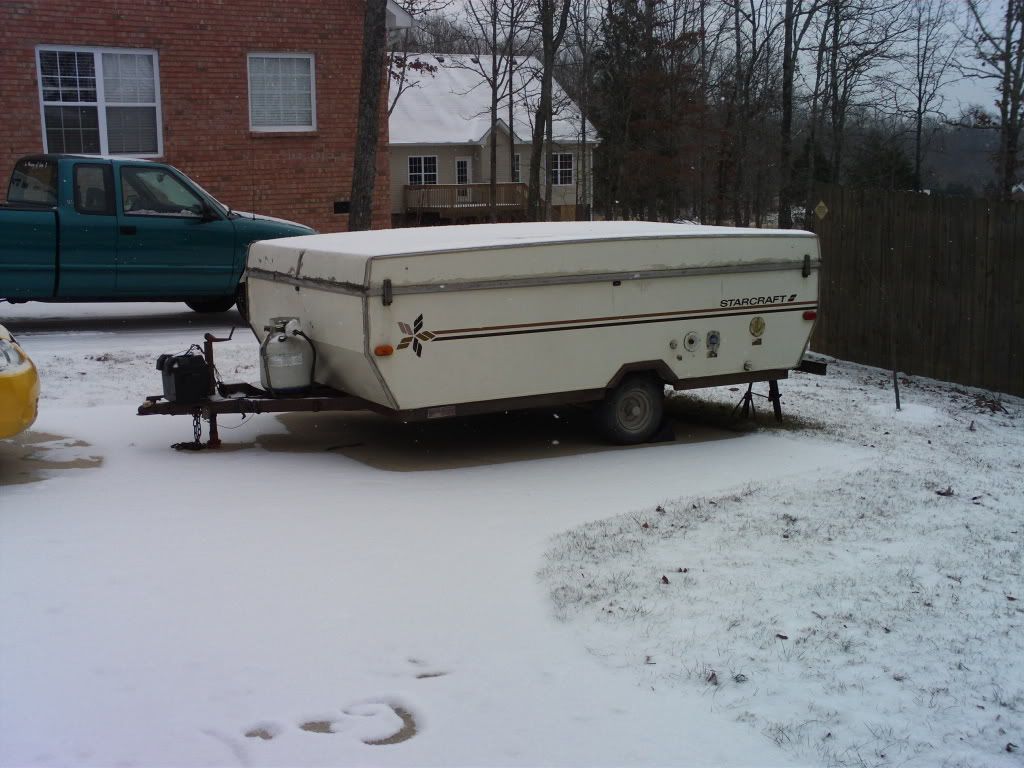
With a final "Everything works," we lowered the popup, hitched it up to Bluebell and drove away.

Two blocks later, it occurs that I should, AT LEAST, verify that the lights and turn signals work. I have a thing about being pulled over. I hate it. I pulled into a parking lot to have my wife operate the controls while I watch the back of the popup.

Everything worked.

Everything was working as long you define "working" as meaning that the lights do come on and flash as the driver operates the various controls. Which lights flash for which specific controls is another matter. I figured that since it was daytime and I can generate a eye catching light display whenever I'm stopping,turning, or hitting a larger than average pothole, everything would be fine.

We just engaged in what I like to call the "Holder Style" of purchasing things. We bought the first camper we actually went out and looked at. I wonder if the New York Dude somehow *knew* we would be employing this technique. The physical exchange of money for a tattered old title which, for all I honestly know is really for a 1978 Pinto, went amazingly smooth.

At some point during the hour drive back home, my daughter named our camper, Frostbite.

It is the perfect name.

Coming up:

Frostbite comes home