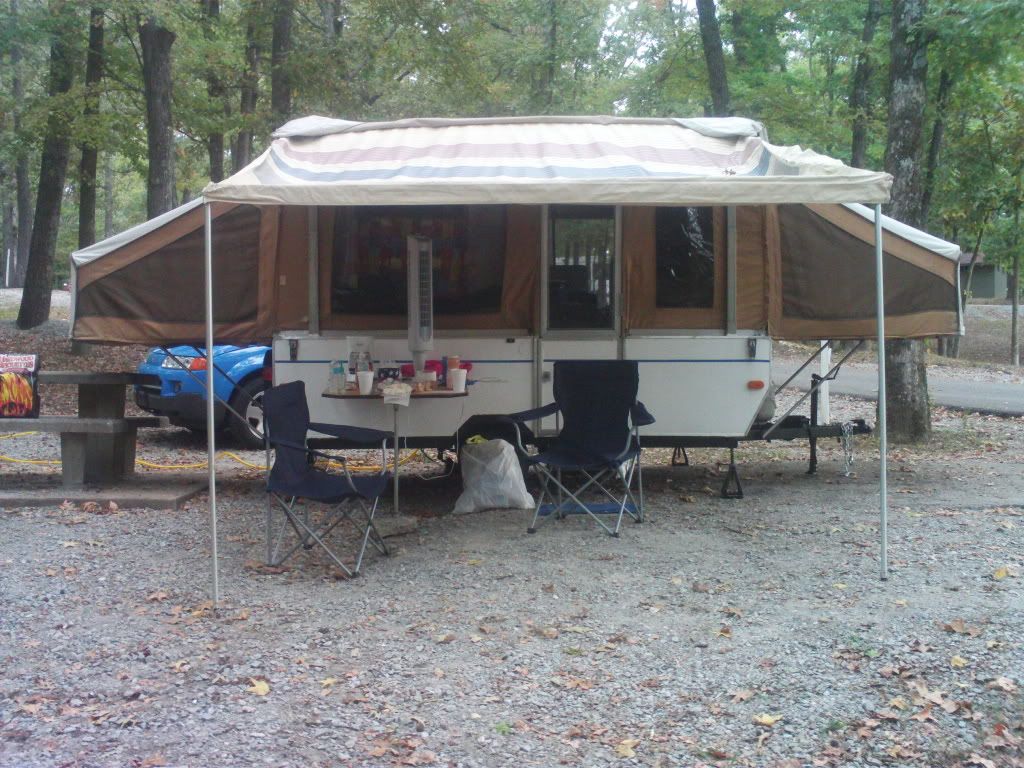
Ok, the outside. Initially I plan to just do a good cleaning. Here is a basic list:
* I will use some type of solvent to remove all the old caulking and goo. (I will have already done this on the corners around the lift poles in the pre-phase work *hopefully*)
* I will try to clean the outside as much as I possibly can. I'll have to find the right kind of goo that will do the best job.
* re-paint the outside panels white. Now I am completely unsure as to what type of paint I need for this. I would like it shiny white. Going to a real paint shop is not out of the question.
* remove the current detail stripes and stickers on the outside. I am divided over replacing the word "Starcraft" on the camper. I have no particular allegiance to this company but my wife thinks she would like to keep it. Maybe replacing the Starcraft "star" design with a blue snowflake would be cool. I haven't decided yet.
* re-paint the trailer base, hitch, fenders, and bumpers the same color blue as bluebell
* add detail stickers or stripes of some type that is the same color as bluebell.
* add the word "Frostbite" on the back in some type of cool font the same color as bluebell.
* I would like the metal lip around the roof and box to be shiny again. Not sure if cleaning and polishing will do the trick or not. Replacing the metal is probably out of the question since it would require taking off the roof, I suspect. I'll decide then.
* replace the four locks that hold the roof to the box when the roof is lowered with shiny new ones. I've seen these for sale so that should be easy.
* replace the battery box on the hitch that holds the 12v battery. The top is completely broken and the battery is exposed to rain and snow which is probably why it isn't working. I probably shouldn't replace the battery if it is not covered properly so a new box will come before a new battery.
* replace the door latch on the lower door. It works but it is loose in the hole and I don't have a key for it. I'm hoping they are not too expensive.
* replace the vent on the top of the roof. The cover has a good 6-8 inch crack in it. I have shopped for these and see that they do come in a standard size (14in). I am tempted to get the ones with a fan built it but that would require that I wire it to the electric system. I'm hoping that won't be too complicated. This one I will probably do in the pre-phase since the cracked vent is surely contributing to the water leak inside.
Finally, I need to do something about the lift system. I am going to relate some damage that I had to have done myself since I brought Frostbite home. There is a long bar that is attached to the main lift cable that is cranked along with the cable when raising the roof. There is a gap in the lower part of the hitch that the bar, once the roof is the correct height, falls into and hooks. This is what holds the roof up.
Well, that bar is bent now at a good 25-30 degree angle. I don't know exactly how it got bent but I suspect that it got hung up on the opening underneath when I was raising it. Instead of sliding forward, it bent. I am very conscious of not using too much force when raising it because it always raised easily.
Apparently, not conscious enough as recently, I hit resistance when I know I shouldn't have. I went underneath and that is when I noticed that the bar was bent and not going through the opening at the front of the trailer. I had a neighbor kid turn the crank while I was underneath guiding the bar through the opening. The roof raised but the bent bar would not fall down and hook where it needed too. The bend in the bar kept it raised several inches.
Now I can get around this by just raising until it gets to where the bar *should* hook and then hooking the trailer safety chains around the crank to hold it in place. However, I would like there to be a working hook. When the weather clears I'll be able to get underneath and take a better survey of the situation. The main cable attaches to a short horizontal bar to which four smaller cables are attached. Each of these cables lead to the four posts in the corners via pulleys underneath. I noted that these cable are nice and silver and didn't appear frayed which has to be a good thing. I'm not 100% sure but I think the bar with the hook is attached to this horizontal bar somehow. I'm really, Really hoping that the hook bar is attached this horizontal bar with a screw and nut *crosses fingers* but it could also be welded there. If it is attached with a nut and bolt, I can remove it and replace it. If not, I'm sort of stuck.
Now I am faced with a problem. I am terrified of un-attaching all of the cables to remove the hook bars. First, the lift system is working. It might stop working when I reattach it because it is probably the most complicated and important part of the entire camper.
One idea I had was to saw off the hook bar (after making sure to paint the spot in the main cable where the hook bar *should* hook which indicates that the roof is raised to the proper height) and get a strong cable with a hook of some sort on one end and attach that cable somehow to the horizontal bar that connects the four lift pole cables on the other end. I could attach this cable to the main cable with plastic zip ties or something so it would pass though the opening underneath when the roof is being raised.
I am not a welder and, while I am not afraid of getting the equipment and giving it a shot, I'm not too jazzed about risking the roof falling down on my family inside on my first try at the skill. Also, I have a better than average chance of setting the camper, myself, my house or all three on fire.
This setback is most frustrating because I must have caused it myself. The lift system and hook was working fine when I bought the camper.
Don't worry. I'm sure I'll find a way to break all the corner lift cables before I'm done. I've already found and printed a file that details how the cables are run through the lift poles.
It's complicated to say the very least.
There is an element of inevitability to this, I fear.
Wednesday, February 3, 2010
Subscribe to:
Post Comments (Atom)


First of all, don't kick yourself too hard. You may or may not have caused the damage to the lift system. Remember - your camper is over 20 years old. You should know, however, that all of the cabinets and such in the trailer box make up some of the trailer's actual structure. What I mean is that the lower galley cabinet, for instance, actually provides structural strength for that side wall. it's entirely possible that raising and lowering the top with that cabinet removed caused the damaged. It's equally possible that the lift system was already damaged, and it only became apparent after all of those structural supports were removed - when you took apart all of those boxes.
ReplyDeleteNow is the time to get ahold of Starcraft, through their website, and order a lift system manual. I think what you're describing is called the whiffletree. Let me caution you NOT to try to modify or repair it in any way. It will almost certainly fail, and that's what holds the roof up. Get the manual from Starcraft first, then assess the damage. Parts are readily available for almost all lift systems, either through Starcraft, or some 3rd party parts houses. From what I understand, Starcraft sells manuals through their website for very reasonable prices - usually $5. Go to their website, click on the Contact Us link, then send them an e-mail telling them the year and model of Frostbite, and that you want to get a Lift System Manual for it. They'll show you the way from there.