Thursday, March 11, 2010

Trial by Thunderstorm

It's raining today.  Not just any rain but, according to my weatherlady, a full fledged, 2-day, thunderstorm.  Normally this wouldn't be noteworthy except for the fact that I left the tarp off of Frostbite for the first time since I discovered that the roof leaks. 

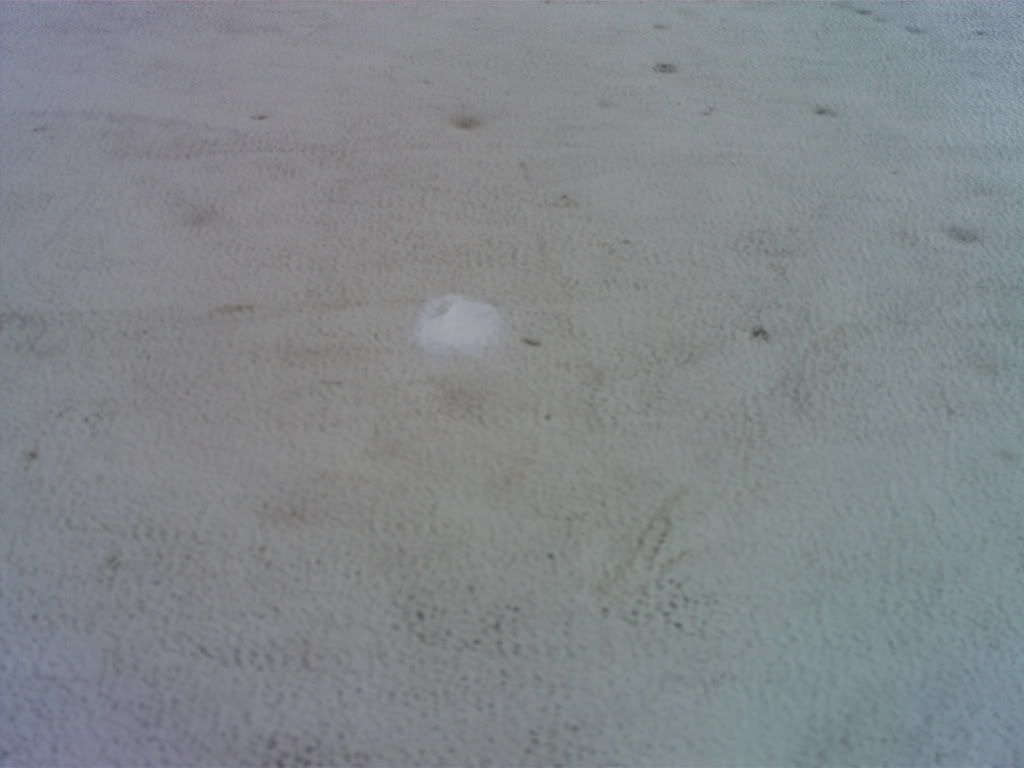
This past weekend, I did repair the large hole in the roof.  By "repair" I mean that I squirted caulk into the hole until it was filled and then scraped a board across the top to make it even with the roof.  Here are some pics:

Before


After

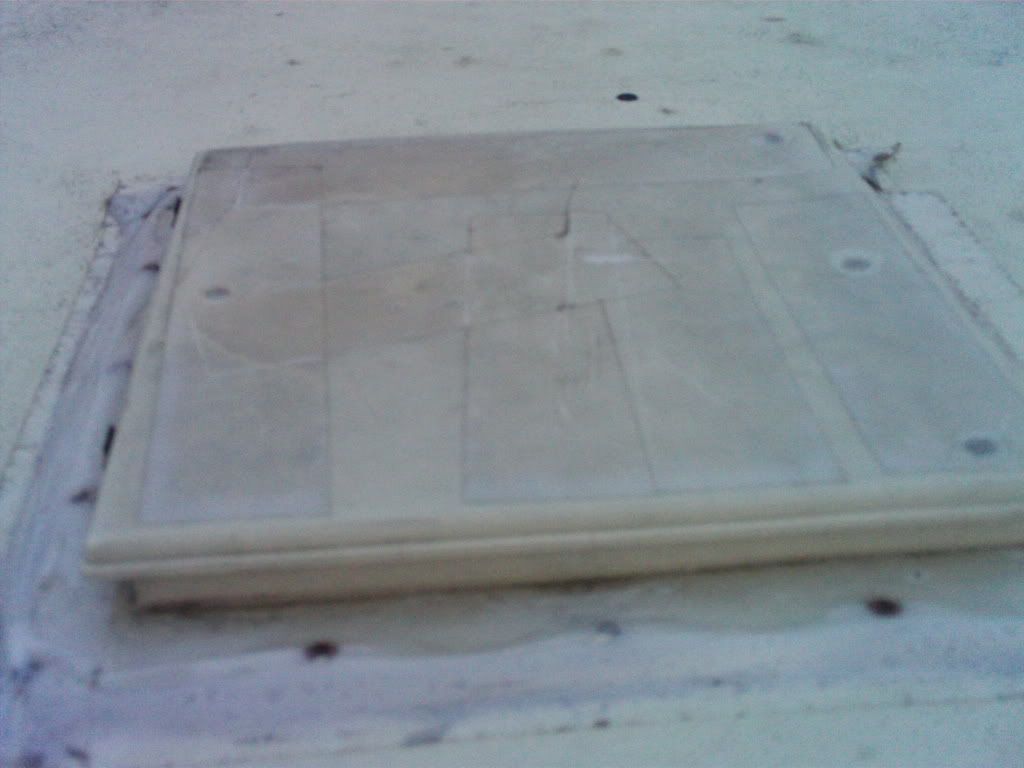
I also did a cheap, redneck-style repair of the vent.  It had clear tape surrounding the edges that had started to come up in the corners.  I didn't want to caulk this up because I intend to eventually replace the vent entirely with a new one.  Caulking it now would just make that fix more difficult so I opted to simply update the tape fix by adding tape around the corners and across the crack on top.


Having no way to know if this successfully addressed the source of the leak and knowing it was going to rain this week, I decided to leave the tarp off and test it out. 

One thing I did not know when I did this, however, was that the rain we were expecting was actually going to be a thunderstorm.  I was hoping for a simple spring rain not 2 days of violent, windy, thundershowers.

I suppose this will be the ultimate test.  I'll know when I pop her up this weekend.  Keep your finger's crossed!

Wednesday, March 10, 2010

. . . And There Was Light!

While waiting for the goo to dry around the floor patch and the roof repairs I made, I decided to finish the lights.  Confident that the $44 fuse fixed Bluebell's problem with the running lights not working, I decided to go ahead and connect all the side lights.  Typical of my method of doing things, I cut wires, spliced the side light wires up, and connected everything first.  I realized that I should have threaded the main wire through the frame only after this was done.

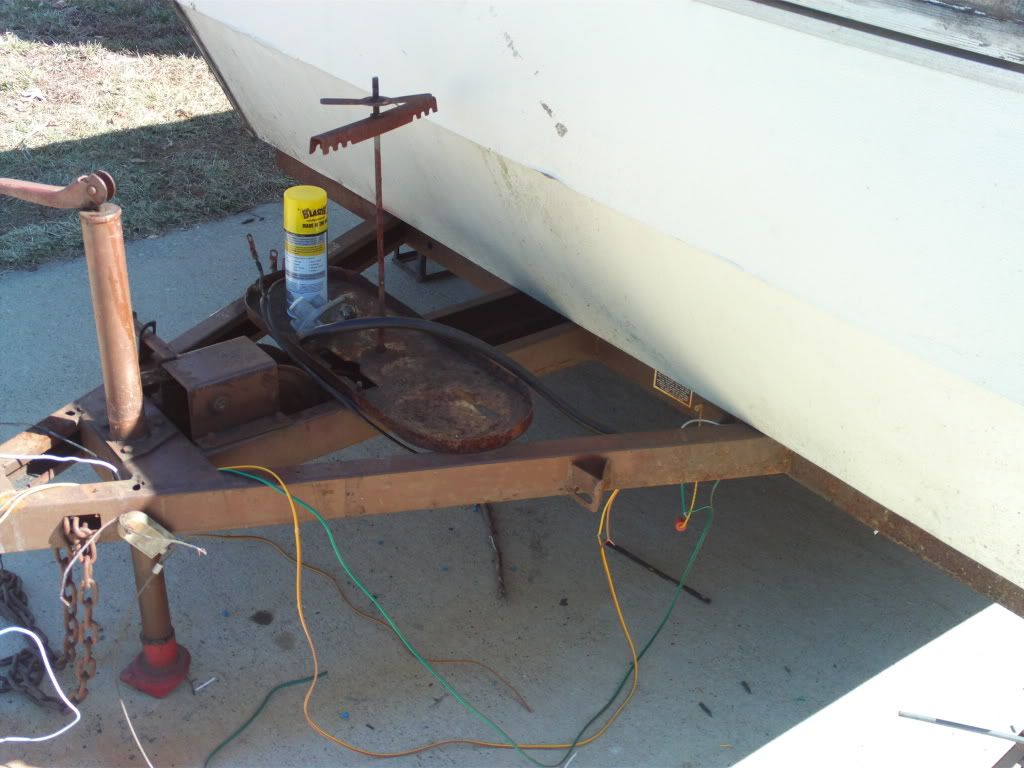
Here is a photo of the main wire.  Trust me it is all spliced and correctly attached to the proper lights around the body of the camper.  Notice that not only is this wire NOT threaded through the frame but it is actually wrapped around the frame.  On the left near the end of the tounge, the wire is on top of the frame.  On the right just before the wire disappears underneath the camper, the wire is underneath.

Photo evidence of idiocy

I unattached all the wires and spent the next hour looking for a sink snake I bought last year to unclog my bathroom sink.  After an hour of emptying out bathroom and kitchen cabinets and turning my garage upside down, I found it laying in plain sight inside Frostbite.  I then remembered that I had thought ahead realizing that I would need it to run the trailer wire through the frame when I first started goofing with the lights a month ago.

So much for planning ahead.

Now armed with the snake, running the wire through the trailer frame was an easy matter.  I then reconnected all the wires and splices and was ready to test her out.  I pulled out Bluebell intent on actually hooking her up to Frostbite this time.  Yes, I did remember to remove the bunk support poles before doing this! 

I hooked her up and plugged in the 4way plug between the camper and Frostbite.

Everything worked!

I dragged my wife outside to help me test.  The running lights, blinkers, brake lights, hazard lights all worked perfectly.  My wife went inside and I started to put the covers on the lights.  Once the covers were on, I checked again.  Everything looked good but I couldn't tell 100% that the yellow covered side lights were on.  They were definately working before I put the covers on.  I removed a cover and the bulb was not lit.  I jiggled it some.  Nothing.

I then noticed that all the running lights were out.  I went inside Bluebell.  The dash lights were out and the fog lights wouldn't work.  Apparently, my $44 dollar fuse blew again.  I checked fuses in Bluebell until, sure enough, I found the blown fuse.  A 10-amp red one.

I didn't have any fuses but I figured I could just run up to AutoZone and get some.  No, I didn't take the blown fuse with me.

At Autozone, I found a pack of 5, 10-amp, red fuses for $3.50.  At the register I did have the foresight to ask if these fuses were standard sized.  I was told that yes, they were standard sizes but there were 2 different sizes used.  He pointed to the ones in my hand and said that there was another size fuse that looked just like that but were half the size.

The ones in my hand *seemed* like the right size so I was confident that I didn't need to look at the smaller ones.  Surely the fuse wasn't THAT tiny.  I would have noticed that.

Upon my return home, eager to replace the fuse, I realized that the fuses I had bought were about twice the size of what I needed.  In fact, none of the fuses in Bluebell took the larger size.

Doh!

I couldn't return the wrong size fuses because I had already opened the package.  No, I didn't bother to hold the unopened package up to the fuse box first to make sure it was correct.  That is just not my style.  I went back to AutoZone and found a 10-pack of the smaller fuses for $10.  I did take the old burned out fuse with me this time but it wasn't really necessary since I had already lost the 50-50 bet.

With the new fuse inserted in Bluebell the problem was solved.  However, I had already unhooked Frostbite so I didn't check those connections but I had, at least, located the $44 dollar fuse and replaced it with a $1 fuse plus I had 9 more to toy with as needed.

I am a bit concerned that it might have been too easy to blow that fuse.  It could still be a ground issue as the tail lights I used did not have a ground wire since they claimed to be grounded to the frame via the screws used to attach them to the frame.  The four side lights did have ground wires, However.

The chance of me doing something to blow the fuse by goofing with the light bulbs and wires when I was replacing the covers is great.  If the fuse blows the next time I have Bluebell hooked up to Frostbite, I'll know that I have a problem and will address it then.

Until then, I can't know if this is the problem or if I even have a problem.

I can say that all the lights in Frostbite are wired correctly and are working.  This is something that was not the case before I started goofing with it so this little project can be marked up as a completed improvement to Frostbite.

more tomorrow . . .
Tuesday, March 9, 2010

The Infamous Patch

Finally, after this weekend, I'm going to mark the status of the floor patch as "Completed."  I wanted to collect all the work on this issue into one post even though it took me over a month from start to finish.

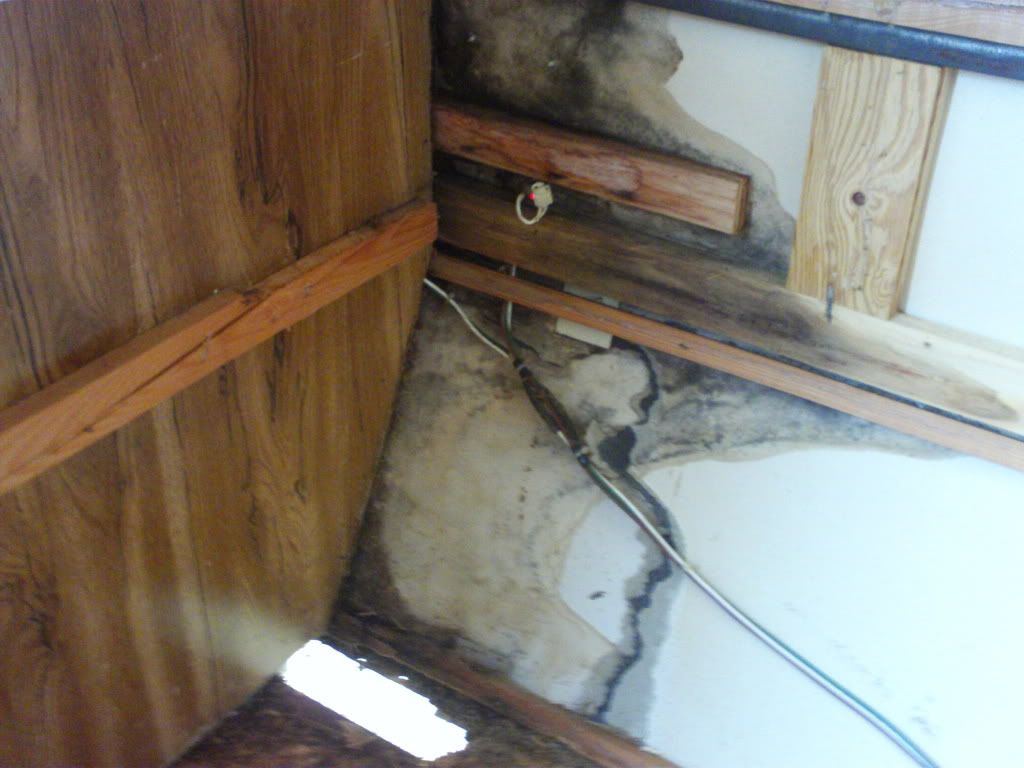
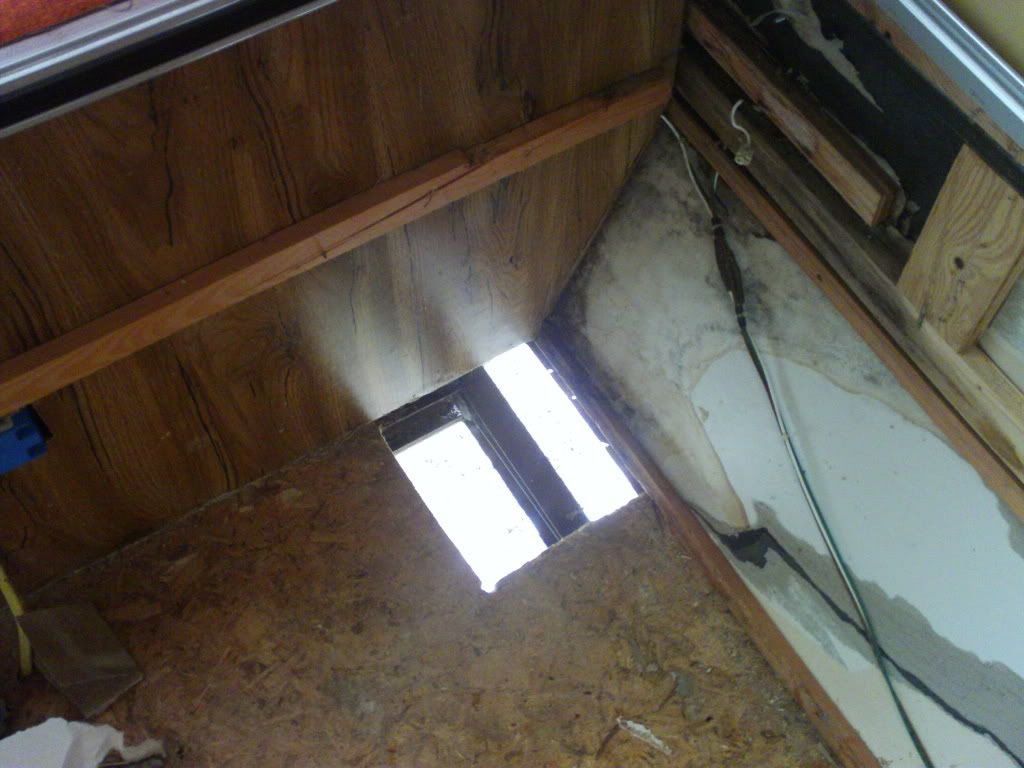
Here is the hole after I poked through some rotted wood in the corner:


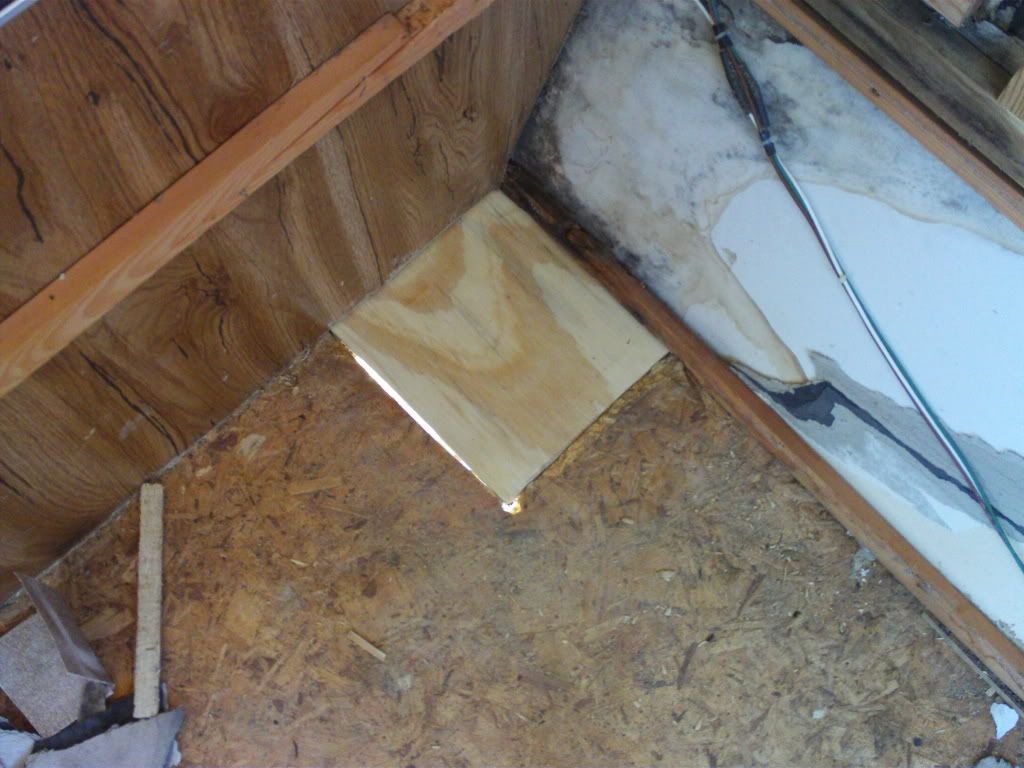
 I purchased a jig-saw and cut out a square making sure that I got out all the rotted wood:


After much adventure obtaining the wood and getting it to fit in the hole, I eventually found a piece of wood that fit (sort of).


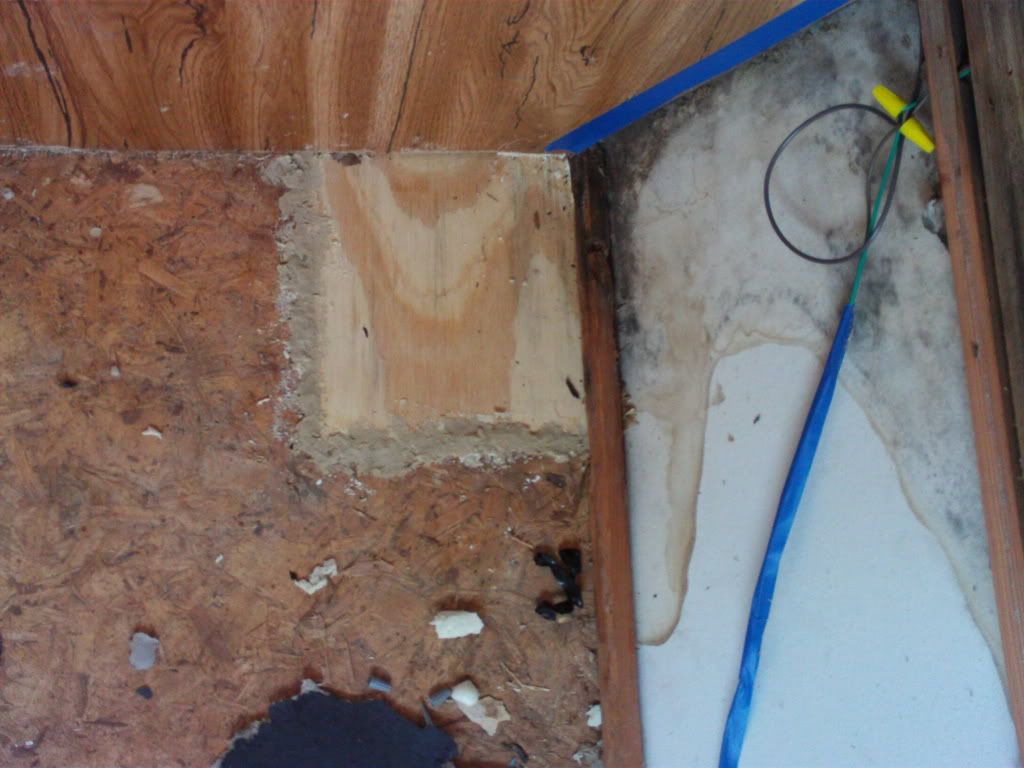
I attached the outside wall to the new patch with screws.  I used some spray foam insulation to fill in the gaps and, once it dried, cut off the excess so that it was even with the floor.  Next I used wood filler around the edges (not real sure why exactly.  It just seemed like a good idea.)


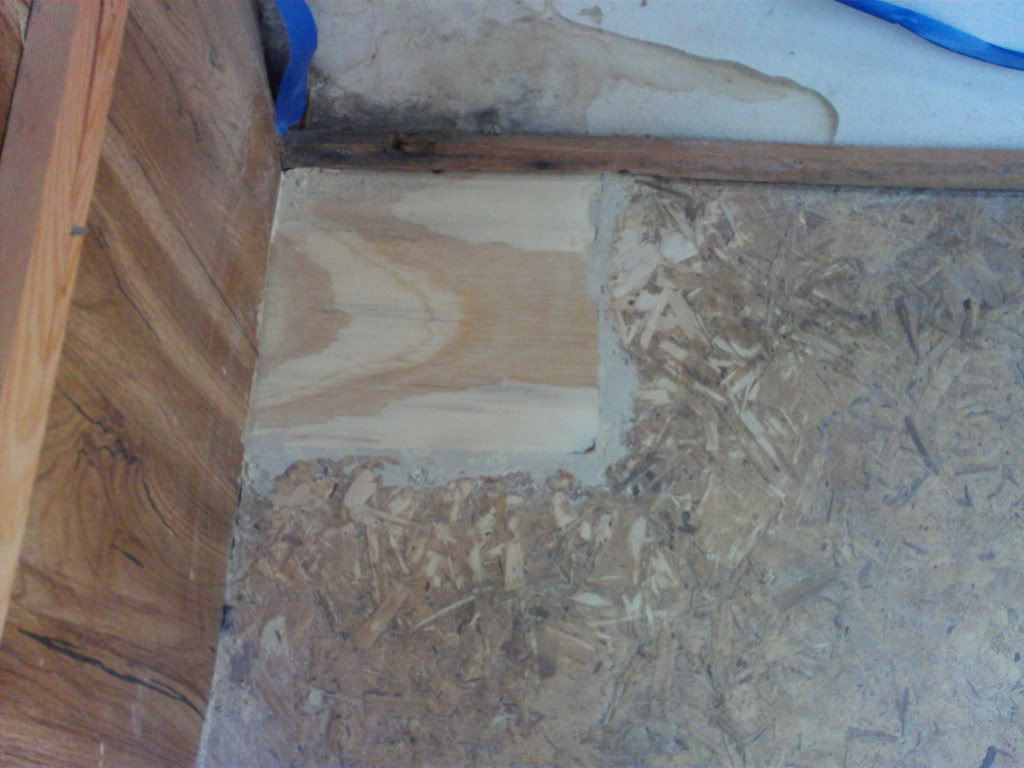
I realize that it looks terrible but I was just waiting for it to dry so I can sand it smooth.  I did use a wall scraper to push the wood filler down into the crack around the patch as much as possible.  After it dried, I plugged my hand sander up and sanded it all smooth.


Hey, it might be ugly but it is as smooth as glass.  Rubbing your hand on the floor, you wouldn't be able to tell where the patch starts and the floor ends.  The look doesn't matter much anyway since I will be laying a new floor on top of it.

I know it's not beautiful work but I am quite proud of it.

more tomorrow . . .

Monday, March 8, 2010

Metal Shop? We don't need no stinking Metal Shop!

As promised by my weather lady, the weather this weekend was outstanding.  I spent six hours on Frostbite on Saturday and about 2 hours on Sunday and, for me anyway, made great progress.

I decided to tackle the safety hook first.  Instead of cringing everytime I raised Frostbite waiting for the lift cables to snap while enduring the scrapes and pops as the bent safety hook was dragged along the underside of the trailer, I decided to remove it. 

I had called and talked with the Starcraft parts department a few weeks ago and was told that the factory that made these safety hooks had long since been closed down.  The fellow I was talking to asked "Can't you have one made locally?"  I said "sure, I suppose so" although I really don't know where or how these things are done.  My father suggested that there are metal shops around that I could take the part in, describe the problem, and they could make me another.  It seemed reasonable enough.

I was already using the chain around the crank to keep the roof up anyway since the hook no longer actually "hooked" to anything because it was bent.  The loss of the safety hook would just allow the roof to crank up easier and, as my father suggested, allow me to take it to a metal shop to be fixed or replaced.

I asertained that the safety hook could be removed.  It was not welded to anything.  One end was bent up at a 90 degree angle and slid into what Dusty identified as the whiffle tree and the bar itself ran through another metal piece that was attached to a larger metal piece that held the end of the lift cable.  The safety hook appeared to be held in place at the top by a cotter pin (Is that the correct term?)

Attempts to remove the cotter pin quickly resulted in me breaking it off.  No real loss because it didn't seem to contribute anything to holding the bar on since it was still very firmly attached.  Now I had to address the metal bar that the safety hook ran through before I could pull it down and out of the hole. 

A couple of things made this next move particularly dangerous.  First, the metal bar was attached to the same bolt that was holding the wiffle bar to the main lift cable.  Removing that bolt would result in the wiffle tree and all the corner roof lifts coming unattached to the main lift cable.  Second, to even get to the bar so I can work on it, I had to raise the roof about six inches.  The sudden seperation of the lift cable from the wiffle tree and the resulting slamming down of the roof was a distinct possibility.

Contemplating my situation and realizing that I would be there underneath the trailer when this occurred, I decided "well, what's the worst that can happen?"  I really had no other options.  Unless I sawed it in half with a hack saw, the bar wasn't coming off any other way.

I decided to proceed.

Getting my tools in place to remove the bolt was a challenge since I had to turn the nut with one tool and hold the bolt at the other end with another tool to keep it from turning.  As I was loosening the bolt I noticed that the bar through which the safety hook was threaded was getting looser.  Eventually, it was loose enough to pull the end of the safety bar out of the hole in the wiffle tree.  I backed it out of the other metal piece and it was free.

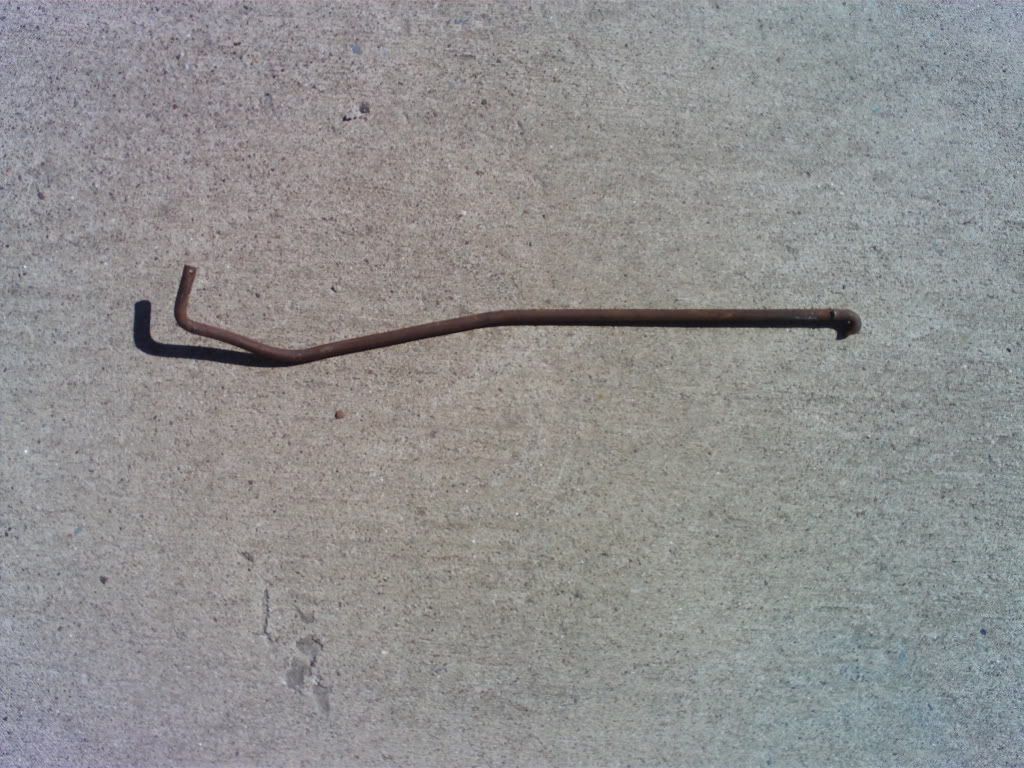
The roof didn't come crashing down since I didn't have to remove the main bolt entirely.  This was a lucky break for me.  Here is the bent safety hook.

This bar is supposed to be straight

I crawled out from under Frostbite and sat there nursing the wounds on my hand that I had collected trying to take if off.  Looking at the bent bar I wondered if I could straighten it myself.  I figured there was noting to lose really and I needed a break from underneath the deathtrap camper anyway so I searched around my garage for something I could use to bend the thing.

I tried the plastic vice built into the top of my toolbox but, of course, it wasn't strong enough.  I found a piece of 2x4 and tried various ways of standing on it with the bar underneath, using it against my knee and tugging at the bar, laying it down on the wood and wacking it with a hammer like a medieval blacksmith.  This last one got the interest of my daughter and I let her smack it a few times. 

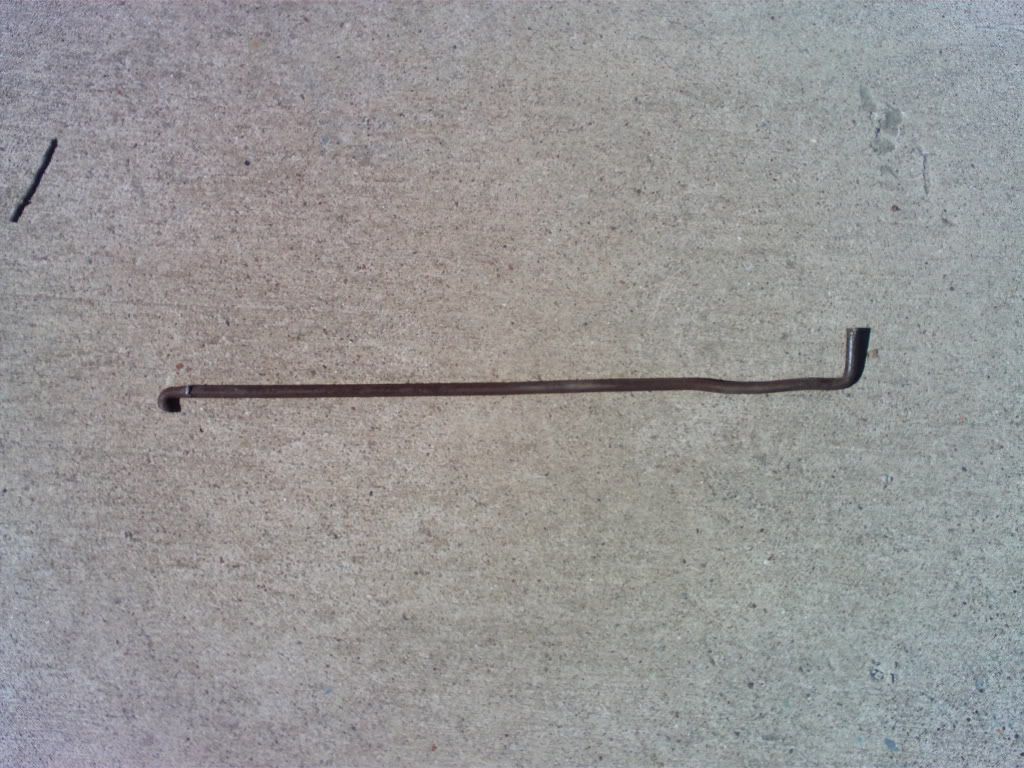
Believe it or not, this actually worked.  Here is the end result:


A masterpiece!

I reattached the new hook and tightened the main bolt a bit.  This was maddenly more difficult now since the safety hook, no longer bent anymore, was in the @#$% way!  I could only get my tools in so that I only turned the nut maybe 1/8th of a turn before having to re-set my tools.  It was slow and frustrating.  I tightened until I got sick of it and opted to get it fully tight another day.  It *seemed* like it would work ok until then.  While underneath, I also noticed where the individual lift pole cables could be adjusted so I knew I would be back underneath to work on that before too long.

I tested it out and raised the roof.  The hook slid exactly into place and hooked onto the trailer frame when the roof was fully raised.  Who needs a metal shop anyway when you've got hammers, brute strength, and dumb luck?

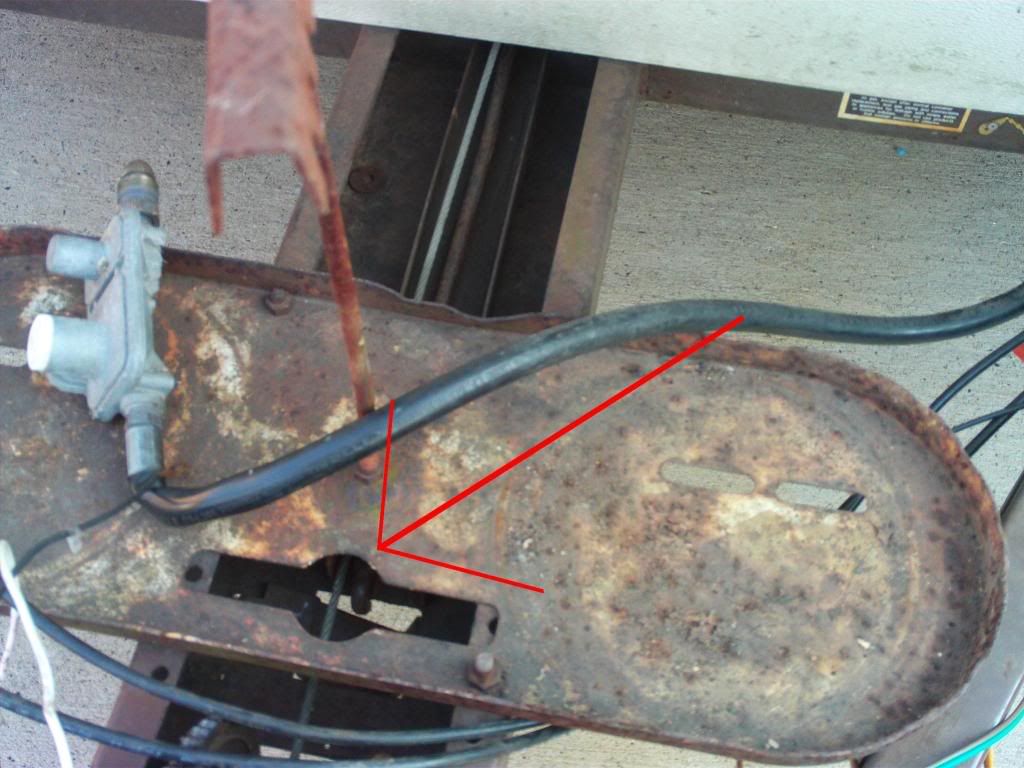
Spraying some cable grease on the crank and wench parts stopped the sqeaking, too.  Here is the safety bar in place:


The arrow is pointing to where the safety bar hooks onto the frame when the roof is up.

Success!  This was a big one for me too.  I did a whole lot more work on Frostbite this weekend which I'll detail in future posts.

Friday, March 5, 2010

Finally, a Nice Weekend

Can Spring be around the corner?  This weekend promises to be wonderful.  Sunny and mid to high 60's for both Saturday and Sunday.  I plan to work a good bit on Frostbite and have a list of what I hope to accomplish:

* finish wiring all lights on Frostbit

* crawl underneath and attach new light wires to the underside

* repaint the inside back wall

* touch up floor patch with wood filler and sand smooth when dry

* caulk the roof and corners around the lift poles

* try to remove the "safety hook" that I stupidly bent a few weeks ago

* fill in all old screw holes in the floor with wood filler

* repaint the ceiling.  This one is questionable as I'm not sure I have enough paint.

* assuming everything above goes well, I might even start to lay down the new floor

Money is tight this weekend so I'm not going to make any supply runs which rules out installing new insulation in the back wall and installing new paneling.  Once I do make a supply run for paneling, insulation, and wood dowels, I will be able to start rebuilding the inside boxes.

Ideally, I would like to purchase the AC and a small microwave before I start rebuilding the boxes so I can incorporate room for these permanent applicances in the boxes.  Money, however, might not be flowing freely enough to do this.  I can measure the microwave I plan to get and work that way, I suppose. 

I'll cross that bridge when I get there.

Another job I'll need to tackle is to use a wire brush on the trailer frame and the axel and get the rust off.  I'll see if I'm motivated to start this weekend or not.  I don't have the anti-rust paint yet, though, but I have already purchased the wire brushes. 

I have decided that I will paint the frame black instead of the bright blue I initially thought.  I think it will look much better overall.

I'm hoping the pictures I start posting here of my progress will start showing Frostbite in better shape each time.  There is really nothing left to tear apart anyway.  Soon, I'll have to start putting it all back together.

Tuesday, March 2, 2010

The $44 fuse

Bluebell is as good as new

. . . except for the nasty dent I scraped into her from the bunk support pole.

Other than that, Bluebell is back home as good as new.  It turned out to be a fuse.  I know I checked all the fuses before deciding to take her to the shop but that is what it was.  In my defense, the blown fuse must not have been obvious because they worked on her for over an hour trying to trace the problem before they rechecked the fuses and found the bad one. 

That fuse cost me $44.

I haven't hooked her up to Frostbite yet, of course, but I feel confident that the running lights will be working now.  It should be easier to hook up the side lights and test them now also.

It is March now and it was snowing this morning.  This winter seems like it will never end.  Frostbite was aptly named as I will remember this winter for a long long time as the worst in TN since I've been alive.

Hopefully, this coming weekend will be nice.  I would very much like to caulk the roof so I can ditch the tarp.  It is a major pain to put on and take off everytime I work on her.

Monday, March 1, 2010

Bluebell is going to the hospital

I'm taking Bluebell to the hospital today @ 1:00pm.  We realized (too late to take Sunny instead) on our trip to Natchez Trace on Friday that Bluebell's taillights aren't working.  The blinkers and brake lights are fine; just no taillights.  There are no dash lights either.  The fog lights also don't work but we rarely if ever use those anyway.  We made it to the park ok and haven't been out after sunset since.

I know what you are thinking!  I was working on the lights the previous weekend and it would be too much of a coincidence for the lights to stop working while I was working on Frostbite's lights.  However, as I mentioned in a previous post that Bluebell's lights were acting oddly prior to be goofing with them.  The digital odometer had gone very very dim and wouldn't adjust with the dash light brightness knob.  Also, more importantly, all I did was hook Frostbite up to Bluebell via the 4-pin connector.  I couldn't get Frostbite's running lights to come on then.  In other words, Frostbite's lights don't work in exactly the same way that Bluebell's light don't work.

I did get some pliers and checked all of Bluebell's fuses when I was first hooking up Frostbite's lights but didn't notice any problems. 

For that matter, I don't know how long Bluebell's taillights have been out since we rarely take her out after dark.

Confident that the problem lies with Bluebell and there is a good chance that I didn't cause it, I made an appointment with CarMax today for her to get looked at.  Hopefully a simple fix but we did purchase the extended warranty when we bought her so, no matter what the problem is, it should only cost us 50 bucks.

Other than that, we had a great time this weekend.  Great food at the state park restraunt.  Drove through Lexington, TN on Sat, saw a movie in their local 1-screen theater, The Lightning Thief, and generally had a nice relaxing time.

We got back around lunch time on Sunday but, although it was sunny, it was still very cold so I opted not to work on Frostbite.  After I get the lights fixed on Bluebell (which will also fix Frostbite's lights) I'll finish wiring up the side lights and get the back wall painted and put back together.

It would be handy if next weekend was nice but they are calling for a sleet/snow mix tonight and tomorrow here in TN.  Is this winter ever going to end?