I decided to tackle the safety hook first. Instead of cringing everytime I raised Frostbite waiting for the lift cables to snap while enduring the scrapes and pops as the bent safety hook was dragged along the underside of the trailer, I decided to remove it.
I had called and talked with the Starcraft parts department a few weeks ago and was told that the factory that made these safety hooks had long since been closed down. The fellow I was talking to asked "Can't you have one made locally?" I said "sure, I suppose so" although I really don't know where or how these things are done. My father suggested that there are metal shops around that I could take the part in, describe the problem, and they could make me another. It seemed reasonable enough.
I was already using the chain around the crank to keep the roof up anyway since the hook no longer actually "hooked" to anything because it was bent. The loss of the safety hook would just allow the roof to crank up easier and, as my father suggested, allow me to take it to a metal shop to be fixed or replaced.
I asertained that the safety hook could be removed. It was not welded to anything. One end was bent up at a 90 degree angle and slid into what Dusty identified as the whiffle tree and the bar itself ran through another metal piece that was attached to a larger metal piece that held the end of the lift cable. The safety hook appeared to be held in place at the top by a cotter pin (Is that the correct term?)
Attempts to remove the cotter pin quickly resulted in me breaking it off. No real loss because it didn't seem to contribute anything to holding the bar on since it was still very firmly attached. Now I had to address the metal bar that the safety hook ran through before I could pull it down and out of the hole.
A couple of things made this next move particularly dangerous. First, the metal bar was attached to the same bolt that was holding the wiffle bar to the main lift cable. Removing that bolt would result in the wiffle tree and all the corner roof lifts coming unattached to the main lift cable. Second, to even get to the bar so I can work on it, I had to raise the roof about six inches. The sudden seperation of the lift cable from the wiffle tree and the resulting slamming down of the roof was a distinct possibility.
Contemplating my situation and realizing that I would be there underneath the trailer when this occurred, I decided "well, what's the worst that can happen?" I really had no other options. Unless I sawed it in half with a hack saw, the bar wasn't coming off any other way.
I decided to proceed.
Getting my tools in place to remove the bolt was a challenge since I had to turn the nut with one tool and hold the bolt at the other end with another tool to keep it from turning. As I was loosening the bolt I noticed that the bar through which the safety hook was threaded was getting looser. Eventually, it was loose enough to pull the end of the safety bar out of the hole in the wiffle tree. I backed it out of the other metal piece and it was free.
The roof didn't come crashing down since I didn't have to remove the main bolt entirely. This was a lucky break for me. Here is the bent safety hook.
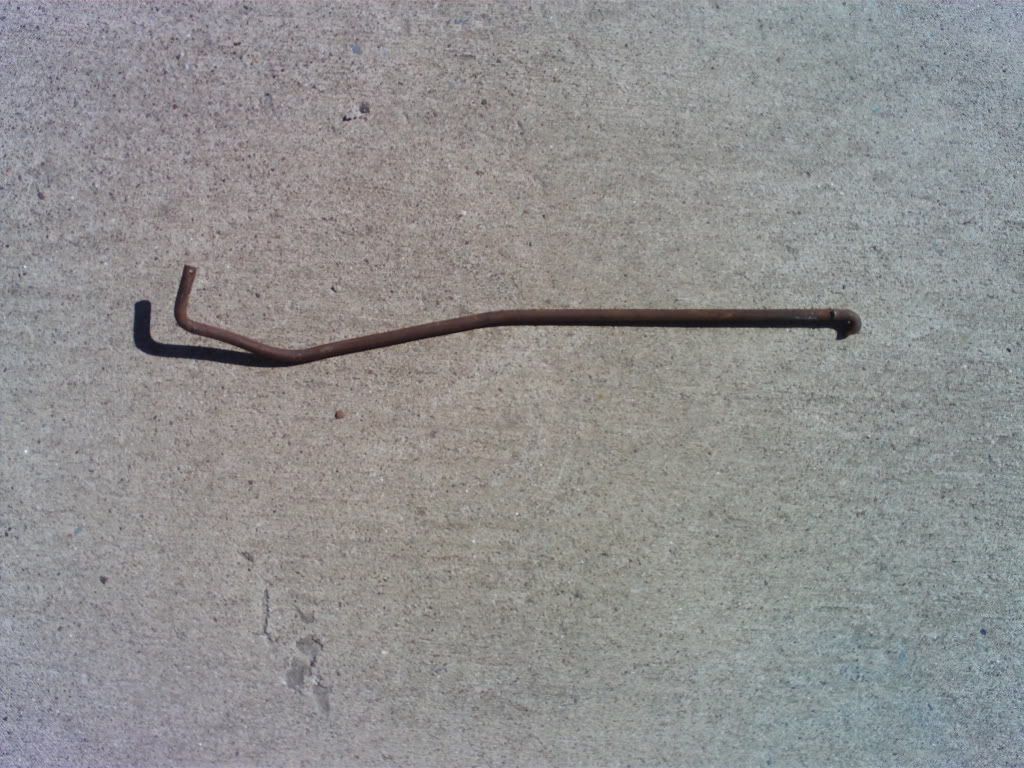
This bar is supposed to be straight
I crawled out from under Frostbite and sat there nursing the wounds on my hand that I had collected trying to take if off. Looking at the bent bar I wondered if I could straighten it myself. I figured there was noting to lose really and I needed a break from underneath the deathtrap camper anyway so I searched around my garage for something I could use to bend the thing.
I tried the plastic vice built into the top of my toolbox but, of course, it wasn't strong enough. I found a piece of 2x4 and tried various ways of standing on it with the bar underneath, using it against my knee and tugging at the bar, laying it down on the wood and wacking it with a hammer like a medieval blacksmith. This last one got the interest of my daughter and I let her smack it a few times.
Believe it or not, this actually worked. Here is the end result:
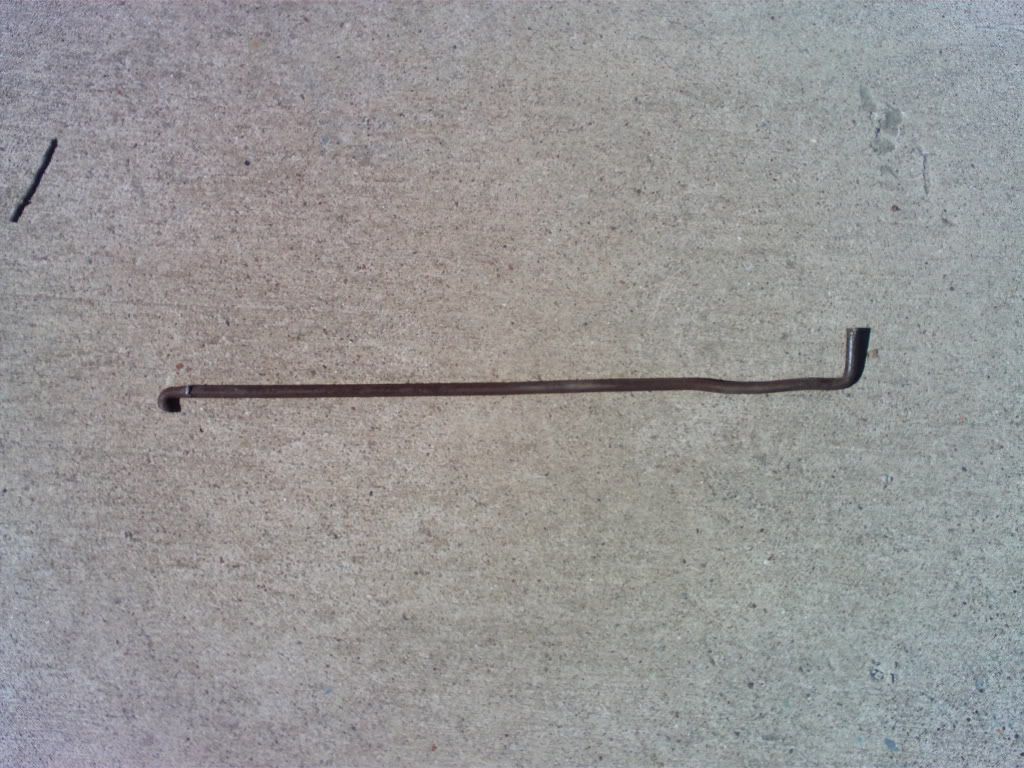
A masterpiece!
I reattached the new hook and tightened the main bolt a bit. This was maddenly more difficult now since the safety hook, no longer bent anymore, was in the @#$% way! I could only get my tools in so that I only turned the nut maybe 1/8th of a turn before having to re-set my tools. It was slow and frustrating. I tightened until I got sick of it and opted to get it fully tight another day. It *seemed* like it would work ok until then. While underneath, I also noticed where the individual lift pole cables could be adjusted so I knew I would be back underneath to work on that before too long.
I tested it out and raised the roof. The hook slid exactly into place and hooked onto the trailer frame when the roof was fully raised. Who needs a metal shop anyway when you've got hammers, brute strength, and dumb luck?
Spraying some cable grease on the crank and wench parts stopped the sqeaking, too. Here is the safety bar in place:
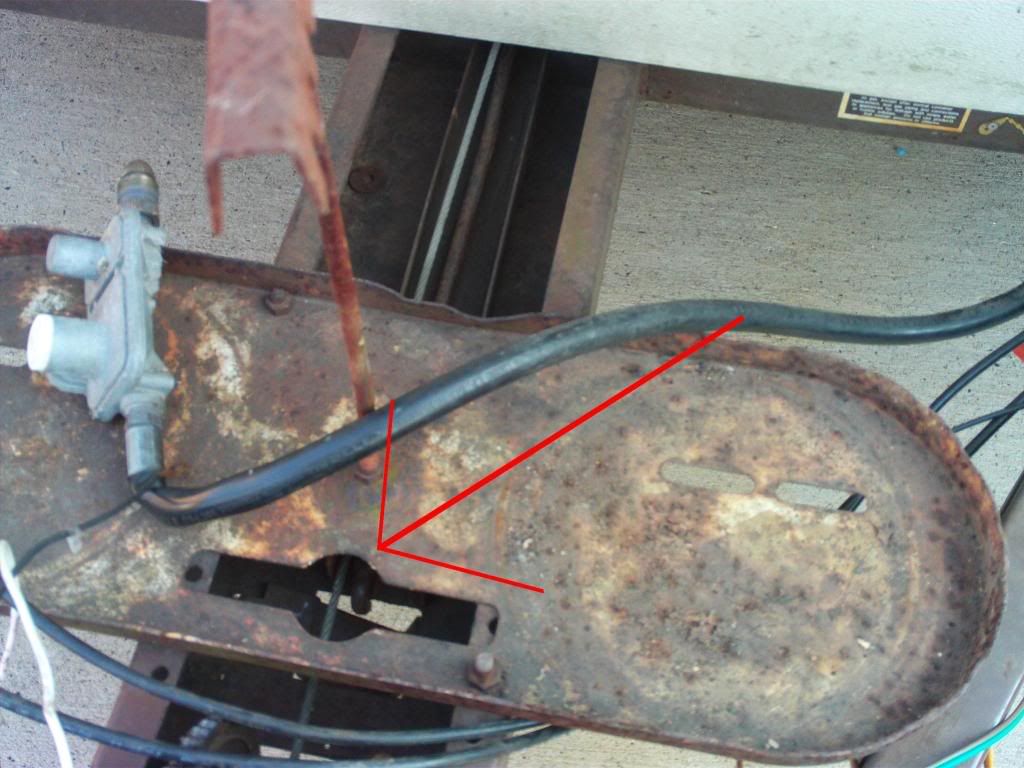
The arrow is pointing to where the safety bar hooks onto the frame when the roof is up.
Success! This was a big one for me too. I did a whole lot more work on Frostbite this weekend which I'll detail in future posts.


No comments:
Post a Comment