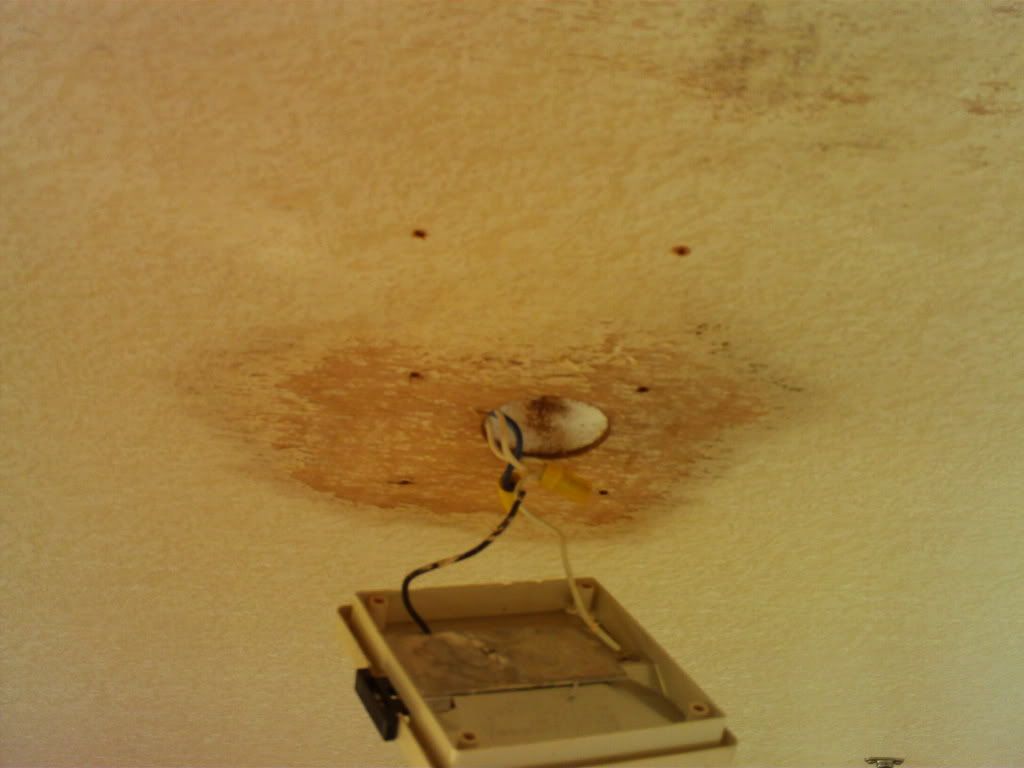
Notice that there are six holes in the ceiling instead of four, which is all that is required for the light to be attached. As you can imagine the light is *supposed* to be attached via the four holes that allow the light to cover the hole where the wires go into the roof. It turns out that 2 of the far holes are stripped so someone prior to me simply drilled two new holes on the other side of the hole and attached the light there.
Now I can appreciate the simplicity of this fix. It's something I, myself, would have thought of. However, it did leave the large hole uncovered which is sort of ugly to say the least.
I dug around in my large tool box, which was an adventure in itself, searching for some screws that were larger than the screws already used in the light hoping that they would fit in the stripped holes. Now my toolbox is huge, it has wheels on it so it can be tugged around. I'm confident is saying that I have never cleaned it out since I bought it some 10 years ago. Mainly because I didn't use it except to dump things in it.
Digging around in it I discovered that it had apparently been home to generations of mice over the years and, unfortunately for the mice, at least one snake since I found a discarded snakeskin at the bottom which was a bit unsettling since I've only stored this toolbox inside the house or in the garage.
I made the mistake of sharing this info with my wife a couple of days later. In hindsight, my comment, "Well, you can't blame them for moving in there. With all the loose insulation and rags at the bottom, I'm sure it was comfy and warm," wasn't the best thing I could have said.
It could well be that the snake *took care* of the mice so to speak. If I can somehow attract some critter into the toolbox that eats snakes we'd be fine.
Nevertheless, I did manage to find four matching screws that happened to be the right length. I reattached the light and filled the 2 extra holes with wood filler.
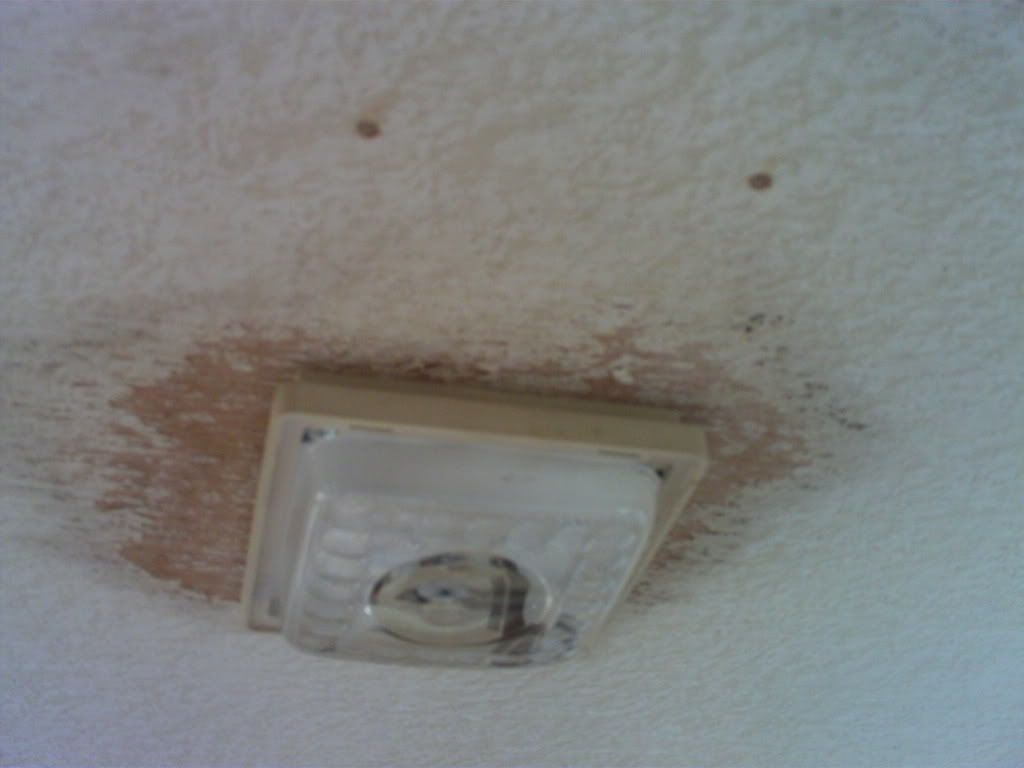
Pretty Snazzy!
I thought this to be a perfect fix until I tried to attach the door to the roof while getting ready to lower the camper. The light cover kept the door from folding flush against the roof. I wondered it this was another reason to reattach the light to the right of it's original placement. That's couldn't be right, though. This was obviously where the light was meant to be attached.
I popped off the plastic light cover and the door attached to the roof perfectly. Maybe this is the way it is supposed to work? Who knows? It's not too much trouble to do. I'm fairly sure these are the original lights too since most everything else in this camper is original. They sure don't look fancy or new.
Reattaching the light cover (It just pops in and out) will just have to be one of those things involved with setting up and taking down the camper. It can be stored in a cabinet when the camper is packed up. I'm fine with that.
I can't explain why the paint is missing around the light. The other light has the same bare spot around it as well. It doesn't matter much though since I will be repainting the roof anyway.
In fact, I plan to do this on the upcoming weekend BEFORE I put down the new floor for obvious reasons. I had hoped to get one of those electric paint sprayer gizmos thinking it would work better than my current paint brush method but money is a bit tight and I need to get the roof painted so I can continue with this project. I'll be doing this job, old school.
BTW, I've never painted a ceiling before. Should be fun stuff.
I suppose I should add cleaning out my tool box to my list of things to do at some point.


No comments:
Post a Comment